
Loading...
Loading...
Loading...
Loading...
Loading...
Loading...
Loading...
Loading...
Loading...
Loading...
Loading...
Loading...
Loading...
Loading...
Loading...
Loading...
Loading...
Loading...
Loading...
Loading...
Loading...
Loading...
Loading...
Loading...
Loading...
Loading...
Loading...
Loading...
Loading...
Loading...
Loading...
Loading...
Loading...
Loading...
Loading...
Loading...
Loading...
Loading...
Loading...
Loading...
Loading...
Loading...
Loading...
Loading...
Loading...
Loading...
Loading...
Loading...
Loading...
Loading...
Loading...
Loading...
Loading...
Loading...
Loading...
Loading...
Loading...
Loading...
Loading...
Loading...
Loading...
Loading...
Loading...
Loading...
Loading...
Loading...
Loading...
Loading...
Loading...
Loading...
Loading...
Loading...
Loading...
Loading...
With CommandBox, we don't need to have Lucee or Adobe ColdFusion installed locally. With a simple command, we can make CommandBox go and get the CFML engine we've requested, and quickly create a server running on Undertow. Make sure you're in the root of your website, and then run:
server start
The server will then start on a random port on 127.0.0.1 and will create a server.json file in your webroot. We can add various options to server.json to customize our server. Here's an example:
{
"name":"myApp",
"force":true,
"web":{
"http":{
"port":60000
},
"rewrites":{
"enable":true,
"config":"urlrewrite.xml"
}
}
}In this example, I've set the server name to myApp, meaning I can now start the server from any directory by simply calling start myApp. I've also specified a specific port, 60000, but you can specify any port you want, or just remove that to start on a random port each time. Lastly, I've enabled URL rewriting, and pointing the URL rewrite configuration file to the urlrewrite.xml which is included in CFWheels 2.x. (If you've used the wheels new command to create your app, this will already be done for you).
You can also specify hosts other than localhost: there's a useful CommandBox module to do that (Host updater) which will automatically create entries in your hosts file to allow for domains such as myapp.local running on port 80. You can install it via install commandbox-hostupdater when running the box shell with administrator privileges.
Obviously, anything you start, you might want to stop. Servers can be stopped either via right/ctrl clicking on the icon in the taskbar, or by the stop command. To stop a server running in the current directory issue the following:
server stop
You can also stop a server from anywhere by using its name:
server stop myApp
If you want to see what server configurations exist on your system and their current status, simply do server list
server list
myapp (stopped)
http://127.0.0.1:60000
Webroot: /Users/cfwheels/Documents/myapp
myAPI (stopped)
http://127.0.0.1:60010
Webroot: /Users/cfwheels/Documents/myAPI
megasite (stopped)
http://127.0.0.1:61280
CF Engine: lucee 4.5.4+017
Webroot: /Users/cfwheels/Documents/megasite
awesomesite (stopped)
http://127.0.0.1:60015
CF Engine: lucee 4.5.4+017
Webroot: /Users/cfwheels/Documents/awesomeoTo remove a server configuration from the list, you can use server forget myapp. Note the status of the servers on the list are somewhat unreliable, as it only remembers the last known state of the server: so if you start a server and then turn off your local machine, it may still remember it as running when you turn your local machine back on, which is why we recommend the use of force: true in the server.json file.
By default, CommandBox will run Lucee (version 5.x at time of writing). You may wish to specify an exact version of Lucee, or use Adobe ColdFusion. We can do this via either setting the appropriate cfengine setting in server.json, or at runtime with the cfengine= argument.
Start the default engine
CommandBox> start
__
Start the latest stable Lucee 5.x engine
CommandBox> start cfengine=lucee@5
__
Start a specific engine and version
CommandBox> start [email protected]
__
Start the most recent Adobe server that starts with version "11"
CommandBox> start cfengine=adobe@11
__
Start the most recent adobe engine that matches the range
CommandBox> start cfengine="adobe@>9.0 <=11"
Or via server.json
{
"name":"myApp",
"force":true,
"web":{
"http":{
"host":"localhost",
"port":60000
},
"rewrites":{
"enable":true,
"config":"urlrewrite.xml"
}
},
"app":{
"cfengine":"adobe@2016"
},
}You can of course run multiple servers, so if you need to test your app on Lucee 4.x, Lucee 5.x and Adobe 2016, you can just start three servers with different cfengine= arguments!
By default the Lucee server that CommandBox starts has all the basic Lucee extensions that you are going to need installed, but if need to minimize the size of the Lucee instance you launch, then you can use Lucee-Light by specifying cfengine=lucee-light in your server.json file. CFWheels can run just fine on lucee-light (which is after all, Lucee, minus all the extensions) but at a minimum, requires the following extensions to be installed as dependencies in your box.json. Please note you may have to add any drivers you need for your database to this list as well.
"dependencies":{
"lucee-image":"lex:https://ext.lucee.org/lucee.image.extension-1.0.0.35.lex",
"lucee-zip": "lex:https://ext.lucee.org/compress-extension-1.0.0.2.lex",
"lucee-esapi": "lex:https://ext.lucee.org/esapi-extension-2.1.0.18.lex"
}Once added to your box.json file, while the server is running, just do box install, which will install the dependencies, and load them into the running server within 60 seconds.
Alternatively you can download the extensions and add them manually to your server root's deploy folder (i.e \WEB-INF\lucee-server\deploy)
Install CFWheels and get a local development server running
By far the quickest way to get started with CFWheels is via CommandBox. CommandBox brings a whole host of command line capabilities to the CFML developer. It allows you to write scripts that can be executed at the command line written entirely in CFML. It allows you to start a CFML server from any directory on your machine and wire up the code in that directory as the web root of the server. What's more is, those servers can be either Lucee servers or Adobe ColdFusion servers. You can even specify what version of each server to launch. Lastly, CommandBox is a package manager for CFML. That means you can take some CFML code and package it up into a module, host it on ForgeBox.io, and make it available to other CFML developers. In fact we make extensive use of these capabilities to distribute CFWheels plugins and templates. More on that later.
One module that we have created is a module that extends CommandBox itself with commands and features specific to the CFWheels framework. The CFWheels CLI module for CommandBox is modeled after the Ruby on Rails CLI module and gives similar capabilities to the CFWheels developer.
The first step is to get CommandBox downloaded and running. CommandBox is available for Windows, Mac & Linux, and can be installed manually or using one of the respective package managers for each OS. You can use Chocolatey on Windows, Homebrew on MacOS, or Yum/Apt on Linux depending on your flavor of Linux. Please follow the instructions on how to install CommandBox on your particular operating system. At the end of the installation process you want to make sure the box command is part of your system path so you can call the command from any directory on your system.
Once installed, you can either double-click on the box executable which opens the CommandBox shell window, or run box from a CMD window in Windows, Terminal window in MacOS, or shell prompt on a Linux server. Sometimes you only want to call a single CommandBox command and don't need to launch a whole CommandBox shell window to do that, for these instances you can call the CommandBox command directly from your default system terminal window by prefixing the command with the box prefix.
So to run the CommandBox version command you could run box version from the shell or you could launch the CommandBox shell and run version inside it.
box version
version
This is a good concept to grasp, cause depending on your workflow, you may find it easier to do one versus the other. Most of the commands you will see in these CLI guides will assume that you are entering the command in the actual CommandBox shell so the box prefix is left off.
Okay, now that we have CommandBox installed, let's add the CFWheels CLI module.
install cfwheels-cli
Installing this module will add a number of commands to your default CommandBox installation. All of these commands are prefixed by the wheels name space. There are commands to create a brand new CFWheels application or scaffold out sections of your application. We'll see some of these commands in action momentarily.
Now that we have CommandBox installed and extended it with the CFWheels CLI module, let's start our first CFWheels app from the command line. We'll look at the simplest method for creating a CFWheels app and starting our development server.
wheels generate app myApp server start
A few minutes after submitting the above commands a new browser window should open up and display the default CFWheels congratulations screen.
So what just happened? Since we only passed the application name myApp to the wheels generate app command, it used default values for most of its parameters and downloaded our Base template (cfwheels-base-template) from ForgeBox.io, then downloaded the framework core files (cfwheels) from ForgeBox.io and placed it in the wheels directory, then configured the application name and reload password, and started a Lucee server on a random port.
This getting started guide has taken you from the very beginning and gotten you to the point where you can go into any empty directory on your local development machine and start a CFWheels project by issuing a couple of CLI commands. In later guides we'll explore these options further and see what else the CLI can do for us.

Using CFWheels to develop web applications with AJAX features is a breeze. You have several options and tools at your disposal, which we'll cover in this chapter.
CFWheels was designed to be as lightweight as possible, so this keeps your options fairly open for developing AJAX features into your application.
While there are several flavors of JavaScript libraries out there with AJAX support, we will be using the jQuery framework in this tutorial. Let's assume that you are fairly familiar with the basics of jQuery and know how to set it up.
For this tutorial, let's create the simplest example of all: a link that will render a message back to the user without refreshing the page.
In this example, we'll wire up some simple JavaScript code that calls a CFWheels action asynchronously. All of this will be done with basic jQuery code and built-in CFWheels functionality.
First, let's make sure we've got an appropriate route setup. It might be you're still using the default wildcard() route which will create some default GET routes for the controller/action pattern, but we'll add a new route here just for practice:
mapper()
.get(name="sayHello", to="say##hello")
.end()Then, let's create a link to a controller's action in a view file, like so:
<cfoutput>
<!--- View code --->
<h1></h1>
<p></p>
#linkTo(text="Alert me!", route="sayHello", id="alert-button")#
</cfoutput>That piece of code by itself will work just like you expect it to. When you click the link, you will load the hello action inside the say controller.
But let's make it into an asynchronous request. Add this JavaScript (either on the page inside script tags or in a separate .js file included via javaScriptIncludeTag() ):
(function($) {
// Listen to the "click" event of the "alert-button" link and make an AJAX request
$("#alert-button").on("click", function(event) {
$.ajax({
type: "GET",
// References "/say/hello?format=json"
url: $(this).attr("href") + "?format=json",
dataType: "json",
success: function(response) {
$("h1").html(response.message);
$("p").html(response.time);
}
});
event.preventDefault();
});
})(jQuery);With that code, we are listening to the click event of the hyperlink, which will make an asynchronous request to the hello action in the say controller. Additionally, the JavaScript call is passing a URL parameter called format set to json.
Note that the success block inserts keys from the response into the empty h1 and p blocks in the calling view. (You may have been wondering about those when you saw the first example. Mystery solved.)
The last thing that we need to do is implement the say/hello action. Note that the request expects a dataType of JSON. By default, CFWheels controllers only generate HTML responses, but there is an easy way to generate JSON instead using CFWheels's provides() and renderWith() functions:
component extends="Controller" {
function config() {
provides("html,json");
}
function hello() {
// Prepare the message for the user.
greeting = {};
greeting["message"] = "Hi there";
greeting["time"] = Now();
// Respond to all requests with `renderWith()`.
renderWith(greeting);
}
}In this controller's config() method, we use the provides() function to indicate that we want all actions in the controller to be able to respond with the data in HTML or JSON formats. Note that the client calling the action can request the type by passing a URL parameter named format or by sending the format in the request header.
The call to renderWith() in the hello action takes care of the translation to the requested format. Our JavaScript is requesting JSON, so Wheels will format the greeting struct as JSON automatically and send it back to the client. If the client requested HTML or the default of none, Wheels will process and serve the view template at views/say/hello.cfm. For more information about provides() and renderWith(), reference the chapter on Responding with Multiple Formats.
Lastly, notice the lines where we're setting greeting["message"] and greeting["time"]. Due to the case-insensitive nature of ColdFusion, we recommend setting variables to be consumed by JavaScript using bracket notation like that. If you do not use that notation (i.e., greetings.message and greetings.time instead), your JavaScript will need to reference those keys from the JSON as MESSAGE and TIME (all caps). Unless you like turning caps lock on and off, you can see how that would get annoying after some time.
Assuming you already included jQuery in your application and you followed the code examples above, you now have a simple AJAX-powered web application built on Wheels. After clicking that Alert me! link, your say controller will respond back to you the serialized message via AJAX. jQuery will parse the JSON object and populate the h1 and pwith the appropriate data.
That is it! Hopefully now you have a clearer picture on how to create AJAX-based features for your web applications.
URL rewriting instructions for Apache
On most Apache setups, you don't have to do anything at all to get URL rewriting to work. Just use the following .htaccess file and Apache will pick up and use them automatically on server start-up.
There are some exceptions though...
If you have installed Apache yourself you may need to turn on the rewrite module and/or change the security settings before URL rewriting will work:
Check that the Apache rewrite_module has been loaded by ensuring there are no pound signs before the line that says LoadModule rewrite_module modules/mod_rewrite.so in the httpd.conf file.
Make sure that Apache has permission to load the rewrite rules from the .htaccess file. This is done by setting AllowOverride to All under the Directory section corresponding to the website you plan on using Wheels on (still inside the httpd.conf file).
If you have an older version of Apache and you're trying to run your Wheels site in a sub folder of an existing site you may need to hard code the name of this folder in your rewrite rules.
Change the last line of the .htaccess file to the following: RewriteRule ^(.*)$ /sub_folder_name_goes_here/rewrite.cfm/$1 [L]. Don't forget to change sub_folder_name_goes_here to the actual folder name first of course.
Options +FollowSymLinks
RewriteEngine On
RewriteCond %{REQUEST_URI} ^.*/index.cfm/(.*)$ [NC]
RewriteRule ^.*/index.cfm/(.*)$ ./rewrite.cfm/$1 [NS,L]
RewriteCond %{REQUEST_URI} !^.*/(flex2gateway|jrunscripts|cfide|cf_scripts|cfformgateway|cffileservlet|lucee|files|images|javascripts|miscellaneous|stylesheets|wheels/public/assets|robots.txt|favicon.ico|sitemap.xml|rewrite.cfm)($|/.*$) [NC]
RewriteRule ^(.*)$ ./rewrite.cfm/$1 [NS,L]Note that it's often considered better practice to include this URL rewriting configuration at the <virtualhost> block level, but get it working with a .htaccess file first.
URL Rewriting for Nginx web server.
Example Nginx configuration
# nginx configuration
location ~ .*/(flex2gateway|jrunscripts|cfide|cf_scripts|cfformgateway|cffileservlet|railo-context|lucee|files|images|javascripts|miscellaneous|stylesheets|robots.txt|favicon.ico|sitemap.xml|rewrite.cfm)($|/.*$) { }
location / {
rewrite ^(.*)$ https://YOURDOMAIN.com/$1 redirect;
rewrite ^/.*/index.cfm/(.*)$ /rewrite.cfm/$1 break;
rewrite ^(.*)$ /rewrite.cfm/$1 break;
}Learn the goals of CFWheels as well as web development frameworks in general. Then learn more about some key concepts in CFWheels.
This chapter will introduce you to frameworks in general and later specifically to CFWheels. We'll help you decide if you even need a framework at all and what common problems a framework tries to solve. If we're able to convince you that using a framework is the right thing for you, then we'll present our goals with creating CFWheels and show you some key CFWheels concepts.
So let's get started.
Short answer, no. If you don't mind doing the same thing over and over again and are getting paid by the hour to do so, then by all means keep doing that.
Slightly longer answer, no. If you're working on a highly customized project that does not fall within what 9 out of 10 web sites/applications normally do then you likely need a high percentage of custom code, and a framework will not help much.
However, if you're like most of us and have noticed that for every new project you start on--or even every new feature you add to an existing project--you waste a lot of time re-creating the wheel, then you should read on because CFWheels may just be the solution for you!
CFWheels will make starting a new project or building a new feature quick and painless. You can get straight to solving business problems on day one! To understand how this is achieved, we figured that a little background info on frameworks in general may help you out.
All good frameworks rise from the need to solve real problems in real world situations. CFWheels is based heavily on the Rails framework for Ruby and also gets inspiration from Django and, though to a lesser extent, other frameworks in the ColdFusion space (like Fusebox, for example). Over the years the contributors to these frameworks have identified problems and tedious tasks in their own development processes, built a solution for it, and abstracted (made it more generic so it suits any project) the solution into the framework in question. Piggy-backing on what all these great programmers have already created and adding a few nice solutions of our own, CFWheels stands on solid ground.
OK, so that was the high level overview of what frameworks are meant to do. But let's get a little more specific.
Most web development frameworks set out to address some or all of these common concerns:
Map incoming requests to the code that handles them.
Separate your business logic from your presentation code.
Let you work at a higher level of abstraction, thus making you work faster.
Give you a good code organization structure to follow.
Encourage clean and pragmatic design.
Simplify saving data to a storage layer.
Like all other good frameworks, CFWheels does all this. But there are some subtle differences, and certain things are more important in CFWheels than in other frameworks and vice versa. Let's have a look at the specific goals with CFWheels so you can see how it relates to the overall goals of frameworks in general.
As we've said before, CFWheels is heavily based on Ruby on Rails, but it's not a direct port, and there are some things that have been changed to better fit the CFML language. Here's a brief overview of the goals we're striving for with CFWheels (most of these will be covered in greater detail in later chapters):
We strive for simplicity on a lot of different levels in CFWheels. We'll gladly trade code beauty in the framework's internal code for simplicity for the developers who will use it. This goal to keep things simple is evident in a lot of different areas in CFWheels. Here are some of the most notable ones:
The concept of object oriented programming is very simple and data-centric in CFWheels, rather than 100% "pure" at all times.
By default, you'll always get a query result set back when dealing with multiple records in CFWheels, simply because that is the way we're all used to outputting data.
CFWheels encourages best practices, but it will never give you an error if you go against any of them.
With CFWheels, you won't program yourself into a corner. If worse comes to worse, you can always drop right out of the framework and go back to old school code for a while if necessary.
Good old CFML code is used for everything, so there is no need to mess with XML for example.
What this means is that you don't have to be a fantastic programmer to use the framework (although it doesn't hurt). It's enough if you're an average programmer. After using CFWheels for a while, you'll probably find that you've become a better programmer though!
If you've ever downloaded a piece of open source software, then you know that most projects lack documentation. CFWheels hopes to change that. We're hoping that by putting together complete, up-to-date documentation that this framework will appeal, and be usable, by everyone. Even someone who has little ColdFusion programming background, let alone experience with frameworks.
Besides what is already mentioned above, there are some key concepts in CFWheels that makes sense to familiarize yourself with early on. If you don't feel that these concepts are to your liking, feel free to look for a different framework or stick to using no framework at all. Too often programmers choose a framework and spend weeks trying to bend it to do what they want to do rather than follow the framework conventions.
Speaking of conventions, this brings us to the first key concept:
Instead of having to set up tons of configuration variables, CFWheels will just assume you want to do things a certain way by using default settings. In fact, you can start programming a Wheels application without setting any configuration variables at all!
If you find yourself constantly fighting the conventions, then that is a hint that you're not yet ready for CFWheels or CFWheels is not ready for you.
Beautiful (for lack of a better word) code is code that you can scan through and immediately see what it's meant to do. It's code that is never repeated anywhere else. And, most of all, it's code that you'll enjoy writing and will enjoy coming back to 6 months from now.
Sometimes the CFWheels structure itself encourages beautiful code (separating business logic from request handling, for example). Sometimes it's just something that comes naturally after reading documentation, viewing other CFWheels applications, and talking to other CFWheels developers.
If you've investigated frameworks in the past, then you've probably heard this terminology before. Model-View-Controller, or MVC, is a way to structure your code so that it is broken down into three easy-to-manage pieces:
Model: Just another name for the representation of data, usually a database table.
View: What the user or their browser sees and interacts with (a web page in most cases).
Controller: The behind-the-scenes guy that's coordinating everything.
"Uh, yeah. So what's this got to do with anything?" you may ask. MVC is how CFWheels structures your code for you. As you start working with CFWheels applications, you'll see that most of the code you write (database queries, forms, and data manipulation) are very nicely separated into one of these three categories.
The benefits of MVC are limitless, but one of the major ones is that you almost always know right where to go when something needs to change.
If you've added a column to the vehicles table in your database and need to give the user the ability to edit that field, all you need to change is your View. That's where the form is presented to the user for editing.
If you find yourself constantly getting a list of all the red cars in your inventory, you can add a new method to your model called getRedCars() that does all the work for you. Then when you want that list, just add a call to that method in your controller and you've got 'em!
The Object Relational Mapping, or ORM, in CFWheels is perhaps the one thing that could potentially speed up your development the most. An ORM handles mapping objects in memory to how they are stored in the database. It can replace a lot of your query writing with simple methods such as user.save(), blogPost.comments(order="date"), and so on. We'll talk a lot more about the ORM in CFWheels in the chapters about models.
So there you have it, a completely fair and unbiased introduction to CFWheels. ;)
If you've been developing ColdFusion applications for a while, then we know this all seems hard to believe. But trust us; it works. And if you're new to ColdFusion or even web development in general, then you probably aren't aware of most of the pains that Wheels was meant to alleviate!
That's okay. You're welcome in the CFWheels camp just the same.
Use redirection to keep your application user friendly.
When a user submits a form, you do not want to show any content on the page that handles the form submission! Why? Because if you do, and the user hits refresh in their browser, the form handling code could be triggered again, possibly causing duplicate entries in your database, multiple emails being sent, etc.
To avoid the above problem, it is recommended to always redirect the user after submitting a form. In CFWheels this is done with the function. It is basically a wrapper around the cflocation tag in CFML.
Being that is a CFWheels function, it can accept the route, controller, action, and key arguments so that you can easily redirect
to other actions in your application.
Let's look at the three ways you can redirect in CFWheels.
You can redirect the user to another action in your application simply by passing in the controller, action, and key arguments. You can also pass in any other arguments that are accepted by the function, like host, params, etc. (The function is what CFWheels uses internally to produce the URL to redirect to.)
If you have configured any routes in config/routes.cfm, you can use them when redirecting as well. Just pass in the route's name to the route argument together with any additional arguments needed for the route in question. You can read more about routing in the chapter.
It's very common that all you want to do when a user submits a form is send them back to where they came from. (Think of a user posting a comment on a blog post and then being redirected back to view the post with their new comment visible as well.) For this, we have the back argument. Simply pass in back=true to , and the user will be redirected back to the page they came from.
The referring URL is retrieved from the cgi.http_referer value. If this value is blank or comes from a different domain than the current one, CFWheels will redirect the visitor to the root of your website instead.
If you want to specify exactly where to send the visitor when the referring domain is blank/foreign, you can pass in the normal arguments like route, controller, action, etc. These will be used only when CFWheels can't redirect to the referrer because it's invalid.
Sometimes it's useful to be able to send the visitor back to the same URL they came from but with extra parameters added to it. You can do this by using the params argument. Note that CFWheels will append to the URL and not replace it in this case.
addToken and statusCode ArgumentsThe function uses <cflocation> under the hood; if you need to pass client variable information automatically in the URL for client management purposes, simply set addToken=true.
You can also set the type of redirect to something other than the default 302 redirect, by passing in statusCode=3xx. For example, 301 indicates a permanent redirect.
Clean up your views by moving common functionality into helper functions.
As you probably know already, Wheels gives you a lot of helper functions that you can use in your view pages.
Perhaps what you didn't know was that you can also create your own view helper functions and have Wheels automatically make them available to you. To do this, you store your UDFs (User Defined Functions) in different controller-level helper files.
Once a UDF is placed in this file, it will be available for use in all your views.
Alternatively, if you only need a set of functions in a specific controller of your application, you can make them controller-specific. This is done by placing a helpers.cfm file inside the controller's view folder.
So if we wanted a set of helpers to generally only be available for your users controller, you would store the UDFs in this file:
Any functions in that file will now only be included for the view pages of that specific controller.
Helper functions, together with the use of , gives you a way to keep your code nice and DRY, but there are a few things to keep in mind as you work with them.
The helpers.cfm files are only meant to be used for views, hence the placement in the views folder.
If you need to share non-view functionality across controllers, then those should be placed in the parent controller file, i.e. controllers/Controller.cfc. If you need helper type functionality within a single controller file, you can just add it as a function in that controller and make it private so that it can't be called as an action (and as a reminder to yourself of its general purpose as well).
The same applies to reusable model functionality: use the parent file, models/Model.cfc. Private functions within your children models work well here, just like with controllers.
If you need to share a function globally across your entire application, regardless of which MVC layer that will be accessing it, then you can place it in the events/functions.cfm file.
Both partials and helpers are there to assist you in keeping programmatic details out of your views as much as possible. Both do the job well, and which one you choose is just a matter of preference.
Generally speaking, it probably makes most sense to use partials when you're generating a lot of HTML and helpers when you're not.
Let CFWheels handle time stamping of records.
When working with database tables, it is very common to have a column that holds the time that the record was added or last modified. If you have an e-commerce website with an orders table, you want to store the date and time the order was made; if you run a blog, you want to know when someone left a comment; and so on.
As with anything that is a common task performed by many developers, it makes a good candidate for abstracting to the framework level. So that's what we did.
If you have either of the following columns in your database table, CFWheels will see them and treat them a little differently than others.
createdat
CFWheels will use a createdat column automatically to store the current date and time when an INSERToperation is made (which could happen through a or operation, for example).
updatedat
If CFWheels sees an updatedat column, it will use it to store the current date and time automatically when an UPDATE operation is made (which could happen through a or operation, for example).
If you add any of these columns to your table, make sure they can accept date/time values (like datetime or timestamp, for example) and that they can be set to null.
Time stamping is done in UTC (Coordinated Universal Time) by default but if you want to use your local time instead all you have to do is change the global setting for it like this:
set(timeStampMode="local");
views/users/helpers.cfmInstructions for installing CFWheels on your system.
Installing CFWheels is so simple that there is barely a need for a chapter devoted to it. But we figured we'd better make one anyway in case anyone is specifically looking for a chapter about installation.
So, here are the simple steps you need to follow to get rolling on CFWheels...
You have 2 choices when downloading CFWheels. You can either use the latest official release of CFWheels, or you can take a walk on the wild side and go with the latest committed source code in our Git repository.
The latest official releases can always be found in the Releases section of GitHub, and the Git repository is available at our GitHub repo.
In most cases, we recommend going with the official release because it's well documented and has been through a lot of bug testing. Only if you're in desperate need of a feature that has not been released yet would we advise you to go with the version stored in the Git master branch.
Let's assume you have downloaded the latest official release. (Really, you should go with this option.) You now have a .zip file saved somewhere on your computer. On to the next step...
Getting an empty website running with CFWheels installed is an easy process if you already know your way around IIS or Apache. Basically, you need to create a new website in your web server of choice and unzip the contents of the file into the root of it.
In case you're not sure, here are the instructions for setting up an empty CFWheels site that can be accessed when typing localhost in your browser. The instructions refer to a system running Windows Server 2003 and IIS, but you should be able to follow along and apply the instructions with minor modifications to your system. (See Requirements for a list of tested systems).
Create a new folder under your web root (usually C:\Inetpub\wwwroot) named wheels_site and unzip the CFWheels .zip file into the root of it.
Create a new website using IIS called CFWheels Site with localhost as the host header name and C:\Inetpub\wwwroot\mysite as the path to your home directory.
If you want to run a CFWheels-powered application from a subfolder in an existing website, this is entirely possible, but you may need to get a little creative with your URL rewrite rules if you want to get pretty URLs--it will only work out of the box on recent versions of Apache. (Read more about this in the URL Rewriting chapter.)
Create a new database in MySQL, PostgreSQL, Microsoft SQL Server, or H2 and add a new data source for it in the ColdFusion/Lucee Administrator, just as you'd normally do. Now open up config/settings.cfm and call set(dataSourceName="") with the name you chose for the data source.
If you don't want to be bothered by opening up a CFWheels configuration file at all, there is a nice convention you can follow for the naming. Just name your data source with the same name as the folder you are running your website from (mysite in the example above), and CFWheels will use that when you haven't set the dataSourceName setting using the Set() function.
When you've followed the steps above, you can test your installation by typing http://localhost/ (or whatever you set as the host header name) in your web browser. You should get a page saying "Welcome to CFWheels!"
That's it. You're done. This is where the fun begins!
Hide your primary key values from nosy users.
The Wheels convention of using an auto-incrementing integer value as the primary key in your database tables will lead to a lot of URLs on your website exposing this value. Using the built-in URL obfuscation functionality in Wheels, you can hide this value from nosy users.
When URL obfuscation is turned off (which is the default setting in Wheels), this is how a lot of your URLs will end up looking:
http://localhost/user/profile/99Here, 99 is the primary key value of a record in your users table.
After enabling URL obfuscation, this is how those URLs will look instead:
http://localhost/user/profile/b7ab9a50The value 99 has now been obfuscated by Wheels to b7ab9a50. This makes it harder for nosy users to substitute the value to see how many records are in your users table, to name just one example.
To turn on URL obfuscation, all you have to do is call set(obfuscateURLs=true) in the config/settings.cfm file.
Once you do that, Wheels will handle everything else. Obviously, the main things Wheels does is obfuscate the primary key value when using the linkTo() function and deobfuscate it on the receiving end. Wheels will also obfuscate all other params sent in to linkTo() as well as any value in a form sent using a get request.
In some circumstances, you will need to obfuscate and deobfuscate values yourself if you link to pages without using the linkTo() function, for example. In these cases, you can use the obfuscateParam() and deObfuscateParam()functions to do the job for you.
No, this is not meant to add a high level of security to your application. It just obfuscates the values, making casual observation harder. It does not encrypt values, so keep that in mind when using this approach.
For instance, unless you specify it in your config/routes.cfm file, you can still directly access numeric keys in the URL, e.g. /users/view/99; However, there is a small work around you can implement to prevent this at least, using the routes constraints argument.
mapper()
.resources(name = "users", constraints = { key = "\w+\d+" } )
.root( to="home##index", method="get")
.end();This uses Regex to ensure the params.key argument is an alpha numeric key and not just purely numeric: otherwise the route won't match.
Use the standard CFML application events through the framework.
Because the Application.cfc file in the root of your Wheels site just includes the wheels/functions.cfm file, which in turn includes a lot of framework specific code, you may wonder what the best way is to use CFML's onApplicationStart, onRequestStart, etc. functions.
While it's perfectly possible to add your code directly to the wheels/functions.cfm file, we certainly don't recommend it. If you add code in there, you both increase the risk of accidentally modifying how the framework functions, and you also make it a lot harder to upgrade to future versions of Wheels.
The general recommendation is to never touch any files in the wheels folder. OK, with that little warning out of the way, how does one go about using the CFML events?
The answer is to use the events folder. There is a file in there for every single event that CFML triggers. So if you want some code executed on application start for example, just place your code in onapplicationstart.cfm, and Wheels will run it when your application starts.
If you look closely in the events folder, you will also notice that there are some custom files in there that do not match up with standard CFML events. The onmaintenance.cfm file is one example. Let's have a closer look at these.
On Maintenance
The onmaintenance.cfm file is included when Wheels is set to maintenance mode. After the file is included, cfabortis called by Wheels so no other code runs in this mode.
On Error
You can place a generic error message in the onerror.cfm file to be displayed to the users whenever your site throws an error.
If you need to access the error information here (for logging purposes, for example) it is available at arguments.exception.
On Missing Template
The onmissingtemplate.cfm file works in a similar way as the error file above, but it gets called when a controller or action in your application could not be found.
Note: If you want to make sure that all browsers show your custom 404 page you need to make it larger than 512 bytes in size. Google Chrome, for example, will display a friendly help page of its own when the 404 page is less than 512 bytes.
Sometimes it's useful to add functions right in the Application.cfc file to make them available to all templates. To achieve the same thing in Wheels, you can place your functions in /global/functions.cfm.
Again, because there is no Application.cfc file for you to work with in Wheels, you have to find a suitable place to set application settings such as SessionManagement, SessionTimeout, ScriptProtect, SetClientCookies, and so on. These are usually set in the constructor area of an Application.cfc file. We recommend that you set them in the config/app.cfm file instead.
An easy way to keep deleted data in your database.
"Soft delete" in database lingo means that you set a flag on an existing table which indicates that a record has been deleted, instead of actually deleting the record.
If you create a new date column (the column type will depend on your database vendor, but usually you want to use date, datetime, or timestamp) on a table and name it deletedAt, Wheels will automagically start using it to record soft deletes.
Without the soft delete in place, a delete() call on an object will delete the record from the table using a DELETE statement. With the soft delete in place, an UPDATE statement is sent instead (that sets the deletedAt field to the current time).
Of course, all other Wheels functions are smart enough to respect this. So if you use a findAll() function, for example, it will not return any record that has a value set in the deletedAt field.
What this all means is that you're given a convenient way to keep deleted data in your database forever, while having your application function as if the data is not there.
Occasionally you might want to include data which has been flagged for deletion. You can do this easily by adding includeSoftDeletes=true to any findAll type call.
Obviously, if you have any manual queries in your application, you'll need to remember to add deletedAt IS NULL to the WHERE part of your SQL statements instead.
Improve database performance and simplify your user interface by using pagination.
If you searched for "coldfusion" on Google, would you want all results to be returned on one page? Probably not because it would take a long time for Google to first get the records out of its index and then prepare the page for you. Your browser would slow to a halt as it tried to render the page. When the page would finally show up, it would be a pain to scroll through all those results.
Rightly so, Google uses pagination to spread out the results on several pages.
And in Wheels, it's really simple to do this type of pagination. Here's how:
Get records from the database based on a page number. Going back to the Google example, this would mean getting records 11-20 when the user is viewing the second results page. This is (mostly) done using the findAll() function and the page and perPage arguments.
Display the links to all the other pages that the user should be able to go to. This is done using the paginationLinks() function or using a lower-level function pagination().
This chapter will deal with the first part: getting the paginated data. Please proceed to the chapter called Displaying Links for Pagination if you wish to learn how to output the page links in your view.
Let's jump straight to an example:
authors = model("Author").findAll(page=2, perPage=25, order="lastName");That simple code will return authors 26-50 from the database, ordered by their last name.
What SQL statements are actually being executed depends on which database engine you use. (The MySQL adapter will use LIMIT and OFFSET, and the Microsoft SQL Server adapter will use TOP and some tricky sub queries.) Turn on debugging in the ColdFusion Administrator if you want to see exactly what's going on under the hood.
One important thing that you should be aware of is that pagination is done based on objects and not records. To illustrate what that means, we can expand on the above example a little:
authorsAndBooks = model("Author").findAll(
include="Books", page=2, perPage=25, order="lastName"
);Here, we tell Wheels that we also want to include any books written by the authors in the result. Since it's possible that an author has written many books, we can't know in advance how many records we'll get back (as opposed to the first example, where we know we will get 25 records back). If each author has written 2 books, for example, we will get 50 records back.
If you do want to paginate based on the books instead, all that you need to do is flip the findAll() statement around a little:
booksAndAuthors = model("Book").findAll(
include="Author", page=2, perPage=25, order="lastName"
);Here, we call the findAll() function on the Book class instead, and thereby we ensure that the pagination is based on the books and not the authors. In this case, we will always get 25 records back.
If you need to know more about the returned query, you can use the pagination() function which returns a struct with keys pagination().currentPage, pagination().totalPages and pagination().totalRecords.
That's all there is to it, really. The best way to learn pagination is to play around with it with debugging turned on.
Don't forget to check the chapter Displaying Links for Pagination.
Techniques for migrating your database in production
Once you've created your migration files and committed your changes (you are all using source control - right?) you might be wondering about the different ways to migrate your database in a production environment.
Probably one of the most common and basic deployment types is a standalone virtual machine, running ACF or Lucee, with a database server such as MySQL running on the same box. In this scenario, we could probably stick with the simplest option: there is after all, probably only one instance of the site running.
Put the site into maintenance mode (this is always good practice when deploying new code)
Load the internal Migration GUI, migrate your database. Note: Ensure your IP address is in the maintenance mode exclusion list: the debug footer may not be available, so make a note of the url string ?controller=wheels&action=wheels&view=migrate
Reload the application back into production mode
You may well have a more complicated setup, such as being behind a load balancer, or having dynamic instances of your application - such as AWS ElasticBeanstalk - where logging into the same instance isn't practical; it may be your application is an API where a request could get routed to any node in the cluster, or that "sticky" sessions aren't enabled.
This means running the migrations manually via GUI isn't a practical option - you might accidentally leave a node in the cluster in maintenance mode and not be able to easily return to it etc.
In this scenario, you could use the built-in autoMigrateDatabase setting: this will automatically migrate the database to the latest schema version when the application starts.
This would fire for each node on a cluster and would fire on each application restart - however, the overhead would be minimal (one additional database call).
To activate this feature, just use set(autoMigrateDatabase=true) in your config/production.cfmsettings, to ensure it only fires in production mode.
It might be that full automatic migrations aren't necessary, or undesirable for some reason. You could have a script which essentially replaces the GUI functions and call the migration methods manually.
Please consult the internal documentation API reference under Configurations > Database Migrations for details of the various functions available to you.
If you are using automatic migrations, then you could lock down production mode even further. With CFWheels 2.x there is more data available to development mode, such as the internal documentation, routing GUI and Migration GUI.
Turn off environment switching
You can force CFWheels to remain in production via set(allowEnvironmentSwitchViaUrl=false) - this will disable ?reload=maintenance style URLs where there is a configuration change, but simple reloading such as ?reload=true will still work. This setting should be approached with caution, as once you've entered into a mode with this setting on, you can't then switch out of it.
Deleting records from your database tables.
Deleting records in Wheels is simple. If you have fetched an object, you can just call its delete() method. If you don't have any callbacks specified for the class, all that will happen is that the record will be deleted from the table and truewill be returned.
If you have callbacks however, this is what happens:
First, all methods registered to be run before a delete happens (these are registered using a beforeDelete() call from the config function) will be executed, if any exist.
If these return true, Wheels will proceed and delete the record from the table. If false is returned from the callback code, processing will return to your code without the record being deleted. (false is returned to you in this case.)
If the record was deleted, the afterDelete() callback code is executed, and whatever that code returns will be returned to you. (You should make all your callbacks return true or false.)
If you're unfamiliar with the concept of callbacks, you can read about them in the Object Callbacks chapter.
Here's a simple example of fetching a record from the database and then deleting it.
aPost = model("post").findByKey(33);
aPost.delete();There are also 3 class-level delete methods available: deleteByKey(), deleteOne(), and deleteAll(). These work similarly to the class level methods for updating, which you can read more about in Updating Records.
URL rewriting instructions for Tomcat
Tomcat 8 can be configured using RewriteValve. See for examples.
UrlRewriteFilter (commonly referred to as Tuckey) is a Java web filter for compliant web application servers such as Tomcat, Jetty, Resin and JBoss. Unfortunately UrlRewriteFilter depends on XML with its extremely strict syntax.
First follow the ().
Append the servlet-mapping markup to the end of the <filter mapping> element in your WEB-INF/web.xml
Add the pretty urls rule markup to the <urlrewrite> element to your WEB-INF/urlrewrite.xml configuration.
Restart the web application server.
Servlet-Mapping markup
Example markup with UrlRewriteFilter and Wheels pretty URLs for WEB-INF/web.xml.
Pretty URLs Rule markup
A complete barebones WEB-INF/urlrewrite.xml configuration example with pretty URLs.
Environments that match your development stages.
CFWheels allows you to set up different environments that match stages in your development cycle. That way you can configure different values that match what services to call and how your app behaves based on where you are in your development.
The Development environment is the most convenient one to use as you start building your application because it does not cache any data. Therefore, if you make any changes to your controllers and actions, for example, it will immediately be picked up by CFWheels.
Other environment modes cache this information in order to speed up your application as much as possible. Making changes to the database in these most modes will cause CFWheels to throw an error. (Although that can be avoided with a reload call. More on that later.)
The fastest environment mode in terms of page load time is the Production mode. This is what you should set your application to run in before you launch your website.
By default, all new applications will start in the Development environment which is middle-of-the-road in terms of convenience versus speed.
Besides the 2 environments mentioned above, there are 2 more. Let's go through them all one by one so you can see the differences between them and choose the most appropriate one given your current stage of development.HTTP
Development
Shows friendly CFWheels specific errors as well as regular ColdFusion errors on screen.
Does not email you when an error is encountered.
Caches controller and model initialization (the config() methods).
Caches the database schema.
Caches routes.
Caches image information.
Production
Caches everything that the Development mode caches.
Activates all developer controlled caching (actions, pages, queries and partials).
Shows your custom error page when an error is encountered.
Shows your custom 404 page when a controller or action is not found.
Sends an email to you when an error is encountered.
Testing
Same caching settings as the Production mode but using the error handling of the Development mode. (Good for testing an application at its true speed while still getting errors reported on screen.)
Maintenance
Shows your custom maintenance page unless the requesting IP address or user agent is in the exception list (set by calling set(ipExceptions="127.0.0.1") in config/settings.cfm or passed along in the URL as except=127.0.0.1, or as except=myuseragentstring to match against the user agent instead. Please note that if passing an exception on the URL using the except parameter, you must also provide the password parameter if a reload password has been define. This eliminates the possibility of a rouge actor breaking out of maintenance mode by simply adding an except to the URL.
This environment mode comes in handy when you want to briefly take your website offline to upload changes or modify databases on production servers.
You change the current environment by modifying the config/environment.cfm file. After you've modified it, you need to either restart the ColdFusion service or issue a reload request. (See below for more info.)
The reload Request
Issuing a reload request is the easiest way to go from one environment to another. It's done by passing in reload as a parameter in the URL, like this:
This tells CFWheels to reload the entire framework (it will also run your code in the events/onapplicationstart.cfmfile), thus picking up any changes made in the config/environment.cfm file.
Lazy Reloading
There's also a shortcut for lazy developers who don't want to change this file at all. To use it, just issue the reload request like this instead:
This will make CFWheels skip your config/environment.cfm file and just use the URL value instead (testing, in this case).
Password-Protected Reloads
For added protection, you can set the reloadPassword variable in config/settings.cfm. When set, a reload request will only be honored when the correct password is also supplied, like this:
Don't forget your reload password in production
You really don't want random users hitting ?reload=development on a production server, as it could potentially expose data about your application and error messages. Always set a reload password!
If you're deploying to a container based environment, or one that you know you'll never want to switch out of production mode, you can disable URL based environment switching completely via:
set(allowEnvironmentSwitchViaUrl = false);
This is just an additional check to ensure that your production mode acts in the way you expect! Application reloading is still allowed, but the configuration can not be altered.\
Making URLs prettier using URL rewriting.
URL rewriting is a completely optional feature of Wheels, and all it does is get rid of the index.cfm part of the URL.
For example, with no URL rewriting, a URL in your application could look like this:
After turning on URL rewriting, it would look like this:
Combine this with the routing functionality of Wheels, and you get the capability of creating some really human-friendly (easier to remember, say over the phone, etc.) and search engine friendly (easier to crawl, higher PageRank, etc.) URLs.
Once you have added the rewrite rules (usually in either .htaccess, web.config or urlrewrite.xml), Wheels will try and determine if your web server is capable of rewriting URLs and turn it on for you automatically. Depending on what web server you have and what folder you run Wheels from, you may need to tweak things a little though. Follow these instructions below for details on how to set up your web server and customize the rewrite rules when necessary.
For webserver specific instructions look at the following pages:
If you need to make changes to get URL rewriting to work, it's important to remember to always restart the web server and the ColdFusion server to make sure the changes are picked up by Wheels.
If you don't have access to restart services on your server, you can issue a reload=true request. It's often enough.
Generally speaking, if you try and add Unicode characters such as umlauts into templates, you may well come across display issues. This is easily fixable, but requires one of the following:
For the template cfm file to be saved in the correct encoding for the language being displayed
Or use of the cfprocessingdirective tag to set pageEncoding
Incorrect encoding example
Correct encoding
Likewise, umlauts in routes would need for the config/routes.cfm file to have the correct encoding:
If you're actively trying to avoid the use of cfprocessingdirective, you can resave the template or route file with UTF-8-BOM. Your local text editor should provide this facility; here's an example in Notepad++ (windows)
// Example using monthNames args in dateSelect() Coming soon
The command line tools extends the functionality of with some commands specifically designed for CFWheels development.
brings a whole host of command line capabilities to the CFML developer. It allows you to write scripts that can be executed at the command line written entirely in CFML. It allows you to start a CFML server from any directory on your machine and wire up the code in that directory as the web root of the server. What's more is, those servers can be either Lucee servers or Adobe ColdFusion servers. You can even specify what version of each server to launch. Lastly, CommandBox is a package manager for CFML. That means you can take some CFML code and package it up into a module, host it on ForgeBox.io, and make it available to other CFML developers. In fact we make extensive use of these capabilities to distribute CFWheels plugins and templates. More on that later.
One module that we have created is a module that extends CommandBox itself with commands and features specific to the CFWheels framework. The CFWheels CLI module for CommandBox is modeled after the Ruby on Rails CLI module and gives similar capabilities to the CFWheels developer.
The first step is to get downloaded and running. CommandBox is available for Windows, Mac & Linux, and can be installed manually or using one of the respective package managers for each OS. You can use on Windows, on MacOS, or Yum/Apt on Linux depending on your flavor of Linux. Please follow the instructions on how to install CommandBox on your particular operating system. At the end of the installation process you want to make sure the box command is part of your system path so you can call the command from any directory on your system.
Once installed, you can either double-click on the box executable which opens the CommandBox shell window, or run box from a CMD window in Windows, Terminal window in MacOS, or shell prompt on a Linux server. Sometimes you only want to call a single CommandBox command and don't need to launch a whole CommandBox shell window to do that, for these instances you can call the CommandBox command directly from your default system terminal window by prefixing the command with the box prefix.
So to run the CommandBox version command you could run box version from the shell or you could launch the CommandBox shell and run version inside it.
box version
version
This is a good concept to grasp, cause depending on your workflow, you may find it easier to do one versus the other. Most of the commands you will see in these CLI guides will assume that you are entering the command in the actual CommandBox shell so the box prefix is left off.
Okay, now that we have CommandBox installed, let's add the CFWheels CLI module.
install cfwheels-cli
Installing this module will add a number of commands to your default CommandBox installation. All of these commands are prefixed by the wheels name space. There are commands to create a brand new CFWheels application or scaffold out sections of your application. We'll see some of these commands in action momentarily.
These tools allow you to adopt a more modern workflow and allow you to create and manipulate many CFWheels objects from the command line. By making these tools available in the command line, not only will you be able to speed up your development but you can also utilize these commands in Continuous Integration (CI) and Continuous Deployment (CD) work flows.
URL rewriting instructions for IIS
Similar to Apache, IIS 7 will pick up the rewrite rules from a file located in the Wheels installation. In the case of IIS 7, the rules are picked up by adding the following web.config file.
This requires that the is installed. It's an IIS extension from Microsoft that you can download for free.
Deprecated
Please note that IIS6 was official End of Life as of 2015. These notes are included for historical purposes only.
Unfortunately, there is no built-in URL rewriting mechanism in IIS 6, so getting Wheels working with pretty URLs is a little more complicated than with Apache and IIS 7 (which often comes with the official "URL Rewrite Module" installed by default). Here's what you need to do:
Download Ionic's . NOTE: the version must be v1.2.16 or later.
Unzip the file, get the IsapiRewrite4.dll file from the lib folder and put it in the root of your website. (It needs to be in the same folder as the IsapiRewrite4.ini file.)
To enable the rewrite filter in IIS 6, click on Properties for your website, then go to the ISAPI Filters tab and click the Add... button.
Type in anything you want as the Filter Name and point the Executable to the IsapiRewrite4.dll file.
Uncomment the rewrite rules in the IsapiRewrite4.ini file.
NOTE: Make sure you have "Verify that file exists" disabled for your site.
Right click your website and select Properties.
Click Home Directory tab.
Click the Configuration button.
Under the Wildcard application mapping section, double-click path for the jrun_iis6_wildcard.dll.
Uncheck Verify that file exists.
Click OK until all property screens are closed.
How to use more than one database in your Wheels application.
Sometimes you need to pull data from more than one database, whether it's by choice (for performance or security reasons, perhaps) or because that's the way your infrastructure is set up. It's something you have to find a way to deal with.
Wheels has built-in functionality for this so that you don't have to revert back to writing the queries and setting the data source manually whenever you need to use a data source other than the default one. In order accomplish this, you will use the function.
Overriding the default data source is done on a per model basis in Wheels by calling the function from within your model's config() method. By doing this, you instruct wheels to use that data source whenever it interacts with that model.
Here's an example of a model file:
It's important to note that in order for Wheels to use the data source, it must first be configured in your respective CFML engine (i.e. in the Adobe ColdFusion, Lucee Admin etc).
One thing to keep in mind when using multiple data sources with Wheels is that it doesn't work across associations. When including another model within a query, Wheels will use the calling model's data source for the context of the query.
Let's say you have the following models set up:
Because the photo model is the main model being used in the following example, its data source (myFirstDatabase) will be the one used in the query that ends up executing.
With the new routing system in CFWheels 2.x, there are lots of nice features which allow for better code organization. One of these is the ability to nest controllers into folders using the namespace() method in our mapper() call.
For example, we may have a whole "Admin" section, where for each endpoint, we need to check some permissions, and possibly load some default data. Let's say we have a Users controller which provides standard CRUD operations.
This will automatically look for the Users.cfc controller in controllers/admin/.
By default, all your controllers extend="Controller", but with a nested controller, we need to change this, as the main Controller.cfc isn't at the same folder level.
We've added a new mapping in 2.x, called app; This mapping will always correspond to your site root, so in our Users.cfc we now have two options - extend the core Controller.cfc via the app mapping, or perhaps extend another component (possibly Admin.cfc) which extends the core Controller instead.
In the above example, we're using the app mapping to "go to" the site root, and then look for a folder called controllers, and within that, our main Controller.cfc.
Our super.config() call will then run the config() function in our base Controller.
We could of course have the following too (just for completeness sake):
And then add the app.controllers.Controller mapping to Admin.cfc, and the extends="Admin" in the Users.cfc.
Of course, we can extend this concept (ha!) to Models too. However, this is either limited to tableless models, or models where you implicitly specify the table() call. As Wheels will look for the tablename dependent on the model file location, it'll get confused if in a sub-directory.
It also potentially makes your model() calls more complex, as you need to specify the model name in dot notation:
Wheels automatically wraps your database calls in transactions to assist your application in maintaining data integrity. Learn how to control this functionality.
Database transactions are a way of grouping multiple queries together. They are useful in case the outcome of one query depends on the completion of another. For example, if you want to take money from one person's bank account, and transfer it into someone else's, you probably want to make sure the debit completes before running the credit.
You'll be pleased to know that Wheels makes using database transactions easy. In fact, the vast majority of the time, you won't need to think about using them at all because Wheels automatically runs all queries within the callback chain as a single transaction for creates, updates, and deletes.
If any of the callbacks within the chain return false, none of the queries will commit.
For example, say you want to automatically create the first post when a new author subscribes to a blog.
In your Author model, you would add the following code:
In this example, if the post doesn't save (perhaps due to a validation problem), the author doesn't get created either. This helps to maintain database integrity.
If you want to manage transactions yourself using the <cftransaction> tag, you can simply add transaction=falseto any CRUD method.
Another option is to disable transactions across your entire application using the transactionMode configuration:
See the chapter about for more details.
Sometimes it's useful to use a rollback to test a process without making any permanent changes to the database. To do this, add transaction="rollback" to any CRUD method.
Again, to configure your entire application to rollback all transactions, you can set the transactionMode configuration to rollback.
One issue with ColdFusion is that you cannot nest <cftransaction> tags. In this case, Wheels provides a workaround. If you wish to run a method within a transaction, use , as below.
Extend Wheels functionality by using plugins.
Wheels is a fairly lightweight framework, and we like to keep it that way. We won't be adding thousands of various features to Wheels just because a couple of developers find them "cool." ;)
Our intention is to only have functionality we consider "core" inside of Wheels itself and then encourage the use of plugins for everything else.
By using plugins created by the community or yourself, you're able to add brand new functionality to Wheels or completely change existing features. The possibilities are endless.
This couldn't be any simpler. To install a plugin, just download the plugin's zip file and drop it in the plugins folder.
If you want to remove it later simply delete the zip file. (Wheels will clean up any leftover folders and files.)
Reloading Wheels is required when installing/uninstalling. (Issue a reload=true request.)
With the CFWheels CLI installed, you can just do:
This will present a list of available plugins. To install one, simply take note of the "Slug" and run with the install command.
When run in the root of a CFWheels application, it should automatically add the plugin to /plugins and generate a .zip file with the corresponding name and version number.
You may need to change access permissions on your application's plugins folder so that Wheels can write the subfolders and files that it needs to run. If you get an error when testing out a plugin, you may need to loosen up the permission level.
When you download plugins, you will see that they are named something like this: Scaffold-0.1.zip. In this case, 0.1 is the version number of the Scaffold plugin. If you drop both Scaffold-0.1.zip and Scaffold-0.2.zip in the plugins folder, Wheels will use the one with the highest version number and ignore any others.
If you try to install a plugin that is not compatible with your installed version of Wheels or not compatible with a previously installed plugin (i.e., they try to add/override the same functions), Wheels will throw an error on application start.
If you install a plugin that depends on another plugin, you will get a warning message displayed in the debug area. This message will name the plugin that you'll need to download and install to make the originally installed plugin work correctly.
The debug area will also show the version number of the plugin if the plugin Author has included a suitable box.json file.
Plugins are very powerful, remember, they can completely override other functions, including CFWheels core functions and functions of other installed plugins. For this reason we recommend that you hake a look at the code itself for the plugins that you intend to use. This is especially important if you have multiple plugins that override the same function. In those cases you'll have to determine if the plugins play well with each other (which they typically do if they run their code and then defer back to the CFWheels core function afterwards) or if they clash and cause problems (in which case you can perhaps contribute to the plugin repository in an effort to make the plugins behave better in situations like this).
To view all official plugins that are available for CFWheels you can go to the listing on forgebox. Often the community will have a better idea of what plugins work best for your situation, so get on the mailing list and ask if you're in any doubt.
http://www.mysite.com/?reload=truehttp://www.mysite.com/?reload=testinghttp://www.mysite.com/?reload=testing&password=mypass.mapper()
.namespace("admin")
.resources("users")
.end()
.end()component extends="app.controllers.Controller" {
function config(){
super.config();
}
}/controllers/
/admin/
- Admin.cfc
- Users.cfc
/public/
- etc.component extends="app.models.Model"
{
function config() {
table(false);
}
function save(){
}
}// Example for "LDAP.cfc" in "/models/auth"
myNewLDAPModel=model("auth.LDAP").new();<servlet-mapping>
<servlet-name>CFMLServlet</servlet-name>
<url-pattern>/rewrite.cfm/*</url-pattern>
</servlet-mapping><filter>
<filter-name>UrlRewriteFilter</filter-name>
<filter-class>org.tuckey.web.filters.urlrewrite.UrlRewriteFilter</filter-class>
</filter>
<filter-mapping>
<filter-name>UrlRewriteFilter</filter-name>
<url-pattern>/*</url-pattern>
<dispatcher>REQUEST</dispatcher>
<dispatcher>FORWARD</dispatcher>
</filter-mapping>
<servlet-mapping>
<servlet-name>CFMLServlet</servlet-name>
<url-pattern>/rewrite.cfm/*</url-pattern>
</servlet-mapping><rule enabled="true">
<name>CFWheels pretty URLs</name>
<condition type="request-uri" operator="notequal">^/(flex2gateway|jrunscripts|cfide|cf_scripts|cfformgateway|cffileservlet|lucee|files|images|javascripts|miscellaneous|stylesheets|wheels/public/assets|robots.txt|favicon.ico|sitemap.xml|rewrite.cfm)</condition>
<from>^/(.*)$</from>
<to type="passthrough">/rewrite.cfm/$1</to>
</rule><?xml version="1.0" encoding="utf-8"?>
<!DOCTYPE urlrewrite
PUBLIC "-//tuckey.org//DTD UrlRewrite 4.0//EN"
"http://www.tuckey.org/res/dtds/urlrewrite4.0.dtd">
<urlrewrite>
<rule enabled="true">
<name>CFWheels pretty URLs</name>
<condition type="request-uri" operator="notequal">^/(flex2gateway|jrunscripts|cfide|cf_scripts|cfformgateway|cffileservlet|lucee|files|images|javascripts|miscellaneous|stylesheets|wheels/public/assets|robots.txt|favicon.ico|sitemap.xml|rewrite.cfm)</condition>
<from>^/(.*)$</from>
<to type="passthrough">/rewrite.cfm/$1</to>
</rule>
</urlrewrite>http://localhost/index.cfm/blog/newhttp://localhost/blog/new<?xml version="1.0" encoding="UTF-8"?>
<configuration>
<system.webServer>
<rewrite>
<rules>
<rule name="ColdFusion on Wheels URL Rewriting" enabled="true">
<match url="^(.*)$" ignoreCase="true" />
<conditions logicalGrouping="MatchAll">
<add input="{SCRIPT_NAME}" negate="true" pattern="^/(flex2gateway|jrunscripts|cf_scripts|cfide|CFFileServlet|cfformgateway|lucee|files|images|javascripts|miscellaneous|stylesheets|wheels/public/assets|robots.txt|favicon.ico|sitemap.xml|rewrite.cfm)($|/.*$)" />
</conditions>
<action type="Rewrite" url="/rewrite.cfm/{R:1}" />
</rule>
</rules>
</rewrite>
</system.webServer>
</configuration>component extends="Model" {
function config(){
dataSource("mySecondDatabase");
}
}component extends="Model" {
function config(){
dataSource("myFirstDatabase");
hasMany("photoGalleries");
}
}component extends="Model" {
function config(){
dataSource("mySecondDatabase");
}
}myPhotos = model("photo").findAll(include="photoGalleries");component extends="Model" {
function config(){
afterCreate("createFirstPost");
}
function createFirstPost(){
var post = model("post").new(
authorId=this.id,
text="This is my first post!";
post.save();
}
}model("author").create(name="John", transaction=false);set(transactionMode=false);model("author").create(name="John", transaction="rollback");set(transactionMode="rollback");invokeWithTransaction(
method="transferFunds",
personFrom=david,
personTo=mary,
amount=100
);# List all CFWheels plugins on forgebox
$ wheels plugins list# install the Shortcodes plugin which has a slug of shortcodes
$ install shortcodes
# install the Select String plugin which has a slug of select-string
$ install select-stringShowing content to the user.
A big part of a controller's task is to respond to the user. In Wheels you can respond to the user in three different ways:
Displaying content
Redirecting to another URL
Sending a file
You can only respond once per request. If you do not explicitly call any of the response functions ( renderView(), sendFile() etc) then Wheels will assume that you want to show the view for the current controller and action and do it for you.
This chapter covers the first method listed above—displaying content. The chapters about Redirecting Users and Sending Files cover the other two response methods.
This is the most common way of responding to the user. It's done with the renderView() function, but most often you probably won't call it yourself and instead let Wheels do it for you.
Sometimes you will want to call it though and specify to show a view page for a controller/action other than the current one. One common technique for handling a form submission, for example, is to show the view page for the controller/action that contains the form (as opposed to the one that just handles the form submission and redirects the user afterwards). When doing this, it's very important to keep in mind that renderView() will not run the code for the controller's action—all it does is process the view page for it.
You can also call renderView() explicitly if you wish to cache the response or use a different layout than the default one.
If the controller and action arguments do not give you enough flexibility,
you can use the template argument that is available for renderView().
Refer to the Pages chapter for more details about rendering content. More specifically, that chapter describes where to place those files and what goes in them.
This is done with the renderPartial() function. It's most often used with AJAX requests that are meant to update only parts of a page.
Sometimes you don't need to return anything at all to the browser. Perhaps you've made an AJAX request that does not require a response or executed a scheduled task that no end user sees the results of. In these cases you can use the renderNothing() function to tell Wheels to just render an empty page to the browser.
This is done with the renderText() function. It just returns the text you specify. In reality it is rarely used but could be useful as a response to AJAX requests sometimes.
Normally when you call any of the rendering functions, the result is stored inside an internal Wheels variable. This value is then outputted to the browser at the end of the request.
Sometimes you may want to do some additional processing on the rendering result
before outputting it though. This is where the returnAs argument comes in
handy. It's available on both renderView() and renderPartial().
Setting returnAs to string will return the result to you instead of placing
it in the internal Wheels variable.
Two of the functions listed above are capable of caching the content for you;
renderView() and renderPartial(). Just pass in cache=true (to use
the default cache time set in config/settings.cfm) or cache=x where x is
the number of minutes you want to cache the content for. Keep in mind that this
caching respects the global setting set for it in your configuration files so
normally no pages will be cached when in Design or Development mode.
We cover caching in greater detail in the Caching chapter.
The renderView() function accepts an argument named layout. Using this
you can wrap your content with common header/footer style code. This is such an
important concept though so we'll cover all the details of it in the chapter
called Using Layouts.
Finding your way around a Wheels application.
After downloading and unzipping Wheels, here's the directory structure that you will see:
config/ controllers/ events/ files/ global/ images/ javascripts/ migrator/* miscellaneous/ models/ plugins/ stylesheets/ tests/ views/ wheels/ Application.cfc index.cfm rewrite.cfm root.cfm
Your configuration settings will be done in the config directory.
Your application code will end up in four of the folders, namely controllers, events, models, and views.
Static media files should be placed in the files, images, javascripts and stylesheets folders.
Place anything that need to be executed outside of the framework in the miscellaneous folder. The framework does not get involved when executing .cfm files in this folder. (The empty Application.cfc takes care of that.) Also, no URL rewriting will be performed in this folder, so it's a good fit for placing CFCs that need to be accessed remotely via <cfajaxproxy> and Flash AMF binding, for example.
Place Wheels plugins in the plugins folder.
And the last directory? That's the framework itself. It exists in the wheels directory. Please go in there and have a look around. If you find anything you can improve or new features that you want to add, let us know!
Let's go through all of the files and directories now starting with the ones you'll spend most of your time in: the code directories.
This is where you create your controllers. You'll see two files in here already: Controller.cfc and Wheels.cfc. You can place functions inside Controller.cfc to have that function shared between all the controllers you create. (This works because all your controllers will extend Controller.) Wheels.cfc is an internal file used by Wheels.
This is where you create your model files (or classes if you prefer that term). Each model file you create should map to one table in the database.
The setup in this directory is similar to the one for controllers, to share methods you can place them in the existing Model.cfc file.
This is where you prepare the views for your users. As you work on your website, you will create one view directory for each controller.
If you want code executed when ColdFusion triggers an event, you can place it here (rather than directly in Application.cfc).
Make all your configuration changes here. You can set the environment, routes, and other settings here. You can also override settings by making changes in the individual settings files that you see in the subdirectories.
Any files that you intend to deliver to the user using the sendFile() function should be placed here. Even if you don't use that function to deliver files, this folder can still serve as file storage if you like.
For application-wide globally accessible functions
This is a good place to put your images. It's not required to have them here, but all Wheels functions that involve images will, by convention, assume they are stored here.
This is a good place to put your JavaScript files.
This is a good place to put your CSS files.
This is where unit tests for your application should go
Use this folder for code that you need to run completely outside of the framework. (There is an empty Application.cfc file in here, which will prevent Wheels from taking part in the execution.)
This is most useful if you're using Flash to connect directly to a CFC via AMF binding or if you're using <cfajaxproxy>in your views to bind directly to a CFC as well.
Place any plugins you have downloaded and want installed here.
Database Migration CFC files and generated SQL files (This directory will only visible once you start using the migrator)
This is the framework itself. When a new version of Wheels is released it is often enough to just drop it in here (unless there has been changes to the general folder structure).
This file is used by Apache, and you specifically need it for URL rewriting to work properly. If you're not using Apache, then you can safely delete it. No longer included by default in 2.x
If you use Tomcat and Tuckey, or CommandBox URL Rewriting, you'll need this file. Otherwise, you can safely delete it. No longer included by default in 2.x
URL rewriting for version 7 of IIS. If you're not using IIS, then you can safely delete it. No longer included by default in 2.x
These are all needed for the framework to run. No changes should be done to these files.
You can add more directories if you want to, of course. Just remember to include a blank Application.cfc in those directories. Otherwise, Wheels will try to get itself involved with those requests as well.
\
These are the commands in the wheels plugins namespace. Currently this section is pretty sparse, make suggestions of what you may want to see in this section.
wheels plugins listThis command will make a call to ForgeBox.io and bring back a list of available CFWheels Plugins listed on ForgeBox.
wheels plugins list❯ wheels plugins list
================ CFWheels Plugins From ForgeBox ======================
Contacting ForgeBox, please wait...
CFWheels Example Plugin ( Tom King )
Type: CFWheels Plugins
Slug: "cfwheels-plugin-example"
CFWheels Example Plugin
Shortcodes ( Tom King )
Type: CFWheels Plugins
Slug: "shortcodes"
Shortcodes Plugin for CFWheels
CFWheels iCal4j ( Tom King )
Type: CFWheels Plugins
Slug: "cfwheels-ical4j"
CFWheels 2.x Plugin Date Repeats Methods via iCal4J Java Lib
CFWheels JS Disable ( Tom King )
Type: CFWheels Plugins
Slug: "cfwheels-js-disable"
JS Disable - CFWheels Plugin
CFWheels bCrypt ( Tom King )
Type: CFWheels Plugins
Slug: "cfwheels-bcrypt"
CFWheels 2.x plugin helper methods for the bCrypt Java Lib
CFWheels JS Confirm ( Tom King )
Type: CFWheels Plugins
Slug: "cfwheels-js-confirm"
JS Confirm - CFWheels Plugin
CFWheels JWT ( Tom King )
Type: CFWheels Plugins
Slug: "cfwheels-jwt"
CFWheels plugin for encoding and decoding JSON Web Tokens (JWT)
CFWheels SAML ( Tom Sucaet )
Type: CFWheels Plugins
Slug: "cfwheels-saml"
CFWheels plugin for SAML Single Sign-On
CFWheels Models Default Scope ( Landon Fabbricino )
Type: CFWheels Plugins
Slug: "defaultScope"
CFWheels 2.1+ Add default scope to models for FindAll method
Bens Json Serializer For Wheels ( Brandon Shea )
Type: CFWheels Plugins
Slug: "cfwheels-bens-json-serializer"
Swaps renderWith()'s use of serializeJson() with Ben Nadel's JsonSerializer
CFWheels DotEnvSettings Plugin ( Peter Amiri )
Type: CFWheels Plugins
Slug: "cfwheels-dotenvsettings"
DotEnvSettings Plugin for CFWheels
TitleTag Plugin ( Chris Geirman )
Type: CFWheels Plugins
Slug: "cfwheels-titletag-plugin"
DRY up your title tags. Allows you to define each page's title within it's view.
CFWheels HTMX Plugin ( Peter Amiri )
Type: CFWheels Plugins
Slug: "cfwheels-htmx-plugin"
HTMX Plugin for CFWheels
CFWheels File Bin ( Brandon Shea )
Type: CFWheels Plugins
Slug: "cfwheels-filebin"
CFWheels File Bin
cfwheels ckEditor plugin ( Reuben Brown )
Type: CFWheels Plugins
Slug: "cfwheels-ckeditor-plugin"
Over-ride the textArea() function
cfwheels Bootstrap Multiselect plugin ( Reuben Brown )
Type: CFWheels Plugins
Slug: "cfwheels-bootstrapmultiselect-plugin"
Creates a new function to allow for a multiselect box
Datepicker ( Adam Chapman )
Type: CFWheels Plugins
Slug: "datepicker"
Datepicker Plugin for CFWheels
Found 17 records.
======================================================================How to create links to other pages in your paginated data in your views.
In the chapter titled Getting Paginated Data, we talked about how to get pages of records from the database (records 11-20, for example). Now we'll show you how to create links to the other pages in your view.
If you have fetched a paginated query in your controller (normally done using findAll() and the page argument), all you have to do to get the page links to show up is this:
#paginationLinks()#Given that you have only fetched one paginated query in your controller, this will output the links for that query using some sensible defaults.
How simple is that?
Simple is good, but sometimes you want a little more control over how the links are displayed. You can control the output of the links in a number of different ways. We'll show you the most important ones here. Please refer to the paginationLinks() documentation for all other uses.
The _name_** Argument**
By default, Wheels will create all links with page as the variable that holds the page numbers. So the HTML code will look something like this:
<a href="/main/userlisting?page=1">
<a href="/main/userlisting?page=2">
<a href="/main/userlisting?page=3">To change page to something else, you use the name argument like so:
#paginationLinks(name="pgnum")#By the way, perhaps you noticed how Wheels chose to use that hideous question mark in the URL, despite the fact that you have URL rewriting turned on? Because paginationLinks() uses linkTo() in the background, you can easily get rid of it by creating a custom route. You can read more about this in the Using Routes chapter.
The _windowSize_** Argument**
This controls how many links to show around the current page. If you are currently displaying page 6 and pass in windowSize=3, Wheels will generate links to pages 3, 4, 5, 6, 7, 8, and 9 (three on each side of the current page).
The _alwaysShowAnchors_** Argument**
If you pass in true here, it means that no matter where you currently are in the pagination or how many page numbers exist in total, links to the first and last page will always be visible.
Most of the time, you'll only deal with one paginated query per page. But in those cases where you need to get/show more than one paginated query, you can use the handle argument to tell Wheels which query it is that you are referring to.
This argument has to be passed in to both the findAll() function and the paginationLinks() function. (You assign a handle name in the findAll() function and then request the data for it in paginationLinks().)
Here is an example of using handles:
In the controller...
users = model("user").findAll(handle="userQuery", page=params.page, perPage=25);
blogs = model("blog").findAll(handle="blogQuery", page=params.page, perPage=25);In the view...
<ul>
<cfoutput query="users">
<li>#users.name#</li>
</cfoutput>
</ul>
<cfoutput>#paginationLinks(handle="userQuery")#</cfoutput>
<cfoutput query="blog">
#address#<br />
</cfoutput>
<cfoutput>#paginationLinks(handle="blogQuery")#</cfoutput>That's all you need to know about showing pagination links to get you started. As always, the best way to learn how the view functions work is to just play around with the arguments and see what HTML is produced.
<h1>Über uns</h1><cfprocessingdirective pageEncoding="utf-8">
<h1>Über uns</h1><cfprocessingdirective pageEncoding="utf-8">
<cfscript>
mapper()
.get(name="about", pattern="/über-uns", to="pages##about")
.root(to="wheels##wheels", method="get")
.end();
</cfscript>One of a developer’s biggest time sinks is coming up with and writing accurate and engaging documentation. Even if it’s an internal project with.. well, just you… it’s still incredibly valuable to have: coming back to projects a few months or even years later can often lead to a bit of head scratching and screams of “why?”, especially with your own code.
Whilst we’re not promising that CFWheels will write all your documentation for you, we have put some tools in place to hopefully make the process a little less painful. With a small amount of adjustment in how you document your core functions, documentation doesn’t necessarily have to be such a time consuming process.
In the CFWheels core, we've adopted javadoc-style syntax (with a few twists of our own) to automatically create our main documentation, and there's nothing stopping you adding to this core set of documentation for your own app. It just needs a bit of markup.
The first thing to notice is the new ‘[View Docs]’ link in the debug section in the footer: Following that link leads you to the main internal documentation.
The three column layout is designed to allow for quick filtering by section or function name. On the left are the main CFWheels core categories, such as Controller and Model functions, which are then broken down into sub categories, such as Flash and Pagination functions etc. Clicking on a link in the first column will filter the list in the second and third columns with all the functions which match (including child functions of that category).
Filtering by function name is made simple by a “Filter as you type” search field in the second column, so getting to the right function should be very quick.
The third column contains the main function definition, including tags, parameters and code samples.
Each function in the core is now appropriately marked up with javaDoc style comments. This, combined with getMetaData() allows us to parse the markup into something useful.
Example Core Function
/**
* Removes all HTML tags from a string.
*
* [section: View Helpers]
* [category: Sanitization Functions]
*
* @html The HTML to remove tag markup from.
*/
public string function stripTags(required string html) {
local.rv = REReplaceNoCase(arguments.html, "<\ *[a-z].*?>", "", "all");
local.rv = REReplaceNoCase(local.rv, "<\ */\ *[a-z].*?>", "", "all");
return local.rv;
}The [section] and [category] tags categorise the function as appropriate, and the @html part describes the function’s parameter. The additional parameter data, such as whether it’s required, type and any defaults are automatically parsed too. This results in a display like:
Any function which is available to Controller.cfc or Model.cfc is automatically included; if there’s no javaDoc comment, then they’ll appear in uncategorized. But of course, there’s nothing stopping you creating your own [section] and [category] tags, which will then automatically appear on the left hand column for filtering: you’re not restricted to what we’ve used in the core.
As an example, if you wanted to document all your filters, you might want to have a [section: Application] tag, with [category: filters]. This way, your application documentation grows as you create it.
Something as simple as a sublime text snippet for a new function which includes the basic javaDoc skeleton can get you in the habit pretty quickly!
We also introspect plugins for the same markup. We encourage plugin authors to adjust their plugin code to include [section: Plugins] at the very least.
You can export the docs via JSON just by changing the URL string:
i.e ?controller=wheels&action=wheels&view=docs&type=core&format=json
You could also include the functions used to create the docs and create your own version (perhaps useful for a CMS or other application where you have internal documentation for authenticated users). Whilst this isn’t officially supported (the main functions may be subject to change!) it is technically possible. The best example is the thing itself – see the main output if you’re interested. Please note that the user interface isn’t available in production mode (for obvious reasons we hope!), so if you wanted to expose this data to an end user, you would probably need to “roll your own” with this approach.
Note that the CFC introspection doesn’t automatically happen on every request, so you will need to ?reload=true to see changes to your code. Additionally, Adobe ColdFusion is more aggressive in caching CFC metadata, so depending on your settings, you may not see changes until a server restart.
Whilst the core has additional code samples which can be loaded from text files, there’s no support for your application functions to take advantage of this yet.
Whilst this API/function explorer is a great first step, you’ll notice your controller and model specific functions aren’t included (only those shared amongst controllers, or in the /global/functions.cfm file. This is because we’re only looking at the main Model.cfc and Controller.cfc and what it can access.
In CFWheels 2.1, we’ll look at adding a full Controller and Model metadata explorer using the same techniques, and map functions like show() to their respective routes too.
Tutorials, demonstrations, and presentations about the ColdFusion on Wheels framework.
Create a basic CRUD interface in CFWheels 2.x
Create a basic JSON API in CFWheels 2.x
Routing in CFWheels 2.x - Part 1
Routing in CFWheels 2.x - Part 2
Introduction to Unit Testing in CFWheels 2.x
Unit Testing Controllers in CFWheels 2.x
Please note that all the webcasts below were created with CFWheels 1.x in mind, and are listed here as they might still be useful to those starting out.
Learn about basic create operations when building standard CRUD functionality in CFWheels
Learn about basic read operations when building standard CRUD functionality in CFWheels
Chris Peters demonstrates updating data in a simple CRUD CFWheels application
Learn how simple it is to delete records in a basic CRUD application using CFWheels
Chris Peters starts the webcast series by demonstrating how to set up ColdFusion on Wheels
Chris Peters demonstrates how to bind a Wheels model object to a form through the use of form helpers
Chris Peters adds data validation to the user registration form
Chris Peters finishes the "success" portion of the registration functionality by adding a success message to the Flash and redirecting the user to their home screen
Chris Peters teaches you about more validation options and how you can add them to the registration form quickly and easily
Chris Peters stylizes form markup globally using a Wheels feature called global helpers
Learn how to set up simple user authentication on a website by using a Wheels feature called filters
Learn the mechanics of reading a single record from the database and displaying its data in the view
Creating custom URL patterns is a breeze in ColdFusion on Wheels
Learn how to fetch multiple records from your model with findAll() and then display them to the user using ColdFusion on Wheels
Learn how to factor out logic in your view templates into custom helper functions in ColdFusion on Wheels
Chris Peters demonstrates joining data together with model associations using ColdFusion on Wheels
All it takes to offer pagination is two extra arguments to findAll() and a call to a view helper called paginationLinks()
Learn how to use the provides() and renderWith() functions to automatically serialize data into XML, JSON, and more
Peter Amiri walks you through setting up a "Hello World" application using the ColdFusion on Wheels framework
Chris Peters gives a high level overview of the ORM included with ColdFusion on Wheels
Chris Peters from Liquifusion demonstrates the ColdRoute plugin for CFWheels
Doug Boude demonstrates using his new Wirebox plugin for CFWheels
Chris Peters from Liquifusion demonstrates creating tables and records in the DBMigrate plugin for ColdFusion on Wheels
Online ColdFusion Meetup (coldfusionmeetup.com) session for March 10 2011, "What's New in CFWheels 1.1", with Chris Peters:
A quick demo of the CFWheels Textmate bundle by Russ Johnson
Verify the existence and type of variables before allowing for a given controller action to run.
Verification, through the function, is just a special type of filter that runs before actions. With verifications defined in your controller, you can eliminate the need for wrapping your entire actions in <cfif> blocks checking for the existence and types of variables. You also can limit your actions' scopes to specific request types like post, get, and AJAX requests.
Let's say that you want to make sure that all requests coming to a page that handles form submissions are postrequests. While you can do this with a filter and the function, it is more convenient and DRY to do it with the function.
All that you need to do is add this line to your controller's config() function:
The code above will ensure that all requests coming to the create and update actions are from form submissions. All other requests will be aborted.
There are also boolean arguments for get and ajax request types.
You can also specify different behavior for when the verification fails in a special handler function registered with the handler argument.
In this example, we register the incorrectRequestType() function as the handler:
Note that you have to either do a call or abort the request completely after you've done what you wanted to do inside your handler function. If you don't do anything at all and just let the function exit on its own, Wheels will redirect the user back to the page they came from. In other words, you cannot render any content from inside this function but you can let another function handle that part by redirecting to it.
A very convenient and common use of is when you want to make sure that a variables exists and is of a certain type; otherwise, you would like for your controller to redirect the user to a different page.
Step back in time for a moment and remember how you used to code websites before Wheels. (Yes I know those were dark days, but stay with me.)
On your edit.cfm page, what you probably did was write some code at the top of that looked like this:
With this snippet of code, you could ensure that any request to the edit.cfm had to have the userId in the form scope and that userId had to be of type guid. If these conditions weren't met, the request was redirected to the index.cfm page. This was a very tedious but necessary task.
Now let's see how using the function within Wheels improves this:
With that one line of code, Wheels will perform the following checks when a request is made to the controller's editaction:
Make sure that the request is a post request.
Make sure that the userId variable exists in the params struct.
Make sure that the params.userId is of typeguid.
If any of those checks fail, redirect the request to the index action and place an error key in the Flash containing the message "Invalid user ID."
All that functionality in only one line of code!
What if you wanted do this for two or more variables? The params and paramsTypes each accept a list so you can include as many variables to check against as you want.
The only thing you need to make sure of is that the number of variables in the params list matches the number types to check against in the paramsTypes list. This also goes for the session/sessionTypes and cookie/cookieTypesarguments, which check for existence and type in the session and cookie scopes, respectively.
exists solely to validate controller and environment level variables and is not a substitute for in your model.
A basic example of this is to validate params passed through to your controller from routes. Suppose we have the following route in our application:
In this example, we will want to verify that the userId integer and address struct are both present in the paramsstruct and also that userId is of a certain type:
However, should not be used to make sure that values within the address struct themselves are valid (such as making sure that address.zipCode is correct). Because the address struct will be passed in to the model, the validation will be performed there.
Wheels includes a plethora of view helpers to help you transform data into a format more easily consumed by your applications' users
Wheels's included view helper functions can help you out in those tricky little tasks that need to be performed in the front-end of your web applications. Although they are called miscellaneous, they are in fact categorized into 3 categories:
Date Helpers
Media Helpers
Text Helpers
We also have separate chapters about Wheels form helpers in and creating your own helpers in .
Wheels does a good job at simplifying the not so fun task of date and time transformations.
Let's say that you have a comment section in your application, which shows the title, comment, and date/time of its publication. In the old days, your code would have looked something like this:
That works, but it's pretty tedious. And if you think about it, the date will be formatted in a way that is not that meaningful to the end user.
Instead of "April 27, 2009 10:10 pm," it may be more helpful to display "a few minutes ago" or "2 hours ago." This can be accomplished with a Wheels date helper called .
With that minimal change, you have a prettier presentation for your end users. And most important of all, it didn't require you to do anything fancy in your code.
Working with media is also a walk in the park with Wheels. Let's jump into a few quick examples.
Style Sheets
First, to include CSS files in your layout, you can use the function:
This will generate the <link> tag for you with everything needed to include the file at stylesheets/main.css.
If you need to include more than one style sheet and change the media type to "print" for another, there are arguments for that as well:
Lastly, you can also link to stylesheets at a different domain or subdomain by specifying the full URL:
JavaScript Files
Including JavaScript files is just as simple with the helper. This time, files are referenced from the javascripts folder.
Like with style sheets, you can also specify lists of JavaScript includes as well as full URLs:
Displaying Images
Wheels's helper also provides some simple, yet powerful functionality:
With this simple call, Wheels will generate the <img> tag for images/logo.png and also set the width, height and alt attributes automatically for you (based on image dimensions and the image file name). Wheels will also cache this information for later use in your application.
If you need to override the alt attribute for better accessibility, you can still do that too:
To illustrate what the text helpers can help you with, let's see a piece of code that includes 2 of the text helpers in a simple search results page.
That code will highlight all occurrences of params.q and will pluralize the word "result" to "results" if the number of records in searchResults is greater than 1. How about them apples? No <cfif> statements, no extra lines, no nothing.
The functions we have shown in this chapter are only the tip of the iceberg when it comes to helper functions. There's plenty more, so don't forget to check out the View Helper Functions API.
How to create new objects and save them to the database.
In Wheels, one way to create objects that represent records in our table is by calling the class-level method.
We now have an empty Author object that we can start filling in properties for. These properties correspond with the columns in the authors database table, unless you have mapped them specifically to columns with other names (or mapped to an entirely different table).
At this point, the newAuthor object only exists in memory. We save it to the database by calling its method.
If you want to create a new object based on parameters sent in from a form request, the method conveniently accepts a struct as well. As we'll see later, when you use the Wheels form helpers, they automatically turn your form variables into a struct that you can pass into and other methods.
Given that params.newAuthor is a struct containing the firstName and lastName variables, the code below does the same as the code above (without saving it though).
If you want to save a new author to the database right away, you can use the method instead.
Note that if we have opted to have the database create the primary key for us (which is usually done by auto-incrementing it), it will be available automatically after the object has been saved.
This means you can read the value by doing something like this. (This example assumes you have an auto-incrementing integer column named id as the primary key.)
Don't forget that you can name your primary key whatever you want, and you can even use composite keys, natural keys, non auto-incrementing, and so on.
No matter which method you prefer, Wheels will use database introspection to see how your table is structured and act accordingly.
The best way of handling model defaults is usually by setting a default constraint in your database. When Wheels saves the model to the database, it will automatically insert the default value if you haven't provided one within your model.
However, unlike the primary key, Wheels will not automatically load database defaults after saving as it requires an additional database call and in most cases is not required. (After saving, the most common action is to redirect, in which case you would reload the newly saved model in the next request anyway.)
Of course, if you do need to access the database default immediately after saving, Wheels allows this. Simply add reload=true to the , , or methods:
Sometimes a database default isn't the most appropriate solution because the value is only set after the model has been inserted. If you want to set a default value when it is first created with or , then you can pass the defaultValue argument of the method used in your model's config() block.
This is effectively the same as doing this:
..except you only need to set it once per model.
Configure CFWheels to properly handle CORS requests
CFWheels can often act as the "backend" in a modern web application, serving data to multiple types of frontend clients. Typically this would be in the form of (but not limited to) JSON served as an API, with something like VueJS or React on the front end, possibly served under a different domain.
When we separate our systems in such a manner, we need to consider CORS (Cross Origin Resource Sharing) and how to properly serve requests which modern browsers will allow.
If you just need to satisfy your CORS requirement quickly, you can do so from CFWheels 2.0 onwards with a simple configuration switch in your /config/settings.cfm file: set(allowCorsRequests=true);.
By default, this will enable the following CORS headers:
This will satisfy most requirements to get going quickly, but is more of a blanket "catch all" configuration which doesn't really restrict anything, or provide much information to the API consumer about your available resources.
From CFWheels 2.1, we can be more specific. We still need to specify set(allowCorsRequests=true); in our /config/settings.cfm to turn on the main CORS functionality, but we can now provide some additional configuration options to fine tune our responses.
The Access Control Allow Origin header tells the browser whether the domain they are connecting from can access the requested resource.
By default, this header is set to a wildcard allowing connection from any domain. But it might be your VueJS app lives at app.domain.com and we only want to allow access from that domain to our API.
You can also take advantage of the environment specific configurations, such as only allowing access to localhost:8080 in /config/development/settings.cfm for example.
CFWheels 2.2 allows for subdomain wildcard matching for CORS permitted origins:
The CORS spec specifies that you are only allowed either a * wildcard, or a specific URL , i.e - it doesn't in itself allow for wildcard subdomains. However in this scenario CFWheels will attempt to match the wildcard and return the full matched domain.
The Access Control Allow Methods tells the browser what HTTP Methods (Verbs) are allowed to be performed against the requested resource.
By default these are set to be all possible Methods, GET, POST, PATCH, PUT, DELETE, OPTIONS. If our API only allows specific methods, we can specify them: note that this is application-wide and not dependent on route.
cfscript
Whilst setting Access Control Allow Methods site-wide is fine, it doesn't actually fulfill the CORS requirement properly - the value returned by this header should indicate what methods are available at that url. For instance, /cats might only allow GET,POST requests, and /cats/1/ might only allow GET,PUT,PATCH,DELETE requests.
Thankfully, we can pull this information in from the routing system automatically! Note, set(accessControlAllowMethodsByRoute=true) will override set(accessControlAllowMethods())
If you're sending credentials such as a cookie from your front end application, you may need to turn this header on.
If you need to specify a specific list of allowed headers, you can simply pass them into this configuration setting
// In the controller
function config(){
verifies(only="create,update", post=true);
}// In the controller
function config(){
verifies(
only="create,update",
post=true,
handler="incorrectRequestType";
}
function incorrectRequestType(){
redirectTo(action="accessDenied");
}<cfif !StructKeyExists(form, "userId") OR !IsValid("guid", form.userId)>
<cflocation url="index.cfm" addToken="false">
</cfif>// In the controller
function config(){
verifies(
only="edit",
post=true,
params="userId",
paramsTypes="guid",
action="index",
error="Invalid user ID."
);
}.post(name="usersAddressesSave",
pattern="admin/users/[userid]/addresses/save",
to="UserAddresses##save")verifies(
only="save",
post=true,
params="userId,address",
paramsTypes="integer,struct"
)><cfoutput query="comments">
<div class="comment">
<h2>#comments.title#</h2>
<p class="timestamp">
#DateFormat(comments.createdAt, "mmmm d, yyyy")#
#LCase(TimeFormat(comments.createdAt, "h:mm tt"))#</p>
<p>#comments.comment#</p>
</div>
</cfoutput><cfoutput query="comments">
<div class="comment">
<h2>#comments.title#</h2>
<p class="timestamp">(#timeAgoInWords(comments.createdAt)#)</p>
<p>#comments.comment#</p>
</div>
</cfoutput><!--- layout.cfm --->
<cfoutput>
#styleSheetLinkTag("main")#
</cfoutput>#styleSheetLinkTag(sources="main,blog")#
#styleSheetLinkTag(source="printer", media="print")##styleSheetLinkTag( source="http://ajax.googleapis.com/ajax/libs/jqueryui/1.7.0/themes/cupertino/jquery-ui.css"
)##javaScriptIncludeTag("jquery")##javaScriptIncludeTag("https://ajax.googleapis.com/ajax/libs/jquery/1.4.4/jquery.min.js")#<cfoutput>
#imageTag("logo.png")#
</cfoutput>#imageTag(source="logo.png", alt="ColdFusion on Wheels")#<!--- Query of search results --->
<cfparam name="searchResults" type="query">
<!--- Search query provided by user --->
<cfparam name="params.q" type="string">
<cfoutput>
<p>
#highlight(text="Your search for #params.q#", phrases=params.q)#
returned #searchResults.RecordCount#
#pluralize(word="result", count=searchResults.RecordCount)#.
</p>
</cfoutput>newAuthor = model("author").new();newAuthor.firstName = "John";
newAuthor.lastName = "Doe";newAuthor.save();newAuthor = model("author").new(params.newAuthor);model("author").create(params.newAuthor);<cfscript>
newAuthor = model("author").new();
newAuthor.firstName = "Joe";
newAuthor.lastName = "Jones";
newAuthor.save();
</cfscript>
<cfoutput>#newAuthor.id#</cfoutput>newAuthor = model("author").new();
newAuthor.firstName = "Joe";
newAuthor.lastName = "Jones";
newAuthor.save(reload=true);property(name="welcomeText", defaultValue="Hello world!");model("myModel").new(welcomeText="Hello world!");Access-Control-Allow-Origin
*
Access-Control-Allow-Methods
GET, POST, PATCH, PUT, DELETE, OPTIONS
Access-Control-Allow-Headers
Origin, Content-Type, X-Auth-Token, X-Requested-By, X-Requested-With// Wildcard
set(accessControlAllowOrigin="*")
// Specify a domain
set(accessControlAllowOrigin="https://app.domain.com");
// Specify multiple domains in a list
set(accessControlAllowOrigin="https://app.domain.com,https://staging-app.domain.com");// Match https://foo.domain.com or https://bar.domain.com or https://www.mydomain.com
set(accessControlAllowOrigin = [
"https://*.domain.com",
"https://www.mydomain.com"
]);// Only ever allow GET requests to this API
set(accessControlAllowMethods="GET");
// Only ever allow GET, POST and OPTIONS
set(accessControlAllowMethods="GET,POST,OPTIONS");// automatically look up the available routes in application.wheels.routes and return the valid methods for the requested route
set(accessControlAllowMethodsByRoute=true);// if set to true, include the Access-Control-Allow-Credentials header
set(accessControlAllowCredentials=true);// Set site wide allowed headers
set(accessControlAllowHeaders = "Origin, Content-Type, X-Auth-Token, X-Requested-By, X-Requested-With, X-MyHeader")

What you need to know and have installed before you start programming in CFWheels.
We can identify 3 different types of requirements that you should be aware of:
Project Requirements. Is CFWheels a good fit for your project?
Developer Requirements. Do you have the knowledge and mindset to program effectively in CFWheels?
System Requirements. Is your server ready for CFWheels?
Before you start learning CFWheels and making sure all the necessary software is installed on your computer, you really need to take a moment and think about the project you intend to use CFWheels on. Is it a ten page website that won't be updated very often? Is it a space flight simulator program for NASA? Is it something in between?
Most websites are, at their cores, simple data manipulation applications. You fetch a row, make some updates to it, stick it back in the database and so on. This is the "target market" for CFWheels--simple CRUD (create, read, update, delete) website applications.
A simple ten page website won't do much data manipulation, so you don't need CFWheels for that (or even ColdFusion in some cases). A flight simulator program will do so much more than simple CRUD work, so in that case, CFWheels is a poor match for you (and so perhaps, is ColdFusion).
If your website falls somewhere in between these two extreme examples, then read on. If not, go look for another programming language and framework. ;)
Another thing worth noting right off the bat (and one that ties in with the simple CRUD reasoning above) is that CFWheels takes a very data-centric approach to the development process. What we mean by that is that it should be possible to visualize and implement the database design early on in the project's life cycle. So, if you're about to embark on a project with an extensive period of object oriented analysis and design which, as a last step almost, looks at how to persist objects, then you should probably also look for another framework.
Still reading?
Good!
Moving on...
Yes, there are actually some things you should familiarize yourself with before starting to use CFWheels. Don't worry though. You don't need to be an expert on any on of them. A basic understanding is good enough.
CFML. You should know CFML, the ColdFusion programming language. (Surprise!)
Object Oriented Programming. You should grasp the concept of object oriented programming and how it applies to CFML.
Model-View-Controller. You should know the theory behind the Model-View-Controller development pattern.
Simply the best web development language in the world! The best way to learn it, in our humble opinion, is to get the free developer edition of Adobe ColdFusion, buy Ben Forta's ColdFusion Web Application Construction Kit series, and start coding using your programming editor of choice. Remember it's not just the commercial Adobe offering that's available; Lucee offers an excellent open source alternative. Using CommandBox is a great and simple way to get a local development environment of your choice up and running quickly.
This is a programming methodology that uses constructs called objects to design applications. Objects model real world entities in your application. OOP is based on several techniques including inheritance, modularity, polymorphism, and encapsulation. Most of these techniques are supported in CFML, making it a fairly functional object oriented language. At the most basic level, a .cfc file in CFML is a class, and you create an instance of a class by using the CreateObject function or the <cfobject> tag.
Trying to squeeze an explanation of object oriented programming and how it's used in CFML into a few sentences is impossible, and a detailed overview of it is outside the scope of this chapter. There is lots of high quality information online, so go ahead and Google it.
Model-View-Controller, or MVC for short, is a way to structure your code so that it is broken down into 3 easy-to-manage pieces:
Model. Just another name for the representation of data, usually a database table.
View. What the user sees and interacts with (a web page in our case).
Controller. The behind-the-scenes guy that's coordinating everything.
MVC is how CFWheels structures your code for you. As you start working with CFWheels applications, you'll see that most of the code you write is very nicely separated into one of these 3 categories.
CFWheels requires that you use one of these CFML engines:
Adobe ColdFusion 10.0.23 / 11.0.12+ / 2016.0.4+ / 2018
Lucee 4.5.5.006 + / 5.2.1.9+
Your ColdFusion or Lucee engine can be installed on Windows, Mac, UNIX, or Linux—they all work just fine.
You also need a web server. CFWheels runs on all popular web servers, including Apache, Microsoft IIS, Jetty, and the JRun or Tomcat web server that ships with Adobe ColdFusion. Some web servers support URL rewriting out of the box, some support the cgi.PATH_INFO variable which is used to achieve partial rewriting, and some don't have support for either. For local development, we strongly encourage the use of CommandBox.
Don't worry though. CFWheels will adopt to your setup and run just fine, but the URLs that it creates might differ a bit. You can read more about this in the URL Rewriting chapter.
Finally, to build any kind of meaningful website application, you will likely interact with a database. These are the currently supported databases:
SQL Server 7+
MySQL 5+ *
PostgreSQL 8.4+
H2 1.4+
OK, hopefully this chapter didn't scare you too much. You can move on knowing that you have the basic knowledge needed, the software to run CFWheels, and a suitable project to start with.
Use Wheels to get statistics on the values in a column, like row counts, averages, highest values, lowest values, and sums.
Since CFWheels simplifies so much for you when you select, insert, update, and delete rows from the database, it would be a little annoying if you had to revert back to using cfquery and COUNT(id) AS x type queries when you wanted to get aggregate values, right?
Well, good news. Of course you don't need to do this; just use the built-in functions sum(), minimum(), maximum(), average() and count().
Let's start with the count() function, shall we?
To count how many rows you have in your authors table, simply do this:
authorCount = model("author").count();What if you only want to count authors with a last name starting with "A"? Like the findAll() function, count() will accept a where argument, so you can do this:
authorCount = model("author").count(where="lastName LIKE 'A%'");Simple enough. But what if you wanted to count only authors in the USA, and that information is stored in a different table? Let's say you have stored country information in a table called profiles and also setup a hasOne / belongsTo association between the author and profile models.
Just like in the findAll() function, you can now use the include argument to reference other tables.
In our case, the code would end up looking something like this:
authorCount = model("author").count(include="profile", where="countryId=1 AND lastName LIKE 'A%'");Or, if you care more about readability than performance, why not just join in the countries table as well?
authorCount = model("author").count(include="profile(country)", where="name='USA' AND lastName LIKE 'A%'");In the background, these functions all perform SQL that looks like this:
SELECT COUNT(*)
FROM authors
WHERE ...However, if you include a hasMany association, CFWheels will be smart enough to add the DISTINCT keyword to the SQL. This makes sure that you're only counting unique rows.
For example, the following method call:
authorCount = model("author").count(include="books", where="title LIKE 'Wheels%'");Will execute this SQL (presuming id is the primary key of the authors table and the correct associations have been setup):
SELECT COUNT(DISTINCT authors.id)
FROM authors LEFT OUTER JOIN books ON authors.id = books.authorid
WHERE ..OK, so now we've covered the count() function, but there are a few other functions you can use as well to get column statistics.
You can use the average() function to get the average value on any given column. The difference between this function and the count() function is that this operates on a single column, while the count() function operates on complete records. Therefore, you need to pass in the name of the property you want to get an average for.
The same goes for the remaining column statistics functions as well; they all accept the property argument.
Here's an example of getting the average salary in a specific department:
avgSalary = model("employee").average(property="salary", where="departmentId=1");You can also pass in distinct=true to this function if you want to include only each unique instance of a value in the average calculation.
To get the highest and lowest values for a property, you can use the minimum() and maximum() functions.
They are pretty self explanatory, as you can tell by the following examples:
highestSalary = model("employee").maximum("salary");
lowestSalary = model("employee").minimum("salary");The last of the column statistics functions is the sum() function.
As you have probably already figured out, sum() adds all values for a given property and returns the result. You can use the same arguments as with the other functions (property, where, include, and distinct).
Let's wrap up this chapter on a happy note by getting the total dollar amount you've made:
howRichAmI = model("invoice").sum("billedAmount");All of the methods we've covered in this chapter accepts the group argument. Let's build on the example with getting the average salary for a department above, but this time, let's get the average for all departments instead.
avgSalaries = model("employee").average(property="salary", group="departmentId");When you choose to group results like this you get a cfquery result set back, as opposed to a single value.
Updating records in your database tables.
When you have created or retrieved an object, you can save it to the database by calling its save() method. This method returns true if the object passes all validations and the object was saved to the database. Otherwise, it returns false.
This chapter will focus on how to update records. Read the Creating Records chapter for more information about how to create new records.
Let's start with an example of getting a blog post from the database, updating its title, and saving it back:
post = model("post").findByKey(33);
post.title = "New version of Wheels just released";
post.save();You can also change the values of one or more properties and save them to the database in one single call using the update() method, like this:
post = model("post").findByKey(33);
post.update(title="New version of Wheels just released");You can also pass in name/value pairs to update() as a struct. The main reason this method accepts a struct is to allow you to easily use it with forms.
This is how it would look if you wanted to update the properties for a post based on a submitted form.
post = model("post").findByKey(params.key);
post.update(params.post);It's also possible to combine named arguments with a struct, but then you need to name the struct argument as properties.
Example:
post = model("post").findByKey(params.key);
post.update(title="New version of Wheels just released", properties=params.post);To cut down even more on lines of code, you can also combine the reading and saving of the objects by using the class-level methods updateByKey() and updateAll().
Give the updateByKey() method a primary key value (or several if you use composite keys) in the key argument, and it will update the corresponding record in your table with the properties you give it. You can pass in the properties either as named arguments or as a struct to the properties argument.
This method returns the object with the primary key value you specified. If the object does not pass validation, it will be returned anyway, but nothing will be saved to the database.
By default, updateByKey() will fetch the object first and call the update() method on it, thus invoking any callbacks and validations you have specified for the model. You can change this behavior by passing in instantiate=false. Then it will just update the record from the table using a simple UPDATE query.
An example of using updateByKey() by passing a struct:
result = model("post").updateByKey(33, params.post);And an example of using updateByKey() by passing named arguments:
result = model("post").updateByKey(id=33, title="New version of Wheels just released", published=1);The updateAll() method allows you to update more than one record in a single call. You specify what records to update with the where argument and tell Wheels what updates to make using named arguments for the properties.
The where argument is used exactly as you specify it in the WHERE clause of the query (with the exception that Wheels automatically wraps everything properly in cfqueryparam tags). So make sure that you place those commas and quotes correctly!
An example:
recordsReturned = model("post").updateAll(
published=1, publishedAt=Now(), where="published=0"
);Unlike updateByKey(), the updateAll() method will not instantiate the objects by default. That could be really slow if you wanted to update a lot of records at once.
Use CFWheels to send files to your users securely and with better control of the user experience.
Sending files?! Is that really a necessary feature of CFWheels? Can't I just place the file on my web server and link to it? You are correct, there is absolutely no need to use CFWheels to send files. Your web server will do a fine job of sending out files to your users.
However, if you want a little more control over the way the user's browser handles the download or be able to secure access to your files then you might find the sendFile() function useful.
The convention in CFWheels is to place all files you want users to be able to download in the files folder.
Assuming you've placed a file named wheels_tutorial_20081028_J657D6HX.pdf in that folder, here is a quick example of how you can deliver that file to the user. Let's start with creating a link to the action that will handle the sending of the file first.
<p>
#linkTo(text="Download Tutorial", action="sendTutorial")#
</p>Now let's send the file to the user in the sendTutorial controller action. Just like the rendering functions in CFWheels, the sendFile() function should be placed as the very last thing you do in your action code.
In this case, that's the only thing we are doing, but perhaps you want to track how many times the file is being downloaded, for example. In that case, the tracking code needs to be placed before the sendFile() function.
Also, remember that the sendFile() function replaces any rendering. You cannot send a file and render a page. (This will be quite obvious once you try this code because you'll see that the browser will give you a dialog box, and you won't actually leave the page that you're viewing at the time.)
Here's the sendTutorial action:
function sendTutorial() {
sendFile(file="wheels_tutorial_20081028_J657D6HX.pdf");
}That's one ugly file name though, eh? Let's present it to the user in a nicer way by suggesting a different name to the browser:
function sendTutorial() {
sendFile(file="wheels_tutorial_20081028_J657D6HX.pdf", name="Tutorial.pdf");
}Much better! :)
By default, the sendFile() function will try and force a download dialog box to be shown to the user. The purpose of this is to make it easy for the user
to save the file to their computer. If you want the file to be shown inside the browser instead (when possible as decided by the browser in question), you can set the disposition argument to inline.
Here's an example:
Example
function sendTutorial() {
sendFile(file="wheels_tutorial_20081028_J657D6HX.pdf", disposition="inline");
}You can also specify what HTTP content type to use when delivering the file by using the type argument. Please refer to the API for the sendFile()
function for complete details.
You can even send files which are stored in ram:// - this is particularly useful when you're dynamically creating files (such as PDF reports) which don't need to be written to the file system.
// Create the PDF.
cfwheels = cfdocument(format='pdf') {
writeOutput(Now());
};
// Write the file to RAM.
fileWrite("ram://cfwheels.pdf", cfwheels);
// Send it.
sendFile(file="ram://cfwheels.pdf");Perhaps the main reason to use the sendFile() function is that it gives you an easy way to secure access to your files. Maybe the tutorial file used in the above example is something the user paid for, and you only want for that user to be able to download it (and no one else). To accomplish this, you can just add some code to authenticate the user right before the sendFile() call in your action.
However, there is a security flaw here. Can you figure out what it is?
You may have guessed that the files folder is placed in your web root, so anyone can download files from it by typing http://www.domain.com/files/wheels_tutorial_20081028_J657D6HX.pdf in their
browser. Although users would need to guess the file names to be able to access the files, we would still need something more robust as far as security goes.
There are two solutions to this.
The easiest one is to just lock down access to the folder using your web server. CFWheels won't be affected by it since it gets the file from the file system.
If that is not an option, the other option is simply to move the files folder out of the web root, thus making it inaccessible. If you move the folder, you'll need to accommodate for this in your code by changing your sendFile() calls to specify the path as well, like this:
function sendTutorial() {
sendFile(file="../../tutorials/wheels_tutorial_20081028_J657D6HX.pdf");
}This assumes you've moved the folder two levels up in your file system and into a folder named "tutorials".
A final note of warning: Be careful to not allow just any parameters from the URL to get passed through to the sendFile() because then a user would be able to download any file from your server by playing around with the URL. Be wary of how you're using the params struct in this context!
How to track changes to objects in your application.
Wheels provides some very useful methods for tracking changes to objects. You might think, Why do I need that? Won't I just know that I changed the object myself?
Well, that depends on the structure of your code.
As you work with Wheels and move away from that procedural spaghetti mess you used to call code to a better, cleaner object-oriented approach, you may get a sense that you have lost control of what your code is doing. Your new code is creating objects, they in turn call methods on other objects automatically, methods are being called from multiple places, and so on. Don't worry though, this is a good thing. It just takes a while to get used to, and with the help of some Wheels functionality, it won't take you that long to get used to it either.
One area where this sense of losing control is especially noticeable is when you are using callbacks on objects (see the chapter on Object Callbacks for more info). So let's use that for our example.
Let's say you have used a callback to specify that a method should be called whenever a user object is saved to the database. You won't know exactly where this method was called from. It could have been the user doing it themselves on the website, or it could have been done from your internal administration area. Generally speaking, you don't need to know this either.
One thing your business logic might need to know though is a way to tell exactly what was changed on the object. Maybe you want to handle things differently if the user's last name was changed than if the email address was changed, for example.
Let's look at the methods Wheels provide to make tracking these changes easier for you.
Let's get to coding…
post = model("post").findByKey(1);
result = post.hasChanged();Here we are using the hasChanged() method to see if any of the object properties has changed.
By the way, when we are talking about "change" in Wheels, we always mean whether or not an object's properties have changed compared to what is stored in the columns they map to in the database table.
In the case of the above example, the result variable will contain false because we just fetched the object from the database and did not make any changes to it at all.
Well, let's make a change then. If we didn't, this chapter wouldn't be all that interesting, would it?
post.title = "A New Post Title";
result = post.hasChanged();Now result will be true because what is stored in post.title differs from what is stored in the titlecolumn for this record in the posts table (well, unless the title was "A New Post Title" even before the change, in which case the result would still be false).
When calling hasChanged() with no arguments, Wheels will check all properties on the object and return true if any of them have changed. If you want to see if a specific property has changed, you can pass in property="title" to it or use the dynamic method XXXHasChanged(). Replace XXX with the name of the property. In our case, the method would then be named titleHasChanged().
If you want to see what a value was before a change was made, you can do so by calling changedFrom() and passing in the name of a property. This can also be done with the dynamic XXXChangedFrom() method.
When an object is in a changed state, there are a couple of methods you can use to report back on these changes. changedProperties() will give you a list of the property names that have been changed. allChanges() returns a struct containing all the changes (both the property names and the changed values themselves).
If you have made changes to an object and for some reason you want to revert it back, you can do so by calling reload() on it. This will query the database and update the object properties with their corresponding values from the database.
OK, let's save the object to the database now and see how that affects things.
post.save();
result = post.hasChanged();Now result will once again contain false. When you save a changed (a.k.a. "dirty") object, it clears out its changed state tracking and is considered unchanged again.
All of the examples in this chapter look a little ridiculous because it doesn't make much sense to check the status of an object when you changed it manually in your code. As we said in the beginning of the chapter, when put into context of callbacks, multiple methods, etc., it will become clear how useful these methods really are.
It's worth noting here that Wheels makes good use of this change tracking internally as well. If you make changes to an object, Wheels is smart enough to only update the changed columns, leaving the rest alone. This is good for a number of reasons but perhaps most importantly for database performance. In high traffic web applications, the bottleneck is often the database, and anything that can be done to prevent unnecessary database access is a good thing.
If you create a brand new object with the new() method and call hasChanged() on it, it will return true. The reason for this seemingly unexpected behavior is that change is always viewed from the database's perspective. The hasChanged() method will return true in this case because it is different from what is stored in the database (i.e. it doesn't exist at all in the database yet).
If you would simply like to know if an object exists in the database or not, you can use the isNew() method.
Generate extra properties in your models on the fly without needing to store redundant data in your database.
Wheels makes up for the slowness of arrays of objects in CFML by providing calculated properties. With calculated properties, you can generate additional properties on the fly based on logic and data within your database.
Consider the example of fullName. If your database table has fields for firstName and lastName, it wouldn't make sense to store a third column called fullName. This would require more storage for redundant data, and it would add extra complexity that could lead to bugs and maintenance problems in the future.
In most object-oriented languages, you would add a method to your class called getFullName(), which would return the concatenation of this.firstName & " " & this.lastName. The getFullName() method could potentially provide arguments to list the last name first and other types of calculations or transformations as well.
Wheels still allows for you to do this sort of dynamic calculation with the returnAs="objects" argument in methods like findAll(), but we advise against it when fetching large data sets because of the slowness of CreateObject()across CFML engines.
See the chapter on Reading Records for more information.
As an alternative, you can set up a calculated property that dynamically performs the concatenation at the database level. In our example, we would write a line similar to this in our model's config() method:
property(
name="fullName",
sql="RTRIM(LTRIM(ISNULL(users.firstname, '') + ' '
+ ISNULL(users.lastname, '')))"
);As you can probably deduce, we're creating a SQL statement that will be run in the SELECT clause to generate the `fullName.
With this line in place, fullName will become available in both full model objects and query objects returned by the various finder methods like findAll() and findOne().
Naturally, if you store the user's birth date in the database, your application can use that data to dynamically calculate the user's age. Your app always knows how many years old the user is without needing to explicitly store his or her age.
In order to calculate an extra property called age based on the birthDate column, our calculated property in config() may look something like this:
Example Code
property(
name="age",
sql="(CAST(CONVERT(CHAR(8), GETDATE(), 112) AS INT)
- CAST(CONVERT(CHAR(8), users.date_of_birth, 112) AS INT))
/ 10000"
);Much like the fullName example above, this will cause the database to add a property called age storing the user's age as an integer.
Note that the cost to this approach is that you may need to introduce DBMS-specific code into your models. This may cause problems when you need to switch DBMS platforms, but at least all of this logic is isolated into your model CFCs.
Calculated properties don't end at just generating extra properties. You can now also use the new property for additional calculations:
Creating additional properties with the select argument
Additional where clause calculations
Record sorting with order
Pagination
And so on…
For example, let's say that we only want to use age to return users who are in their 20s. We can use the new ageproperty as if it existed in the database table. For extra measure, let's also sort the results from oldest to youngest.
Example Code
users = model("user").findAll(
where="age >= 20 AND age < 30", order="age DESC"
);By default, calculated properties will return char as the column data type. Whilst this covers most scenarios, if you want to return something like a date, it can be problematic. Thankfully we can just specify a dataType argument to return the appropriate data type.
property(
name="createdAtAlias",
sql="posts.createdat",
dataType="datetime"
);In this tutorial, we'll be writing a simple application to make sure we have CFWheels installed properly and that everything is working as it should.
Let's make sure we're all on the same page. I'm going to assume that you've followed the guide and have CommandBox all setup. If you haven't done that, stop and read that guide get everything setup. It's okay, this web page will wait for you.
Okay, so you have CFWheels installed and can see the CFWheels "Congratulations!" page as shown below. That wasn't that hard now, was it?
Okay, let's get to some example code. We know that you've been dying to get your hands on some code!
To continue with Programming Tutorial Tradition, we'll create the ubiquitous Hello World! application. But to keep things interesting, let's add a little CFWheels magic along the way.
Let's create a controller from scratch to illustrate how easy it is to set up a controller and plug it into the CFWheels framework.
First, create a file called Say.cfc in the controllers directory and add the
code below to the file.
component extends="Controller"{
}Congratulations, you just created your first CFWheels controller! What does this
controller do, you might ask? Well, to be honest, not much. It has no methods
defined, so it doesn't add any new functionality to our application. But because
it extends the base Controller component, it inherits quite a bit of powerful
functionality and is now tied into our CFWheels application.
So what happens if we try to call our new controller right now? Lets take a
look. Open your browser and point your browser to the new controller. Because my
local server is installed on port 60000, my URL is http://127.0.0.1:60000/say.
You may need to enter a different URL, depending on how your web server is
configured. In my case, I'm using CommandBox.
The error says "Could not find the view page for the 'index' action in the 'say'
controller." Where did "index" come from? The URL we typed in only specified a
controller name but no action. When an action is not specified in the URL,
CFWheels assumes that we want the default action. Out of the box, the default
action in CFWheels is set to index. So in our example, CFWheels tried to find
the index action within the say controller, and it threw an error because it
couldn't find its view page.
But let's jump ahead. Now that we have the controller created, let's add an
action to it called hello. Change your say controller so it looks like the
code block below:
component extends="Controller" {
function hello() {
}
}As you can see, we created an empty method named hello.
Now let's call our new action in the browser and see what we get. To call the
hello action, we simply add /hello to the end of the previous URL that we
used to call our say controller:
http://127.0.0.1:60000/say/hello
Once again, we get a ColdFusion error. Although we have created the controller
and added the hello action to it, we haven't created the view.
By default, when an action is called, CFWheels will look for a view file with
the same name as the action. It then hands off the processing to the view to
display the user interface. In our case, CFWheels tried to find a view file for
our say/hello action and couldn't find one.
Let's remedy the situation and create a view file. View files are simple CFML pages that handle the output of our application. In most cases, views will return HTML code to the browser. By default, the view files will have the same name as our controller actions and will be grouped into a directory under the view directory. This new directory will have the same name as our controller.
Find the views directory in the root of your CFWheels installation. There will
be a few directories in there already. For now, we need to create a new
directory in the views directory called say. This is the same name as the
controller that we created above.
Now inside the say directory, create a file called hello.cfm. In the
hello.cfm file, add the following line of code:
<h1>Hello World!</h>Save your hello.cfm file, and let's call our say/hello action once again.
You have your first working CFWheels page if your browser looks like Figure 3
below.
You have just created your first functional CFWheels page, albeit it is a very simple one. Pat yourself on the back, go grab a snack, and when you're ready, let's go on and extend the functionality of our Hello World! application a little more.
We will add some simple dynamic content to our hello action and add a second
action to the application. We'll then use some CFWheels code to tie the 2
actions together. Let's get get to it!
The first thing we are going to do is to add some dynamic content to our
say/hello action. Modify your say controller so it looks like the code block
below:
component extends="Controller" {
function hello() {
time = Now();
}
}All we are doing here is creating a variable called time and setting its value
to the current server time using the basic ColdFusion Now() function. When we
do this, the variable becomes immediately available to our view code.
Why not just set up this value directly in the view? If you think about it, maybe the logic behind the value of time may eventually change. What if eventually we want to display its value based on the user's time zone? What if later we decide to pull it from a web service instead? Remember, the controller is supposed to coordinate all of the data and business logic, not the view.
Next, we will modify our say/hello.cfm view file so that it looks like the
code block bellow. When we do this, the value will be displayed in the browser.
<h1>Hello World!</h1>
<p>Current time: <cfoutput>#time#</cfoutput></p>call your say/hello action again in your browser. Your browser should look
like Figure 4 below.
This simple example showed that any dynamic content created in a controller
action is available to the corresponding view file. In our application, we
created a time variable in the say/hello controller action and display that
variable in our say/hello.cfm view file.
Now we will expand the functionality of our application once again by adding a
second action to our say controller. If you feel adventurous, go ahead and add
a goodbye action to the say controller on your own, then create a
goodbye.cfm view file that displays a "Goodbye" message to the user. If you're
not feeling that adventurous, we'll quickly go step by step.
First, modify the the say controller file so that it looks like the code block
below.
component extends="Controller" {
function hello() {
time = Now();
}
function goodbye() {
}
}Now go to the views/say directory and create a goodbye.cfm page.
Add the following code to the goodbye.cfm page and save it.
Goodbye World!If we did everything right, we should be able to call the new say/goodbye
action using the following URL:
http://127.0.0.1:60000/say/goodbye
Your browser should look like Figure 5 below:
Now let's link our two actions together. We will do this by adding a link to the bottom of each page so that it calls the other page.
Open the say/hello.cfm view file. We are going to add a line of code to the
end of this file so our say/hello.cfm view file looks like the code block
below:
<h1>Hello World!</h1>
<p>Current time: <cfoutput>#time#</cfoutput></p>
<p>Time to say <cfoutput>#linkTo(text="goodbye", action="goodbye")#?</cfoutput></p>The linkTo() function is a built-in CFWheels function. In this case, we are passing 2 named parameters to it. The first parameter, text, is the text
that will be displayed in the hyperlink. The second parameter, action, defines the action to point the link to. By using this built-in function, your application's main URL may change, and even controllers and actions may get shifted around, but you won't suffer from the dreaded dead link. CFWheels will
always create a valid link for you as long as you configure it correctly when you make infrastructure changes to your application.
Once you have added the additional line of code to the end of the
say/hello.cfm view file, save your file and call the say/hello action from
your browser. Your browser should look like Figure 6 below.
You can see that CFWheels created a link for us and added an appropriate URL for
the say/goodbye action to the link.
Let's complete our little app and add a corresponding link to the bottom of our
say/goodbye.cfm view page.
Open your say/goodbye.cfm view page and modify it so it looks like the code
block below.
CFML: views/say/goodbye.cfm
<h1>Goodbye World!</h1>
<p>Time to say <cfoutput>#linkTo(text="hello", action="hello")#?</cfoutput></p>If you now call the say/goodbye action in your browser, your browser should
look like Figure 7 below.
You now know enough to be dangerous with CFWheels. Look out! But there are many more powerful features to cover. You may have noticed that we haven't even talked about the M in MVC.
No worries. We will get there. And we think you will enjoy it.
With a convention-over-configuration framework like CFWheels, it's important to know these conventions. This is your guide.
There is a specific set of standards that CFWheels follows when you run it in its default state. This is to save you time. With conventions in place, you can get started coding without worrying about configuring every little detail.
But it is important for you to know these conventions, especially if you're running an operating system and/or DBMS configuration that's picky about things like case sensitivity.
CFWheels uses a very flexible routing system to match your application's URLs to controllers, views, and parameters.
Within this routing system is a default route that handles many scenarios that you'll run across as a developer. The default route is mapped using the pattern [controller]/[action]/[key].
Consider this example URL:http://localhost/users/edit/12
http://localhost/users/edit/12
This maps to the Users controller, edit action, and a key of 12. For all intents and purposes, this will load a view for editing a user with a primary key value in the database of 12.
This URL pattern works up the chain and will also handle the following example URLs:
Note that the above conventions are for GET requests and only apply when you have a wildcard() call in config/routes.cfm (which is the default). See for instructions on overriding this behavior and how to deal with PUT, POST etc.
Controllers, actions, and views are closely linked together by default. And how you name them will influence the URLs that CFWheels will generate.
First, a controller is a CFC file placed in the controllers folder. It should be named in PascalCase. For example, a site map controller would be stored at controllers/SiteMap.cfc.
Multi-word controllers will be delimited by hyphens in their calling URLs. For example, a URL of /site-map will reference the SiteMap controller.
See for instructions on overriding this behavior.
Methods within the controllers, known as actions, should be named in camelCase.
Like with controllers, any time a capital letter is used in camelCase, a hyphen will be used as a word delimiter in the corresponding URL. For example, a URL of /site-map/search-engines will reference the searchEngines action in the SiteMap controller.
See for instructions on overriding this behavior.
By default, view files are named after the action names and are stored in folders that correspond to controller names. Both the folder names and view file names should be all lowercase, and there is no word delimiter.
In our /site-map/search-engines URL example, the corresponding view file would be stored at views/sitemap/searchengines.cfm.
For information on overriding this behavior, refer to documentation for the function and read the chapter.
A special type of view file called a layout defines markup that should surround the views loaded by the application. The default layout is stored at views/layout.cfm and is automatically used by all views in the application.
Controller-level layouts can also be set automatically by creating a file called layout.cfm and storing it in the given controller's view folder. For example, to create a layout for the users controller, the file would be stored at views/users/layout.cfm.
When a controller-level layout is present, it overrides the default layout stored in the root views folder.
For information on overriding the layout file to be loaded by an action, see the chapter on ] and documentation for the function.
By default, the names of CFWheels models, model properties, database tables, and database fields all relate to each other. CFWheels even sets a sensible default for the CFML data source used for database interactions.
CFWheels will automatically look for a data source with the same name as the folder that your application is deployed in. If your CFWheels application is in a folder called blog, CFWheels will look for a data source called blog, for example.
Refer to the chapter for instructions on overriding data source information.
CFWheels adopts a Rails-style naming conventions for database tables and model files. Think of a database table as a collection of model objects; therefore, it is named with a plural name. Think of a model object as a representation of a single record from the database table; therefore, it is named with a singular word.
For example, a user model represents a record from the users database table. CFWheels also recognizes plural patterns like binary/binaries, mouse/mice, child/children, etc.
Like controller files, models are also CFCs and are named in PascalCase. They are stored in the models folder. So the user model would be stored at models/User.cfc.
For instructions on overriding database naming conventions, refer to documentation for the function and the chapter on .
In your database, both table names and column names should be lowercase. The customersegments table could have fields called title, regionid, and incomelevel, for example.
Because of CFML's case insensitive nature, we recommend that you refer to model names and corresponding properties in camelCase. This makes for easier readability in your application code.
In the customersegments example above, you could refer to the properties in your CFML as title, regionId, and incomeLevel to stick to CFML's Java-style roots. (Built-in CFML functions are often written in camelCase and PascalCase, after all.)
For information on overriding column and property names, refer to documentation for the function and the chapter.
There are many default values and settings that you can tweak in CFWheels when you need to. Some of them are conventions and others are just configurations available for you to change. You can even change argument defaults for built-in CFWheels functions to keep your code DRYer.
For more details on what you can configure, read the chapter.
An overview of Object Relational Mapping (ORM) and how is it used in Wheels. Learn how ORM simplifies your database interaction code.
Mapping objects in your application to records in your database tables is a key concept in CFWheels. Let's take a look at exactly how this mapping is performed.
Unlike most other languages, there is no notion of class level (a.k.a. "static") methods in CFML (at least not in the earlier versions of it which we still support) . This means that even if you call a method that does not need to use any instance data, you still have to create an object first.
In CFWheels, we create an object like this:
The built-in CFWheels function will return a reference to an author object in the application scope (unless it's the first time you call this function, in which case it will also create and store it in the application scope).
Once you have the author object, you can start calling class methods on it, like , for example. returns an instance of the object with data from the database record defined by the key value that you pass.
Obviously, author is just an example here, and you'll use the names of the .cfc files you have created in the models folder.
For readability, this is usually combined into the following:
Now authorObject is an instance of the Author class, and you can call object level methods on it, like and .
In this case, the above code updates firstName field of the author record with a primary key value of 1 to Joe.
Traditionally in CFWheels, a primary key is usually named id, it increments automatically, and it's of the integerdata type. However, CFWheels is very flexible in this area. You can setup your primary keys in practically any way you want to. You can use natural keys (varchar, for example), composite keys (having multiple columns as primary keys), and you can name the key(s) whatever you want.
You can also choose whether the database creates the key for you (using auto-incrementation, for example) or create them yourself directly in your code.
What's best, CFWheels will introspect the database to see what choices you have made and act accordingly.
CFWheels comes with a custom built ORM. ORM stands for "Object-Relational Mapping" and means that tables in your relational database map to classes in your application. The records in your tables map to objects of your classes, and the columns in these tables map to properties on the objects.
To create a class in your application that maps to a table in your database, all you need to do is create a new class file in your models folder and make it extend the Model.cfc file.
If you don't intend to create any custom methods in your class, you can actually skip this step and just call methods without having a file created. It will work just as well. As your application grows, you'll probably want to have your own methods though, so remember the models folder. That's where they'll go.
Once you have created the file (or deliberately chosen not to for now), you will have a bunch of methods available handle reading and writing to the authors table. (For the purpose of showing some examples, we will assume that you have created a file named Author.cfc, which will then be mapped to the authors table in the database).
For example, you can write the following code to get the author with the primary key of 1, change his first name, and save the record back to the database.
This code makes use of the class method , updates the object property in memory, and then saves it back to the database using the object method . We'll get back to all these methods and more later.
By default, a table name should be the plural version of the class name. So if you have an Author.cfc class, the table name should be authors.
To change this behavior you can use the method. This method call should be placed in the config() method of your class file, which is where all configuration of your model is done.
So, for example, if you wanted for your author model to map to a table in your database named tbl_authors, you would add the following code to the config() method:
Most of the time, you will want to have your model mapped to a database table. However, it is possible to skip this requirement with a simple setting:
With that in place, you have the foundation for a model that never touches the database. When you call methods like , , , and on a tableless model, the entire model lifecycle will still run, including object validation and object callbacks.
Typically, you will want to configure properties and validations manually for tableless models and then override and other persistence methods needed by your application to persist with the data elsewhere (maybe in the sessionscope, an external NoSQL database, or as an email sent from a contact form).
Objects in CFWheels have properties that correspond to the columns in the table that it maps to. The first time you call a method on a model, CFWheels will reflect on the schema inside the database for the table the class maps to and extract all the column information.
Note about database permissions
In order for CFWheels to successfully read all schema data from your database be sure the data source user has the required access for your DBMS. For example, Microsoft SQL Server requires the "ddl_admin" permission for some meta data such as column defaults.
To keep things as simple as possible, there are no getters or setters in CFWheels. Instead, all the properties are made available in the this scope.
If you want to map a specific property to a column with a different name, you can override the CFWheels mapping by using the method like this:
Since there is no concept of null / nil in CFML (at least not in the earlier versions of it which we still support), CFWheels will assume that when you save a blank string to the database it should be converted to NULL.
For this reason we recommend that you avoid having blank strings stored in the database (since there is no way to distinguish them from NULL values once they've been mapped to a CFWheels object / result set).
Where to place your view files and what to put in them.
We've talked previously about how the controller is responsible for deciding which view files to render to the user. Read the chapter if you need to refresh your memory about that topic.
In this chapter, we'll explain exactly where to place these files and what to put in them.
In the simplest case, your controller action (typically a function inside your controller CFC file) will have a view file associated with it. As explained in the chapter, this file will be included automatically at the end of the controller action code. So if you're running the show action in the blog controller, for example, Wheels will include the views/blog/show.cfm file.
Some rules can be spotted here:
All view files live in the views folder.
Each controller gets a subfolder named after it in the views folder.
The view file to include is just a regular .cfm file named after the action.
For creating standard pages, your work process will likely consist of the following steps:
Create the controller action (a function in the controller CFC file).
Create the corresponding view file for it (a .cfm file in the controller's view folder).
There can be some exceptions to this process though, so let's go through some possible scenarios.
Not all controller actions need a corresponding view file. Consider the case where you process a form submission. To make sure it's not possible for the user to refresh the page and cause multiple submissions, you may choose to perform the form processing and then send the user directly to another page using the function.
Sometimes you want the controller action to render the view file for a different action than the one currently executing. This is especially common when your application processes a form and the user makes an input error. In this case, you'll probably choose to have your application display the same form again for correction.
In this case, you can use the function and specify a different action in the action argument (which will include the view page for that action but not run the controller code for it).
Sometimes it's useful to have a view file that can be called from several controller actions. For these cases, you'll typically call with the template argument.
When using the template argument, there are specific rules that Wheels will follow in order to locate the file you want to include:
If the template argument starts with the / character, Wheels will start searching from the root of the viewsfolder. Example: renderView(template="/common/page") will include the views/common/page.cfm file.
If it contains the / character elsewhere in the string, the search will start from the controller's view folder. Example: renderView(template="misc/page") will include the views/blog/misc/page.cfm file if we're currently in the blog controller.
In all other cases (i.e. when the template argument does not contain the / character at all), Wheels will just assume the file is in the controller's view folder and try to include it. Example: renderView(template="something") will include the views/blog/something.cfm file if we're currently in the blog controller.
Also note that both renderView(template="thepage") and renderView(template="thepage.cfm") work fine. But most of the time, Wheels developers will tend to leave out the .cfm part.
This is the output of your application: what the users will see in their browsers. Most often this will consist of HTML, but it can also be JavaScript, CSS, XML, etc. You are of course free to use any CFML tags and functions that you want to in the file as well. (This is a CFML application, right?)
In addition to this normal code that you'll see in most ColdFusion applications—whether they are made for a framework or not—Wheels also gives you some nice constructs to help keep your code clean. The most important ones of these are , Partials, and Helpers.
When writing your view code, you will have access to the variables you have set up in the controller file. The idea is that the variables you want to access in the view should be set unscoped (or in the variables scope if you prefer to set it explicitly) in the controller so that they are available to the view template.
In addition to the variables you have set yourself, you can also access the params struct. This contains anything passed in through the URL or with a form. If you want to follow MVC rules more closely though, we recommend only accessing the params struct in the controller and then setting new variables for the information you need access to in the view.
The most important thing to remember when creating your view is to be careful not to put too much code in there. Avoid code dealing with the incoming request (this can be moved to the controller) and code containing business logic (consider moving this to a model). If you have view-related code but too much of it, it may be beneficial to break it out into a helper or a partial.
A view's job is also to clean up and format the values provided by the controller before being displayed. This is especially important when content from a data source is not HTML-encoded.
For example, if the view is to display the title column from a query object called posts, it should encode HTML special characters:
Please note that you do not need to do this when passing in data to CFWheels view helpers. The view helpers themselves will handle calling EncodeForUrl, EncodeForHtml and EncodeForHtmlAttribute internally as needed.
By "view helpers" we mean everything listed as such in the , so be aware that global helpers, such as , etc, do not encode the content you pass in. When in doubt, simply test by passing in a string and check the HTML source of the output to see whether CFWheels encoded it or not.
To control encoding in general you have three global settings at your disposal (they all default to true):
encodeURLs: When true, calls EncodeForUrl to encode parameter name and values in .
encodeHtmlTags: When true, calls EncodeForHtml to encode tag content in , etc.
encodeHtmlAttributes: When true, calls EncodeForHtmlAttribute to encode attribute values in , etc.
All individual functions also have their own encode argument (can be set to true / false or attributes) that overrides the global setting. Setting it to attributes will only encode HTML attribute values but leave tag content as is. Note that the attributes option is not available on functions that don't produce any tag content (such as for example), in those cases it's enough to pass in either true or false.
Here are the rules of the road for contributing code to the project. Let's follow this process so that we don't duplicate effort and so the code base is easy to maintain over the long haul.
The official Git repository for Wheels is located at our .
Anyone may fork the cfwheels repository, make changes, and submit a pull request.
To make sure that we don't have too many chefs in the kitchen, we will be limiting direct commit access to a core team of developers.
At this time, the core team consists of these developers:
This does not restrict you from being able to contribute. See "Process for Implementing Code Changes" below for instructions on volunteering. With enough dedication, you can earn a seat on the core team as well!
Here's the process that we'd like for you to follow. This process is in place mainly to encourage everyone to communicate openly. This gives us the opportunity to have a great peer-review process, which will result in quality. Who doesn't like quality?
Open an issue in the , outlining the changes or additions that you would like to make.
A member of the core team will review your submission and leave feedback if necessary.
Once the core team member is satisfied with the scope of the issue, they will indicate so in a comment to the issue. This is your green light to start working. Get to coding, grasshopper!
Need help or running across any issues while coding? Start a .
When you have implemented your enhancement or change, use your Git repository to create a pull request with your changes.
You should annotate your commits with the issue number as #55 if the code issue is 55
A core team member will review it and post any necessary feedback in the issue tracker.
Once everything is resolved, a core team member will merge your commit into the Git repository.
If needed, open an issue to have the additions and changes in your revision documented in the . You may claim the issue if you'd like to do this, but it's entirely your choice.
To easily develop and test CFWheels locally on multiple CFML engines using Docker, check out the
All framework code should use the guidelines at . This will make things more readable and will keep everyone on the same page. If you're working on code and notice any violations of the official style, feel free to correct it!
Additionally, we recommend that any applications written using the CFWheels framework follow the same style. This is optional, of course, but still strongly recommended.
All code for CFWheels should be written for use with both Adobe ColdFusion 2016 upwards, and Lucee 5 upwards.
To stay true to our ColdFusion and Java roots, all names must be camelCase. In some cases, such as internal CFML functions, the first letter should be capitalized as well. Refer to these examples.
Since moving to CFWheels 2.x, the old loc scope has now been deprecated and you should use the function local scope.
Code Example
All CFC methods should be made public. If a method is meant for internal use only and shouldn't be included in the API, then prefix it with a dollar sign $. An example would be $query().
users
edit
12
users
new
users
index
model("author");authorClass = model("author");
authorObject = authorClass.findByKey(1);authorObject = model("author").findByKey(1);authorObject.update(firstName="Joe");component extends="Model" {
}auth = model("author").findByKey(1);
auth.firstName = "Joe";
auth.save();component extends="Model" {
function config() {
table("tbl_authors");
}
}function config() {
table(false);
}component extends="Model" {
function config() {
property(name="firstName", column="tbl_auth_f_name");
}
}<ul>
<cfoutput query="posts">
<li>#EncodeForHtml(posts.title)#</li>
</cfoutput>
</ul>CFC Names
MyCfc.cfc, BlogEntry.cfc
CapitalizedCamelCase
Variable Names
myVariable, storyId
camelCase
UDF Names
myFunction()
camelCase
Built-in CF Variables
result.recordCount, cfhttp.fileContent
camelCase
Built-in CF Functions
IsNumeric(), Trim()
CapitalizedCamelCase
Scoped Variables
application.myVariable, session.userId
lowercase.camelCase
CGI Variables
cgi.remote_addr, cgi.server_name
cgi.lowercase_underscored_name
// This is just for illustration. It's obviously a silly function.
function returnArrayLengthInWords(required array someArray) {
local.rv = "Unknown";
if (ArrayLen(arguments.someArray) > 50) {
local.rv = "Pretty Long!";
}
if (ArrayLen(arguments.someArray) > 100) {
local.rv = "Very Long!";
}
return local.rv;
}These are the commands in the wheels dbmigrate namespace. They allow you to manipulate the database structure and script the changes. This makes is easy to share your changes with coworkers, check them into source control, or apply them automatically when you deploy your code to production.
wheels dbmigrateThis is another namespace with sub commands within it. It also has an alias of wheels db which allows you to shorten the command you need to type.
wheels dbmigrate infoThis command doesn't take any inputs but simply tries to communicate with the running server and gather information about your migrations and displays them in a table.
wheels dbmigrate info❯ wheels db info
Sending: http://127.0.0.1:59144/rewrite.cfm?controller=wheels&action=wheels&view=cli&command=info
Call to bridge was successful.
+-----------------------------------------+-----------------------------------------+
| Datasource: MyCFWheelsApp | Total Migrations: 3 |
| Database Type: H2 | Available Migrations: 2 |
| | Current Version: 20220619110404 |
| | Latest Version: 20220619110706 |
+-----------------------------------------+-----------------------------------------+
+----------+------------------------------------------------------------------------+
| | 20220619110706_cli_create_column_user_lastname |
| | 20220619110540_cli_create_column_user_firstname |
| migrated | 20220619110404_cli_create_table_users |
+----------+------------------------------------------------------------------------+From the information presented in the two tables you can see how many migration files are in your application and of those how many have already been applied and available to be applied. You are also presented with the datasource name and database type information.
wheels dbmigrate latestThis command will migrate the database to the latest version. This command will apply each migration file from the current state all the way to the latest one at a time. If a SQL error is encountered in one of the files, the command will stop at that point and report the error.
wheels dbmigrate latestwheels dbmigrate resetThis command will migrate the database to version 0 effectively resetting the database to nothing.
wheels dbmigrate resetwheels dbmigrate upThis command will process the next migration file from the current state. If the database is already at the latest version this command will have no effect.
wheels dbmigrate upwheels dbmigrate downThis command will reverse the current migration file and take the database one step backwards. If the database is already at version 0 then this command will have no effect.
wheels dbmigrate downwheels dbmigrate execThis command will run a particular migration file and take the database to that version. The four directional migration commands above latest, reset, up, and down each in turn call this command to process their intended action.
wheels dbmigrate exec [version]version
true
The version to migrate the database to
wheels dbmigrate create tableThis command will generate a new migration file for creating a table in the database. Keep in mind you will still have to run the migration file but this will add it to the migration history.
wheels dbmigrate create table [name] [force] [id] [primaryKey]name
true
The name of the database table to create
force
false
false
Force the creation of the table
id
false
true
Auto create ID column as autoincrement ID
primaryKey
false
ID
Overrides the default primary key column name
wheels dbmigrate create columnThis command will generate a new migration file for adding a new column to an existing table.
wheels dbmigrate create column [name] [columnType] [columnName] [default] [null] [limit] [precision] [scale]name
true
The name of the database table to modify
columnType
true
The column type to add
columnName
false
The column name to add
default
false
The default value to set for the column
null
false
true
Should the column allow nulls
limit
false
The character limit of the column
precision
false
The precision of the numeric column
scale
false
The scale of the numeric column
wheels dbmigrate create blankwheels dbmigrate remove tableThis command generates a migration file to remove a table. The migration file is will still need to be run individual but this command gets the migration generated and into the history.
wheels dbmigrate remove table [name]name
true
The name of the database table to remove
These are the top level commands in the wheels namespace.
wheels infoThis command is the most basic of the commands and other than printing some pretty ASCII art it also displays the Current Working Directory, the CommandBox Module Root which can be handy when trying to diagnose version discrepancies, and lastly the CFWheels version currently installed. The version is determined from a variaty of sources. First and foremost, if there is a box.json file in the wheels/ directory the version is extracted from that box.json. Alternatively, if there is no box.json file in the wheels/ directory, we look in wheels/events/onapplicationstart.cfm and extract a version number from that file. That is the version number that is displayed on the default congratulations screen by the way. If both of these fail to get us a version number we can use, we ask you to let us know what version of wheels you are using and give you the option of generating a box.json file. This is handy for bringing old legacy installations under CLI control.
,-----.,------.,--. ,--.,--. ,--. ,-----.,--. ,--.
' .--./| .---'| | | || ,---. ,---. ,---. | | ,---. ' .--./| | | |
| | | `--, | |.'.| || .-. || .-. :| .-. :| |( .-' | | | | | |
' '--'\| |` | ,'. || | | |\ --.\ --.| |.-' `) ' '--'\| '--.| |
`-----'`--' '--' '--'`--' `--' `----' `----'`--'`----' `-----'`-----'`--'
=================================== CFWheels CLI ===================================
Current Working Directory: /Users/peter/projects/ws/MyCFWheelsApp/
CommandBox Module Root: /Users/peter/projects/cfwheels-cli/
Current CFWheels Version in this directory: 2.3.0
====================================================================================wheels initThis will attempt to bootstrap an EXISTING wheels app to work with the CLI.
We'll assume the database/datasource exists and the other config options like reloadpassword is all set up. If there's no box.json, create it, and ask for the version number if we can't determine it. If there's no server.json, create it, and ask for cfengine preferences. We'll ignore other templating objects for now, as this will probably be in place too.
wheels reloadThis command will reload your CFWheels application. In order for this command to work, your local server needs to be started and running. This command basically issues a request to the running CFWheels application to reload as if you were doing it from your browsers address bar. You will be prompted for your reload password that will be passed to the reload endpoint.
wheels reload [mode]mode
false
development
possible values development, testing, maintenance, production
wheels testThis command will call the Test Runner in a running server and return the results. The command can be run from within the directory of the running server or you can specify the server name to run against. Additionally you can specify the test suite to run, possible choices include the running application's test suite (app), the core framework test suite (core), or a particular plugin's test suite by passing in the plugin name.
wheels test [type] [servername] [reload] [debug]type
false
app
Either Core, App, or the name of the plugin
servername
false
Servername to run the tests against
reload
false
false
Force Reload
debug
false
false
Output passing tests as well as failing ones
format
false
json
Force a specific return format for debug
adapter
false
Attempt to override what dbadapter wheels uses
wheels scaffoldThis command will completely scaffold a new object. Typically you would run this command to stub out all the CRUD related files and then follow it up with a series of wheels g property commands to add the individual fields to the object. This command will:
Create a model file
A Default CRUD Controller complete with create/edit/update/delete code
View files for all those actions
Associated test stubs
DB migration file
This command can be run without the server running except the database migration portion because that requires a running database. So if your server is already up and running you can run this command completely including the database migration portion. Afterwards make sure to run wheels reload to reload your application since we just made model changes. If the server isn't running, you can run this command and stub out all the files, then start your server with server start and finally migrate the database with wheels db latest.
wheels scaffold [objectName]Name
true
Name of the object to scaffold out
wheels destroyThis command will destroy a given object. This is highly destructive, given the name, so proceed with caution. If you created an object using the wheels scaffold [objectName] command, this command is the inverse of that command and will remove all elements created by that command.
This command will destroy the following elements:
the models definition file
the controllers definition file
the view sub folder and all it's contents
the model test file
the controller test file
the views test file
resource route configuration
wheels destroy [objectName]Name
true
Name of the object to destroy
Returning records from your database tables as objects or queries.
Reading records from your database typically involves using one of the 3 finder methods available in Wheels: findByKey(), findOne(), and findAll().
The first 2 of these, findByKey() and findOne(), return an object, while the last one, findAll(), returns the result from a cfquery tag.
Let's start by looking at the simplest of the finder methods, findByKey(). This method takes one argument: the primary key (or several keys if you're using composite keys) of the record you want to get.
If the record exists, it is returned to you as an object. If not, Wheels will return the boolean value false.
In the following example, we assume that the params.key variable has been created from the URL (for example a URL such as http://localhost/blog/viewauthor/7.)
In your controller:
author = model("author").findByKey(params.key);
if(!IsObject(author)){
flashInsert(message="Author #params.key# was not found");
redirectTo(back=true);
}In your view:
<cfoutput>Hello, #author.firstName# #author.lastName#!</cfoutput>Often, you'll find yourself wanting to get a record (or many) based on a criteria other than just the primary key value.
As an example, let's say that you want to get the last order made by a customer. You can achieve this by using the findOne() method like so:
anOrder = model("order").findOne(order="datePurchased DESC");You can use findAll() when you are asking to get one or more records from the database. Wheels will return this as a cfquery result (which could be empty if nothing was found based on your criteria).
Besides the difference in the default return type, findOne() and findAll() accept the same arguments. Let's have a closer look at these arguments.
This maps to the SELECT clause of the SQL statement.
Wheels is pretty smart when it comes to figuring out what to select from the database table(s). For example, if nothing is passed in to the select argument, Wheels will assume that you want all columns returned and create a SELECTclause looking something like this:
artists.id,artists.nameAs you can see, Wheels knows that the artist model is mapped to the artists table and will prepend the table name to the column names accordingly.
If you have mapped columns to a different property name in your application, Wheels will take this into account as well. The end result then could look like this:
artists.id,artists.fname AS firstNameIf you select from more than one table (see the include argument below) and there are ambiguous column names, Wheels will sort this out for you by prepending the model name to the column name.
Let's say you have a column called name in both the artists and albums tables. The SELECT clause will be created like this:
artists.name,albums.name AS albumNameIf you use the include argument a lot, you will love this feature as it saves a lot of typing.
If you don't want to return all properties, you can override this behavior by passing in a list of the properties you want returned.
If you want to take full control over the SELECT clause, you can do so by specifying the table names (i.e. author.firstName) in the select argument or by using alias names (i.e., firstname AS firstName). If Wheels comes across the use of any of these techniques, it will assume you know what you're doing and pass on the select argument straight to the SELECT clause with no changes.
A tip is to turn on debugging when you're learning Wheels so you can get a good understanding of how Wheels creates the SQL statements.
This maps to the WHERE clause of the SQL statement. Wheels will also convert all your input to cfqueryparam tags for you automatically.
There are some limitations to what you can use in the where argument, but the following SQL will work: =, !=, <>, <, <=, >, >=, LIKE, NOT LIKE, IN, NOT IN, IS NULL, IS NOT NULL, AND, and OR. (Note that it's a requirement to write SQL keywords in upper case.) In addition to this, you can use parentheses to group conditional SQL statements together.
It's worth mentioning that although Wheels does not support the BETWEEN operator, you can get around this by using >= and <=.
Example with numeric value:
items = model("item").findAll(where="price >= 100 AND price <= 500");The same goes for NOT BETWEEN:
items = model("item").findAll(where="price <= 100 OR price >= 500");In CFWheels ORM queries, you need to surround strings with single quotes or leave the quotes out if you're passing in a number or boolean.
Example with non-numeric value:
bobsArticles = model("author").findAll(where="firstName='Bob'");This maps to the ORDER clause of the SQL statement. If you don't specify an order at all, none will be used. (Makes sense, eh?) So in those cases, the database engine will decide in what order to return the records. Note that it's a requirement to write the SQL keywords ASC and DESC in upper case.
There is one exception to this. If you paginate the records (by passing in the page argument) without specifying the order, Wheels will order the results by the primary key column. This is because pagination relies on having unique records to order by.
This is a powerful feature that you can use if you have set up associations in your models.
If, for example, you have specified that one Author has many Articles, then you can return all authors and articles in the same call by doing this:
bobsArticles = model("author").findAll(where="firstName='Bob'", include="Articles");This limits the number of records to return. Please note that if you call findAll() with maxRows=1, you will still get a cfquery result back and not an object. (We recommend using findOne() in this case if you want for an object to be returned.)
Set these if you want to get paginated data back.
So if you wanted records 11-20, for example, you write this code:
bobsArticles = model("author").findAll(
where="firstName='Bob'", include="Articles", page=2, perPage=10
);This is the number of minutes to cache the query for. This is eventually passed on to the cachedwithin attribute of the cfquery tag.
In the beginning of this chapter, we said that you either get a query or an object back depending on the method that you call. But you can actually specify the return type so that you get either an object, a query, or an array of objects back.
To do this, you use the returnAs argument. If you want an array of objects back from a findAll() call, for example, you can do this:
users = model("user").findAll(returnAs="objects");On findOne() and findByKey(), you can set this argument to either object or query. On the findAll() method, you can set it to objects (note the plural) or query.
We recommend sticking to this convention as much as possible because of the CFML engines' slow CreateObject()function. Be careful when setting returnAs to objects. You won't want to create a lot of objects in your array and slow down your application unless you absolutely need to.
If you have a specific index setup on a table that you'd like the findAll() call to use, you can specify a structure of arguments for each model/index you'd like to use. Only MySQL and SQLServer support index hints.
model("author").findAll(
include="posts",
useIndex={
author="idx_authors_123",
post="idx_posts_123"
}
);


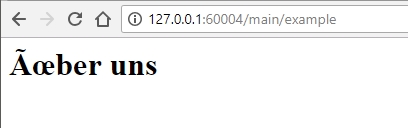
Using the Flash to pass data from one request to the next.
The Flash is actually a very simple concept. And no, it has nothing to do with Adobe's Flash Player.
The Flash is just a struct in the session or cookie scope with some added
functionality. It is cleared at the end of the next page that the user views.
This means that it's a good fit for storing messages or variables temporarily
from one request to the next.
By the way, the name "Flash" comes from Ruby on Rails, like so many other cool things in Wheels.
The code below is commonly used in Wheels applications to store a message about an error in the Flash and then redirect to another URL, which then displays the message in its view page.
The following example shows how code dealing with the Flash can look in an action that handles a form submission.
Here's an example of how we then display the Flash message we just set in the
view page for the edit action. Please note that this is done on the next
request since we performed a redirect after setting the Flash.
As you can see above, you use the function with a named argument when you want to store data in the Flash and the function when you want to display the data in a view.
The key chosen above is success, but it could have been anything that we wanted. Just like with a normal struct, the naming of the keys is your job.
As an example, you may choose to use one key for storing messages after the user made an error, called error, and another one for storing messages after a successful user operation, called success.
The more you work with Wheels and the Flash, the more that you're going to find that you keep repeating that / combo all the time. Wheels has a solution for that within the function itself:
That piece of code does exactly the same thing as the example shown previously
in this chapter. The Wheels function sees the success
argument coming in and knows that it's not part of its own declared arguments.
Therefore, you (the developer) must intend for it to be stored in the Flash,
so Wheels goes ahead and calls flashInsert(success="The user was updated successfully.")
for you behind the scenes.
So what if you want to redirect to the edit action and set a key in the Flash
named action as well? Simply prepend the key with flash to tell Wheels to
avoid the argument naming collision.
CFScript
We don't recommend naming the keys in your Flash action, but these naming
collisions can potentially happen when you want to redirect to a route that
takes custom arguments, so remember this workaround.
Besides and that are used to read from/insert to the Flash, there are a few other functions worth mentioning.
is used to count how many key/value pairs there are in the Flash.
and do exactly the same as their
counterparts in the struct world, StructClear and StructDelete—they clear
the entire Flash and delete a specific key/value from it, respectively.
is used to check if a specific key exists. So it would
make sense to make use of that function in the code listed above to avoid
outputting an empty <p> tag on requests where the Flash is empty.
( will return an empty string when the specified key does not
exist.)
Check out the section in the API listing of all the functions that deal with the Flash.
Throw the function into the mix, and you might find yourself writing code across your Wheels projects that looks something like this:
All of that above code can be replaced with a single call to the function:
Whenever any value is inserted into the Flash, will
display it similarly to the complex example above, with class attributes set
similarly (errorMessage for the error key and successMessage for the
success key).
You can also use 's key/keys argument to limit its reach
to a list of given keys. Let's say that we only want our layout to show messages
for the alert key but not for the error or success keys (or any other for
that matter). We would write our call like so:
Just keep in mind that this approach isn't as flexible, so if you need to customize the markup of the messages beyond 's capabilities, you should revert back to using , , and other related functions manually.
Earlier, we mentioned that the data for the Flash is stored in either the
cookie or the session scope. You can find out where Wheels stores the Flash
data in your application by outputting get("flashStorage"). If you have
session management enabled in your application, Wheels will default to storing
the Flash in the session scope. Otherwise, it will store it in a cookie on the
user's computer.
You can override this setting in the same way that you override other Wheels settings by running the function like this:
Note: Before you set Wheels to use the session scope, you need to make sure
that session management is enabled. To enable it, all you need to do is add
this.SessionManagement = true to the config/app.cfm file.
So what storage option should you choose? Well, to be honest, it doesn't really matter that much, so we recommend you just go with the default setting. If you're a control freak and always want to use the optimal setting, here are some considerations.
Although the Flash data is deserialized before stored in a cookie (making it possible to store complex values), you need to remember that a cookie is not the best place to store data that requires a lot of space.
If you run multiple ColdFusion servers in a clustered environment and use session-based Flash storage, users might experience a loss of their Flash variables as their request gets passed to other servers.
Using cookies is, generally speaking, less secure than using the session
scope. Users could open their cookie file up and manually change its value.
Sessions are stored on the server, out of users' reach.
From CFWheels 2.1, you can now change the default flash behavior to append to an existing key, rather than directly replacing it. To turn on this behavior, add set(flashAppend=true) to you /config/settings.cfm file.
An example of where this might be useful:
Which, when output via flashMessages() would render:
With set(flashAppend=true), you can also directly pass in an array of strings like so:
In 2.2 upwards:
There are certain circumstances where you might not be using the flash: for example, if you have wheels setup as a stateless API (perhaps in a cluster behind a load balancer) where you're using tokens vs sessions. In this circumstance, you've probably turned off session management, which only leaves cookie as a viable route. But if set to cookie, you always get Set-Cookie being returned, which is unnecessary.
In wheels 2.2 you can now set(flashStorage = "none") which will prevent the creation of the cookie, and also not try and write to a session.
CFWheels controllers provide some powerful mechanisms for responding to requests for content in XML, JSON, and other formats. You can build an API with ease using these functions.
If you've ever needed to create an XML or JSON API for your Wheels application, you may have needed to go down the path of creating a separate controller or separate actions for the new format. This introduces the need to duplicate model calls or even break them out into a super long list of before filters. With this, your controllers can get pretty hairy pretty fast.
Using a few CFWheels functions, you can easily respond to requests for HTML, XML, JSON, and PDF formats without adding unnecessary bloat to your controllers.
With CFWheels Provides functionality in place, you can request different formats using the following methods:
URL Variable
URL Extension
Request Header
Which formats you can request is determined by what you configure in the controller. See the section below on Responding to Different Formats in the Controller for more details.
CFWheels will accept a URL variable called format. If you wanted to request the
XML version of an action, for example, your URL call would look something like
this:
The same would go for JSON:
Perhaps a cleaner way is to request the format as a "file" extension. Here are the XML and JSON examples, respectively:
This works similarly to the URL variable approach mentioned above in that
there will now be a key in the params struct set to the format requested.
With the XML example, there will be a variable at params.format with a value
of xml.
If you are calling the CFWheels application as a web service, you can also request
a given format via the HTTP Accept header.
If you are consuming the service with another CFWheels application, your
<cfhttp> call would look something like this:
In this example, we are sending an Accept header with the value for the xml
format.
Here is a list of values that you can grab from with CFWheels out of the box.
html
xml
json
csv
pdf
xls
You can use to set more types to the appropriate MIME type for reference. For example, we could set a Microsoft Word MIME type in
config/settings.cfm like so:
The fastest way to get going with creating your new API and formats is to call
from within your controller's config() method.
Take a look at this example:
By calling the function in config(), you are instructing the CFWheels controller to be ready to provide content in a number of formats.
Possible choices to add to the list are html (which runs by default), xml,
json, csv, pdf, and xls.
This is coupled with a call to in the following actions. In the example above, we are setting a query result of products and passing it to . By passing our data to this function, CFWheels gives us the ability to respond to requests for different formats, and it even gives us the option to just let CFWheels handle the generation of certain formats automatically.
You can also use the call in an individual controller action to define which formats the action will respond with. This can be used to define behavior in individual actions or to override the controller's config().
When CFWheels handles this response, it will set the appropriate MIME type in the
Content-Type HTTP header as well.
Responding to requests for the HTML version is the same as you're already used to with . will accept the same arguments as , and you create just a view template in the views folder like normal.
If the requested format is xml or json, the function will automatically transform the data that you provide it. If you're fine with what the function produces, then you're done!
Best Practices for Providing JSON
Unfortunately there have been a lot of JSON related issues in CFML over the years. To avoid as many of these problems as possible we thought we'd outline some best practices for you to follow.
First of all, always return data as an array of structs. This is done by using the returnAs argument (on for example), like this:
The reason for doing it this way is that it will preserve the case for the struct / JSON keys.
Secondly, make use of CFWheels ability to return the JSON values in a specified type. This is done in the function, like this:
With that in place you can be sure that firstName will always be treated as a string (i.e. wrap in double quotes) and booksForSale as an integer (i.e. no decimal places) when producing the JSON output. Without this, your CFML engine might guess what the data type is, and it wouldn't always be correct unfortunately.
If you need to provide content for another type than xml or json, or if you
need to customize what your CFWheels application generates, you have that option.
In your controller's corresponding folder in views, all you need to do is
implement a view file like so:
If you need to implement your own XML- or JSON-based output, the presence of your new custom view file will override the automatic generation that CFWheels normally performs.
Example: PDF Generation
If you need to provide a PDF version of the product catalog, the view file at
views/products/index.pdf.cfm may look something like this:
HTML
function update() {
if ( user.update(params.user) ) {
flashInsert(success="The user was updated successfully.");
redirectTo(action="edit");
} else {
renderView(action="edit");
}
}<cfoutput>
<p class="success-message">
#flash("success")#
</p>
</cfoutput>redirectTo(action="edit", success="The user was updated successfully.");redirectTo(action="edit", flashAction="The user was updated successfully.");<cfoutput>
<cfif NOT flashIsEmpty()>
<div id="flash-messages">
<cfif flashKeyExists("error")>
<p class="errorMessage">
#flash("error")#
</p>
</cfif>
<cfif flashKeyExists("success")>
<p class="successMessage">
#flash("success")#
</p>
</cfif>
</div>
</cfif>
</cfoutput><cfoutput>
#flashMessages()#
</cfoutput><cfoutput>
#flashMessages(key="alert")#
</cfoutput>//In `config/settings.cfm` or another `settings.cfm` file within the `config` subfolders
set(flashStorage="session");// In your controller
if( thingOneHappened ){
flashInsert(info="Thing One Happened");
}
if( thingTwoHappened ){
flashInsert(info="Thing Two Happened");
}<div class=""flash-messages"">
<p class=""info-message"">Thing One Happened</p>
<p class=""info-message"">Thing Two Happened</p>
</div>msgs=[
"Thing One Happened", "Thing Two Happened"
];
flashInsert(info=msgs);http://www.example.com/products?format=xmlhttp://www.example.com/products?format=jsonhttp://www.example.com/products.xml
http://www.example.com/products.json<cfhttp url="http://www.example.com/products">
<cfhttpparam type="header" name="Accept" value="application/octet-stream">
</cfhttp>addFormat(extension="doc", mimeType="application/msword");component extends="Controller" {
function config(){
provides("html,json,xml");
}
function index(){
products = model("product").findAll(order="title");
renderWith(products);
}
}authors = model("author").findAll(returnAs="structs");renderWith(data=authors, firstName="string", booksForSale="integer");html
views/products/index.cfm
xml
views/products/index.xml.cfm
json
views/products/index.json.cfm
csv
views/products/index.csv.cfm
views/products/index.pdf.cfm
xls
views/products/index.xls.cfm
<cfdocument format="pdf">
<h1>Products</h1>
<table>
<thead>
<tr>
<th>Name</th>
<th>Description</th>
<th>Price</th>
</tr>
</thead>
<tbody>
#includePartial(products)#
</tbody>
</table>
</cfdocument>Stop repeating yourself with the use of before and after filters.
If you find the need to run a piece of code before or after several controller actions, then you can use filters to accomplish this without needing to explicitly call the code inside each action in question.
This is similar to using the onRequestStart / onRequestEnd functions in CFML's Application.cfc file, with the difference being that filters tie in better with your CFWheels controller setup.
One common thing you might find yourself doing is authenticating users before allowing them to see your content. Let's use this scenario to show how to use filters properly.
You might start out with something like this:
component extends="Controller" {
function secretStuff() {
if ( !StructKeyExists(session, "userId") ) {
abort;
}
}
function evenMoreSecretStuff() {
if ( !StructKeyExists(session, "userId") ) {
abort;
}
}
}Sure, that works. But you're already starting to repeat yourself in the code. What if the logic of your application grows bigger? It could end up looking like this:
component extends="Controller" {
function secretStuff() {
if ( cgi.remote_addr Does !Contain "212.55" ) {
flashInsert(alert="Sorry, we're !open in that area.");
redirectTo(action="sorry");
} else if ( !StructKeyExists(session, "userId") ) {
flashInsert(alert="Please login first.");
redirectTo(action="login");
}
}
function evenMoreSecretStuff() {
if ( cgi.remote_addr Does !Contain "212.55" ) {
flashInsert(msg="Sorry, we're !open in that area.");
redirectTo(action="sorry");
} else if ( !StructKeyExists(session, "userId") ) {
flashInsert(msg="Please login first.");
redirectTo(action="login");
}
}
}Ouch! You're now setting yourself up for a maintenance nightmare when you need to update that IP range, the messages given to the user, etc. One day, you are bound to miss updating it in one of the places.
As the smart coder that you are, you re-factor this to another function so your code ends up like this:
component extends="Controller" {
function secretStuff() {
restrictAccess();
}
function evenMoreSecretStuff() {
restrictAccess();
}
function restrictAccess() {
if ( cgi.remote_addr Does !Contain "212.55" ) {
flashInsert(msg="Sorry, we're !open in that area.");
redirectTo(action="sorry");
} else if ( !StructKeyExists(session, "userId") ) {
flashInsert(msg="Please login first!");
redirectTo(action="login");
}
}
}Much better! But CFWheels can take this process of avoiding repetition one step further. By placing a filters() call in the config() function of the controller, you can tell CFWheels what function to run before any desired action(s).
component extends="Controller" {
function config() {
filters("restrictAccess");
}
private function restrictAccess() {
if ( cgi.remote_addr Does !Contain "212.55" ) {
flashInsert(msg="Sorry, we're !open in that area.");
redirectTo(action="sorry");
} else if ( !StructKeyExists(session, "userId") ) {
flashInsert(msg="Please login first!");
redirectTo(action="login");
}
}
function secretStuff() {
}
function evenMoreSecretStuff() {
}
}Besides the advantage of not having to call restrictAccess() twice, you have also gained two other things:
The developer coding secretStuff() and evenMoreSecretStuff() can now focus on the main tasks of those two actions without having to worry about repetitive logic like authentication.
The config() function is now starting to act like an overview for the entire controller.
All of these advantages will become much more obvious as your applications grow in size and complexity. This was just a simple example to put filters into context.
So far, we've only been dealing with one controller. Unless you're building a very simple website, you'll end up with a lot more.
The question then becomes, "Where do I place the restrictAccess() function so I can call it from any one of my controllers?" The answer is that because all controllers extend Controller.cfc, you should probably put it there. The config() function itself with the call to filters() should remain inside your individual controllers though.
If you actually want to set the same filters to be run for all controllers, you can go ahead and move it to the Controller.cfc file's config() function as well. Keep in mind that if you want to run the config() function in the individual controller and in Controller.cfc, you will need to call super.config() from the config() function of your individual controller.
You specify if you want to run the filter function before or after the controller action with the type argument to the filters() function. It defaults to running it before the action.
The previous example with authentication showed a "before filter" in action. The other type of filter you can run is an "after filter." As you can tell from the name, an after filter executes code after the action has been completed.
This can be used to make some last minute modifications to the HTML before it is sent to the browser (think translation, compression, etc.), for example.
If you want to get a copy of the content that will be rendered to the browser from an after filter, you can use the response() function. To set your changes to the response afterward, use the setResponse() function.
As an example, let's say that you want to translate the content to Gibberish before sending it to your visitor. You can do something like this:
function config() {
filters(through="translate", type="after");
}
private function translate() {
setResponse(gibberify(response()));
}By default, filters apply to all actions in a controller. If that's not what you want, you can tell CFWheels to only run the filter on the actions you specify with the only argument. Or you can tell it to run the filter on all actions except the ones you specify with the except argument.
Here are some examples showing how to setup filtering in your controllers. Remember, these calls go inside the config() function of your controller file.
filters(through="isLoggedIn,checkIPAddress", except="home,login");
filters(through="translateText", only="termsOfUse", type="after");Sometimes it's useful to be able to pass through arguments to the filters. For one, it can help you reduce the amount of functions you need to write. Here's the easy way to pass through an argument:
filters(through="authorize", byIP=true);Now the byIP argument will be available in the authorize function.
To help you avoid any clashing of argument names, CFWheels also supports passing in the arguments in a struct as well:
// The `through` argument would clash here if it wasn't stored within a struct
args.byIP = true;
args.through = true;
filters(through="authorize", authorizeArguments=args);Because your controller's config() function only runs once per application start, the passing of arguments can also be written as expressions to be evaluated at runtime. This is helpful if you need for the value to be dynamic from request to request.
For example, this code would only evaluate the value for request.region on the very first request, and CFWheels will store that particular value in memory for all subsequent requests:
// This is probably not what you intended
filters(through="authorize", byIP=true, region=request.region);To avoid this hard-coding of values from request to request, you can instead pass an expression. (The double pound signs are necessary to escape dynamic values within the string. We only want to store a string representation of the expression to be evaluated.)
// This is probably more along the lines of what you intended
filters(through="authorize", byIP=true, region="##request.region##");Now instead of evaluating request.region inside the config() function, it will be done on each individual request.
You probably don't want anyone to be able to run your filters directly (by modifying a URL on your website for example). To make sure that isn't possible we recommend that you always make them private. As you can see in all examples on this page we make sure that we always have access="private" in the function declaration for the filter.
If you need to access your filters on a lower level, you can do so by using the filterChain() and setFilterChain()functions. Typically, you'll want to call filterChain() to return an array of all the filters set on the current controller, make your desired changes, and save it back using the setFilterChain() function.
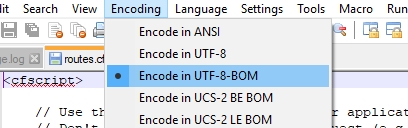
Write code that runs every time a given object is created, updated, or deleted.
Callbacks in Wheels allow you to have code executed before and/or after certain operations on an object. This requires some further explanation, so let's go straight to an example of a real-world application: the e-commerce checkout.
Let's look at a possible scenario for what happens when a visitor to your imaginary e-commerce website submits their credit card details to finalize an order:
You create a new order object using the method based on the incoming form parameters.
You call the method on the order object, which will cause Wheels to first validate the object and then store it in the database if it passes validation.
The next day, you call the method on the object because the user decided to change the shipping method for the order.
Another day passes, and you call the method on the object because the visitor called in to cancel the order.
Let's say you want to have the following things executed somewhere in the code:
Stripping out dashes from the credit card number to make it as easy as possible for the user to make a purchase.
Calculating shipping cost based on the country the package will be sent to.
It's tempting to put this code right in the controller, isn't it? But if you think ahead a little, you'll realize that you might build an administrative interface for orders and maybe an express checkout as well at some point in the future. You don't want to duplicate all your logic in all these places, do you?
Object callbacks to the rescue! By using object callbacks to implement this sort of logic in your model, you keep it out of your controllers and ensure your code stays DRY (Don't Repeat Yourself).
Part of the Order.cfc model file:
The above code registers 2 methods to be run at specific points in the life cycle of all objects in your application.
When naming your callbacks you might be tempted to try and keep things (too) simple by doing something like afterValidation("afterValidation").
Do not do this.
If you do, CFWheels will fail silently and you might be left wondering why nothing is happening. (What is happening is that you, if there is a corresponding method named afterValidation, unintentionally overrode an internal CFWheels method.)
It's best to name the methods so they describe what task they actually perform, such as calculateShippingCost or fixCreditCard as shown in the example above.
The following 16 functions can be used to register callbacks.
or
or
or
or
or
As you can see above, there are a few places (5, to be exact) where one callback or the other will be executed, but not both.
The very first possible callback that can take place in an object's life cycle is either or . The callback methods are triggered when you create the object yourself for the very first time, for example, when using the method. is triggered when the object is created as a result of fetching a record from the database, for example, when using . (There is some special behavior for this callback type that we'll explain in detail later on in this chapter).
The remaining callbacks get executed depending on whether or not we're running a "create," "update," or "delete" operation.
If you want to completely break the callback chain for an object, you can do so by returning false from your callback method. (Otherwise, always return true or nothing at all.) As an example of breaking the callback chain, let's say you have called the method on a new object and the method you've registered with the callback returns false. As a result, because the method you've registered with the callback will exit the callback chain early by returning false, no record will be inserted in the database.
Sometimes you need to run more than one method at a specific point in the object's life cycle. You can do this by passing in a list of method names like this:
When an object is saved in your application, these two callbacks will be executed in the order that you registered them. The checkSomething method will be executed first, and unless it returns false, the checkSomethingElse method will be executed directly afterward.
When you read about the callback above, you may have thought that it must surely only work for / calls but not for because those calls return query result sets by default, not objects.
Believe it or not, but callbacks are even triggered on ! You do need to write your callback code differently though because there will be no this scope in the query object. Instead of modifying properties in the this scope like you normally would, the properties are passed to the callback method via the arguments struct.
Does that sound complicated? This example should clear it up a little. Let's show some code to display how you can handle setting a fullName property on a hypothetical artist model.
Because all callbacks run when fetching records from the database, it's a good idea to check to make sure that the columns used in the method's logic exist before performing any operations. You mostly encounter this issue when using the select argument on a finder to limit the number of columns returned. But no worries! You can use StructKeyExists() and perform a simple check to make sure that the columns exists in the arguments scope.
In our example model, an artist's name can consist of both a first name and a last name ("John Mayer") or just the band / last name ("Abba."). The setFullName() method handles the logic to concatenate the names.
Always remember to return the arguments struct, otherwise Wheels won't be able to tell that you actually wanted to make any changes to the query.
Note that callbacks set on included models are not executed. Look at this example:
That will cause callback to be executed on the Foo model but not the Bar model.
Please note that if you use the or the methods in Wheels, they will not instantiate objects by default, and thus any callbacks will be skipped. This is good for performance reasons because if you update 1,000 records at once, you probably don't want to run the callbacks on each object. Especially not if they involve database calls.
However, if you want to execute all callbacks in those methods as well, all you have to do is pass in instantiate=trueto the / methods.
Use CFWheels to simplify the task of setting up automated emails in your application.
Sending emails in CFWheels is done from your controller files with the function. It's basically a wrapper around cfmail, but it has some smart functionality and a more CFWheels-like approach in general.
Getting this to work in CFWheels can be broken down in 3 steps. We'll walk you through them.
We recommend using CFWheels ability to set global defaults for so that you don't have to specify more arguments than necessary in your controller files. Because it's likely that you will use the same mail server across your application, this makes it worthwhile to set a global default for it.
This setting should be done in the config/settings.cfm file and can look something like this:
By specifying these values here, these arguments can be omitted from all function calls, thus providing cleaner, less cluttered code.
But you are not limited to setting only these 3 variables. In fact, you can set a global default for any optional argument to and since it accepts the same arguments that cfmail does. That's quite a few.
Alternatively, most modern CFML engines allow setting SMTP information directly within the application configuration. So you can actually add this in /config/app.cfm: here's an example configuration:
An email template is required for to work and forms the basis for the mail message content. Think of an email template as the content of your email.
Templates may be stored anywhere within the /views/ folder, but we recommend a structured, logical approach. If different controllers utilize
and each require a unique template, place each email template within the views/controllername folder structure.
Consider this example scenario:
Multiple templates may be stored within this directory should there be a need.
The content of the template is simple: simply output the content and any expected variables.
Here's an example for myemailtemplate.cfm, which will contain HTML content.
As we've said before, accepts all attribute of CFML's cfmail tag as arguments. But it also accepts any variables that you need to pass to the email template itself.
Consider the following example:
Here we are sending an email by including the myemailtemplate template and passing values for recipientNameand startDate to it.
Note that the template argument should be the path to the view's folder name and template file name without the extension. If the template is in the current controller, then you don't need to specify a folder path to the template file. In that case, just be sure to store the template file in the folder with the rest of the views for that controller.
The logic for which template file to include follows the same logic as the template argument to .
Did you notice that we did not have to specify the type attribute of cfmail? CFWheels is smart enough to figure out that you want to send as HTML since you have tags in the email body. (You can override this behavior if necessary though by passing in the type argument.)
The intelligence doesn't end there though. You can have CFWheels send a multipart email by passing in a list of templates to the templates argument (notice the plural), and CFWheels will automatically figure out which one is text and which one is HTML.
Like the template argument, the logic for which file to include follows the same logic as the template argument to .
You can attach files to your emails as well by using the file argument (or files argument if you want multiple attachments). Simply pass in the name of a file that exists in the files folder (or a subfolder of it) of your application.
Alternatively you can pass in mail parameters directly if you require more control (such as sending a dynamically generated PDF which isn't written to disk):
Much like the layouts outlined in the chapter, you can also create layouts for your emails.
A layout should be used just as the name implies: for layout and stylistic aspects of the email body. Based on the example given above, let's assume that the same email content needs to be sent twice.
Message is sent to a new member with a stylized header and footer.
A copy of message is sent to an admin at your company with a generic header and footer.
Best practice is that variables (such as recipientName and startDate, in the example above) be placed as outputs in the template file.
In this case, the two calls to would be nearly identical, with the exception of the layout argument.
CFWheels also lets you set up layouts for the HTML and plain text parts in a multipart email.
If we set up generic email layouts at views/plainemaillayout.cfm and views/htmlemaillayout.cfm, we would call like so:
For both the templates and layouts arguments (again, notice the plurals), we provide a list of view files to use. CFWheels will figure out which of the templates and layouts are the HTML versions and separate out the MIME parts for you automatically.
Now you're all set to send emails the CFWheels way. Just don't be a spammer, please!
Extend CFWheels functionality by creating a plugin.
Plugins are the recommended way to get new code accepted into CFWheels. If you have written code that you think constitutes core functionality and should be added to Wheels, please create a plugin. After the community has used it for a while, it will be a simple task for us to integrate it into the CFWheels core.
To create a plugin named MyPlugin, you will need to create a MyPlugin.cfc and an index.cfm file. Then zip these together as MyPlugin-x.x.zip, where x.x is the version number of your plugin.
The only other requirement to make a plugin work is that MyPlugin.cfc must contain a method named init. This method must set a variable called this.version, specifying the Wheels version the plugin is meant to be used on (or several Wheels version numbers in a list) and then return itself.
Here's an example:
The index.cfm file is the user interface for your plugin and will be viewable when clicking through to it from the debug area of your application.
A plugin can add brand new functions to Wheels or override existing ones. A plugin can also have a simple one-page user interface so that the users of the plugin can provide input, display content, etc.
To add or override a function, you simply add the function to MyPlugin.cfc, and Wheels will inject it into Wheels on application start.
Please note that all functions in your plugin need to be public (access="public"). If you have functions that should only be called from the plugin itself, we recommend starting the function name with the $character (this is how many internal Wheels functions are named as well) to avoid any naming collisions.
It is also important to note that although you can overwrite functions, they are still available for you to leverage with the use of core.functionName().
Let's say that we wanted Wheels's built-in function to return the time followed by the string " (approximately)":
There are 3 attributes you can set on your plugin to customize its behavior. The first and most important one is the mixin attribute.
By default, the functions in your plugins will be injected into all Wheels objects (controller, model, etc.). This is usually not necessary, and to avoid this overhead, you can use the mixin attribute to specify exactly where the functions should be injected. If you have a function that should be available in a controller (or view) this is how it could look:
The mixin attribute can be set either on the cfcomponent tag or on the individual cffunction tags.
The following values can be used for the mixin attribute: application, global, none, controller, model, dispatch, microsoftsqlserver, mysql, oracle, postgresql.
Another useful attribute is the environment attribute. Using this, you can tell Wheels that a plugin should only inject its functions in certain environment modes. Here's an example of that, taken from the Scaffold plugin, which doesn't need to inject any functions to Wheels at all when it's running in production mode.
Finally, there is a way to specify that your plugin needs another plugin installed in order to work. Here's an example of that:
When your Wheels application first initializes, it will unzip and cache the zip files in the plugins folder. Each plugin then has its own expanded subfolder. If a subfolder exists but has no corresponding zip file, Wheels will delete the folder and its contents.
This is convenient when you're deploying plugins but can be annoying when you're developing your own plugins. By default, every time you make a change to your plugin, you need to rezip your plugin files and reload the Wheels application by adding ?reload=true to the URL.
To force Wheels to skip the unzipping process, set the overwritePlugins setting to falsedevelopment` environment.
With this setting, you'll be able to reload your application without worrying about your file being overwritten by the contents of the corresponding zip file.
To force Wheels to skip the folder deletion process, set the deletePluginDirectories setting tofalse for your development environment.
With this setting, you can now develop new plugins in your application without worrying about having a corresponding zip file in place.
See the chapter on for more details about changing Wheels settings.
If your plugin is completely stand-alone, you can call it from its view page using just the name of the plugin. This works because Wheels has created a pointer to the plugin object residing in the application scope. One example of a stand-alone plugin is the PluginManager. If you check out its view code, you will see that it calls itself like this:
With CFWheels 2.x we can take advantage of the inbuilt documentation generator. Try and tag your public facing functions appropriately.
Here's an example from the cfwheels ical4J plugin:
The javaDoc style comments will automatically show this function under Plugins > Calendaring, rather than in the "Uncategorized" functions. The @parameter lines give a helpful hint to the user
With 2.x, a box.json is required for new plugins. Read the chapter for more details on that. One advantage is that CFWheels now includes the version and meta data for each plugin when there's a box.json file.
This saves you having to read in the box.json file, should you wish to use it for storing ancillary data and settings.
If you've ever wanted to do a quick wrapper for a java class/lib, this new feature in 2.x means you can add a .class or .jar file, and it will be automatically mapped into the this.javaSettings.loadpaths setting when the application starts.
This means you can distribute plugins with Java libs and they'll work properly without additional user intervention!
One of the nicest things about 2.x is the tighter integration with command-line tools such as CommandBox. We can take advantage of the new testing suite JSON return type and the new CFWheels CLI in CommandBox 2.x to easily build a Travis CI test. It's perhaps easiest to just show the .travis.yml file - this goes in the root of your gitHub plugin repository, and once you've turned on testing under Travis.org, will run your test suite on every commit.
In sum, this:
Installs CommandBox
Installs the CFWheels CLI
Installs the master branch of the CFWheels repository
Installs your plugin from your repository (rather than the forgebox version which will be the version behind)
Starts the local server
Runs the test suite, pointing only at your plugin's unit tests
Naturally, you could do more complex things with this, such as multiple CF Engines, but for a quick setup it's a good starting point!
Armed with this knowledge about plugins, you can now go and add that feature you've always wanted or change that behavior you've always hated. We've stripped you of any right to blame us for your discontents. :)
component extends="Model" {
public function config() {
beforeValidationOnCreate("fixCreditCard");
afterValidation("calculateShippingCost");
}
public function fixCreditCard() {
writeOutput("Code for stripping out dashes in credit card numbers goes here...");
}
public function calculateShippingCost() {
writeOutput("Code for calculating shipping cost goes here...");
}
}beforeSave("checkSomething,checkSomethingElse");component extends="Model" output="false" {
public function config() {
afterFind("setFullName");
}
public function setFullName() {
arguments.fullName = "";
if ( StructKeyExists(arguments, "firstName")
&& StructKeyExists(arguments, "lastName") ) {
arguments.fullName = Trim(
arguments.firstName & " " & arguments.lastName
);
}
return arguments;
}
}fooBars = model("foo").findAll(include="bars");set(
functionName="sendEmail",
server="yourServer",
username="yourUsername",
password="yourPassword"
);// Lucee:
this.tag.mail.server="smtp.mydomain.com";
this.tag.mail.username="mySMTPUsername";
this.tag.mail.password="mySMTPPassword";
this.tag.mail.port=587; // Optional port
this.tag.mail.usetls=true; // Optional TLS
// Adobe ColdFusion
this.smtpServersettings = {
'server' : 'smtp.thedomain.com:2525',
'username' : 'xxxxxxxx',
'password' : 'xxxxxxx'
};Membership
/views/membership/myemailtemplate.cfm
<cfoutput>
<p>Hi #recipientName#,</p>
<p>
We wanted to take a moment to thank you for joining our service
and to confirm your start date.
</p>
<p>
Our records indicate that your membership will begin on
<strong>#DateFormat(startDate, "dddd, mmmm, d, yyyy")#</strong>.
</p>
</cfoutput>member = model("member").findByKey(newMember.id);
sendEmail(
from="[email protected]",
to=member.email,
template="myemailtemplate",
subject="Thank You for Becoming a Member",
recipientName=member.name,
startDate=member.startDate
);// Send files/termsAndConditions.pdf
sendEmail(
to="[email protected]",
from="[email protected]",
template="/email/exampletemplate",
subject="Test",
files="termsAndConditions.pdf"
);// Create PDF
cfdocument(name="PDFContent", format="pdf"){
writeOutput("<h1>Cats are better than dogz!</h1>");
};
// Setup Mail Params
mailParams[1]["file"]= "Test.pdf";
mailParams[1]["type"]= "application/pdf";
mailParams[1]["content"]= PDFContent;
sendEmail(
to="[email protected]",
from="[email protected]",
template="/email/exampletemplate",
subject="Test",
mailParams=mailParams
);// Get new member.
member = model("member").findByKey(params.key);
// Customer email with customized header/footer.
sendEmail(
from="[email protected]",
template="myemailtemplate",
layout="customer",
to=member.email,
subject="Thank You for Becoming a Member",
recipientName=member.name,
startDate=member.startDate
);
// Plain text message with "admin" layout.
sendEmail(
from="[email protected]",
template="myemailtemplate",
layout="admin",
to="[email protected]",
subject="Membership Verification: #member.name#",
recipientName=member.name,
startDate=member.startDate
);// Multipart customer email.
sendEmail(
from="[email protected]",
templates="/myemailtemplateplain,/myemailtemplatehtml",
layouts="customerPlain,customerHtml",
to=member.email,
subject="Thank You for Becoming a Member",
recipientName=member.name,
startDate=member.startDate
);component {
function init(){
this.version="1.4.5,2.0";
return this;
}
}public string function timeAgoInWords(){
return core.timeAgoInWords(argumentCollection=arguments) & " (approximately)";
}<cfcomponent output="false" mixin="controller"><cfcomponent output="false" mixin="controller" environment="development"><cfcomponent output="false" dependency="someOtherPlugin">set(overwritePlugins=false);set(deletePluginDirectories=false);pluginManager.installPlugin(URL.plugin);/**
* Given a iCal style repeat rule, a seed date and a from-to range, get all recurring dates which satisfy those conditions
*
* [section: Plugins]
* [category: Calendaring]
*
* @pattern The ical RRULE style string
* @seed The seed date
* @from When to generate repeat range from
* @to When to generate repeat range till
*/
public array function getRecurringDates(
required string pattern,
required date seed,
date from,
date to
){
local.recur = $ical_createRecur(arguments.pattern);
return local.recur.getDates($ical_createDate(arguments.seed), $ical_createDate(arguments.from), $ical_createDate(arguments.to), $ical_createValue("DATE"));
}// Version Number
application.wheels.pluginMeta["pluginName"]["version"];
// Meta Struct from box.json
application.wheels.pluginMeta["pluginName"]["boxjson"];language: java
sudo: required
jdk:
- oraclejdk8
before_install:
# Get Commandbox
- sudo apt-key adv --keyserver keys.gnupg.net --recv 6DA70622
- sudo echo "deb http://downloads.ortussolutions.com/debs/noarch /" | sudo tee -a /etc/apt/sources.list.d/commandbox.list
install:
# Install Commandbox
- sudo apt-get update && sudo apt-get --assume-yes install CommandBox
# Check it's working
- box version
# Install CLI: needed to repackage the plugin to a zip on install
- box install cfwheels-cli
# Install Master Branch; nb, installed into folder of the git repo name, i.e neokoenig/cfwheels-ical4j
- box install cfwheels/cfwheels
# Install the Plugin: use gitHub path to get the absolute latest rather than the forgebox version
- box install neokoenig/cfwheels-ical4j
before_script:
# Master branch has a bunch of server.jsons we can use: lucee4 | lucee5 | cf10 | cf11 | cf2016
- box server start lucee5
# Type should be the name of the plugin | servername should reflect the server we've just started
script: >
testResults="$(box wheels test type=ical4j servername=lucee5)";
echo "$testResults";
if ! grep -i "\Tests Complete: All Good!" <<< $testResults; then exit 1; fi
notifications:
email: true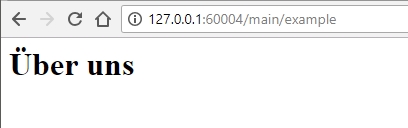
How to speed up your website by caching content.
If your website doesn't get a whole lot of traffic, then you can probably skip this chapter completely. Just remember that it's here, waiting for your triumphant return.
On the other hand, you're probably hoping for massive amounts of traffic to reach your website very soon, an imminent sell-out to Google, and a good life drinking Margaritas in the Caribbean. Knowing a little bit about the CFWheels caching concepts will prepare you for this. (Except for the Margaritas... You're on your own with those ;).)
Consider a typical page on a CFWheels website. It will likely call a controller action, get some data from your database using a finder method, and render the view for the user using some of the handy built-in functions.
All this takes time and resources on your web and database servers. Let's assume this page is accessed frequently, rarely changes, and looks the same for all users. Then you have a perfect candidate for caching.
CFWheels will configure all caching parameters behind the scenes for you based on what environment mode you are currently in. If you leave everything to CFWheels, caching will be optimized for the different environment modes (and set to have reasonable settings for cache size and culling). This means that all caching is off when working in Development mode but on when in Production mode, for example.
Here are the global caching parameters you can set, their default values, and a description of what they do. Because these are not meant to be set differently based on the environment mode, you would usually set these in the config/settings.cfm file:
set(maximumItemsToCache=5000);
set(cacheCullPercentage=10);
set(cacheCullIntervalMinutes=5);
set(cacheDatePart="n");
set(defaultCacheTime=60);
set(cacheQueriesDuringRequest=true);
set(clearQueryCacheOnReload=true);
set(cachePlugins=true);The total amount of items the cache can hold. When the cache is full, items will be deleted automatically at a regular interval based on the other settings below.
Note that the cache is stored in ColdFusion's application scope, so take this into consideration when deciding the number of items to store.
This is the percentage of items that are culled from the cache when maximumItemsToCache has been reached.
For example, if you set this value to 10, then at most, 10% of expired items will be deleted from the cache.
If you set this to 100, then all expired items will be deleted. Setting it to 100 is perfectly fine for small caches but can be problematic if the cache is very large.
This is the number of minutes between each culling action. The reason the cache is not culled during each request is to keep performance as high as possible.
The measurement unit to use during caching. The default is minutes ("n"), but you can set it to seconds ("s") for example if you want more precise control over when a cached item should expire. For the rest of this chapter, we'll assume you've left it at the default setting.
The number of minutes an item should be cached when it has not been specifically set through one of the functions that perform the caching in CFWheels (i.e., caches(), findAll(), includePartial(), etc).
When set to true, CFWheels caches identical queries during a request. See the section titled Automatic Caching of Identical Queries below for more information about this setting.
When set to true, CFWheels will clear out all cached queries when doing a reload=true request. This is usually a good idea, but if you want to avoid hitting the database too hard on application reloads, you can set this to false to keep queries cached and ease the load on the database.
If you set this to false, all plugins will reload on each request (as opposed to during reload=true requests only). Setting this is only recommended if you are developing a plugin yourself and need to see the impact of your changes as you develop it on a per-request basis.
The following cache variables are usually set per environment mode:
// always turned on regardless of mode setting.
set(cacheControllerConfig = true);
set(cacheDatabaseSchema = true);
set(cacheModelConfig = true);
set(cachePlugins = true);
// Development mode example
set(cacheActions = false);
set(cacheFileChecking = false);
set(cacheImages = false);
set(cachePages = false);
set(cachePartials = false);
set(cacheQueries = false);The settings shown above are what's in use in the Development mode. As you can see, when running in that mode, very little is cached. This makes it possible to do extensive changes without having to issue a reload=true request or restart the ColdFusion server, for example. The downside is that it makes for slightly slower development because the pages will not load as fast in this environment.
The variables themselves are fairly self-explanatory. When cacheDatabaseSchema is set to false, you can add a field to the database, and CFWheels will pick that up right away. When cacheModelConfig is false, any changes you make to the config() function in the model file will be picked up. And so on.
Please refer to the Configuration and Defaults chapter for a complete listing of all the variables you can set and their default values.
In CFWheels, you can cache data in 4 different ways:
Action caching is the most effective of these methods because it caches the entire resulting HTML for the user.
Page caching is similar to action caching, but it will only cache the view page itself and in reality, this caching method is rarely used.
Partial caching is used when you only want to cache specific parts of pages. One reason for this could be that the page is personalized for a specific user, and you can only cache the sections that are not personalized.
Query caching is the least effective of the 4 caching options because it only caches result sets that you get back from the database. But if you have a busy database and you're not too concerned with leaving pages/partials uncached, this could be a good option for you.
This code specifies that you want to cache the browseByUser and browseByTitle actions for 30 minutes:
component extends="Controller" {
function config(){
caches(actions="browseByUser,browseByTitle", time=30);
}
function browseByUser(){
}
function browseByTitle(){
}
}As you can see, the caches() function call goes inside the config() function at the top of your controller file and accepts a list of action names and the number of minutes the actions should be cached for.
So what happens when users request the browseByUser page?
When CFWheels receives the first request for this page, it will handle everything as it normally would, with the exception that it also adds a copy of the resulting HTML to the cache before ending the processing.
CFWheels creates an internal key for use in the cache as well. This key is created from the controller, action, key, and params variables. This means, for example, that paginated pages are all stored individually in the cache (because the URL variable for the page to display would be different on each request).
When the second user requests the same page, CFWheels will serve the HTML directly from the cache.
All subsequent requests now get the cached page until it expires.
But there are 2 exceptions to this (which you can make good use of in your code to have the cache re-created at the right times). If the request is a post request (normally coming from a form submission) or if the Flash (you can read everything about the Flash in the Using the Flash chapter) is not empty, then the cache won't be used. Instead, a new fresh page will be created.
One way to use this feature is to submit your forms to the same page to have it re-created or redirect to the cached page with a message in the Flash.
Here is some code that shows this technique with using the Flash to expire the cache. (Imagine that the showArticlepage is cached and a user is adding a new comment to it.)
flashInsert(message="Your comment was added");
redirectTo(action="showArticle", key=params.key);Note that by default, any filters set for the action are being run as normal. This means that if you do authentication in the filter (which is a common technique for sites with content where you have to login first to see it), you can still cache those pages safely using the caches() function.
However, to achieve the fastest possible cache, you can override this default and tell CFWheels to cache the HTML and serve that exactly as it is to all subsequent requests without running any filters. To do this, set the static argument on caches() to true. This will cache your content using the cfcache tag behind the scenes. This means that the CFWheels framework won't even get involved with the subsequent requests until they expire from the cache again (please note that application events like onSessionStart, onRequestStart, etc. will run though).
This code specifies that you want to cache the view page for the browseByUser action for 1 hour:
component extends="Controller" {
function browseByUser(){
renderView(cache=60);
}
function browseByTitle(){
}
}The difference between action caching and page caching is that page caching will run the action and then only cache the view page itself. Action caching, as explained above, does not run the action code at all (but it does run filters and verifications).
When your site contains personalized information (maybe some text specifying who you are logged in as, a list of items in your shopping cart, etc.), then action caching is not an option, and you need to cache at a lower level. This is where being able to cache only specific parts of pages comes in handy.
In CFWheels, this is done by using the cache argument in a call to includePartial() or renderPartial(). You can pass in cache=true or cache=x where x is the number of minutes you want to cache the partial for.
If you just pass in true, the default cache expiration time will be used.
So, for example, if you have an e-commerce site that lists products with a shopping cart in the sidebar, then you'd create a partial for the list of products and cache only that.
Example code:
#includePartial(partial="listing", cache=true)#Behind the scenes CFWheels creates the cache key based on the name of the partial plus all of the arguments passed in to it. This means that if you pass in a userId variable for example, they will be cached separately.
You can also use this to your advantage when it comes to expiring cached content. You could, for example, update an updatedAt property on a user object and pass that in to includePartial. As soon as it changes, CFWheels will recreate the cached content (since the cache key is now different).
You can cache result sets returned by your queries too. As a ColdFusion developer, this probably won't be new to you because you've always been able to use the cachedwithin attribute in the <cfquery> tag. The query caching in CFWheels is very similar to this.
You can use query caching on all finder methods, and it looks like this:
users = model("user").findAll(where="name LIKE 'a%'", cache=10);So there you have it: 4 easy ways to speed up your website!
When working with objects in CFWheels, you'll likely find yourself using all of the convenient association functions CFWheels makes available to you.
For example, if you have set up a belongsTo association from article to author, then you will likely write a lot of article.author().name() calls. In this case, CFWheels is smart enough to only call the database once per request if the queries are identical. So don't worry about adding performance hits when making multiple calls like that in your code.
You can turn off this functionality either by using the reload argument to findAll() (or any of the dynamic methods that end up calling findAll() behind the scenes) or globally by adding set(cacheQueriesDuringRequest=false) to your configuration files.
The caching of these queries are stored on a per-model basis and CFWheels will conveniently clear the cache for a model whenever anything changes in the database for a model (e.g. you call something that creates, updates or deletes records).
How to publish your plugin to forgebox.io via CommandBox
So, you've created your new magic, world solving plugin, and naturally, you want to share it with the world. CFWheels uses forgebox.io as a plugins repository. This enables us to our CFWheels application's dependencies, install updates easily via CommandBox and more.
As a plugin author, it's well worth spending a little time setting yourself up to work with forgebox with the minimum amount of effort. Once done, you'll be able to either publish directly from the commandline, or upload to forgebox manually.
This tutorial makes extensive use of CommandBox, GIT and the CFWheels CLI.
We strongly recommend always having the latest version of CommandBox.
You'll also want the CFWheels CLI. You can install that in CommandBox via install cfwheels-cli. This will also update it if you've got an older version installed.
Some scripted commands also require the git CLI, although these are technically optional.
If you've not got a forgebox.io account you can either register directly on forgebox or very quickly via CommandBox itself
# Register for an account
$ forgebox registerOnce you've got your credentials, you should be good to go.
If you've already got an account, you need to login at least once, which will store an API token for future use:
# Login
$ forgebox login
# (optional) Check which account you're logged in with
$ forgebox whoamiForgebox uses your local box.json - you'll need one! Critical package information like the name of your plugin and the location are stored here. You can create one manually, or you can run:
# Create a basic box.json
$ init
# Or pass in parameters at the same time
$ init name="My Funky Plugin" slug=my-funky-plugin version=1.0.0 type="cfwheels-plugins"
# Or use the wizard
$ init --wizardIn order for other CFWheels users to quickly identify and install your plugin via the CFWheels CLI, make sure you set the following box.json attributes - whilst a standard box.json might only have name, version,author, we need a little more information. Here's a template to get you started: (replace the values in CAPS)
{
// Required:
"name":"PLUGIN-NAME",
"version":"0.0.1",
"author":"YOURNAME",
// Required: GitHub Repository stub
"location":"GITHUBUSERNAME/GITHUB-REPONAME#v0.0.1",
// Required: Should always be /plugins/
"directory":"/plugins/",
// Required: Should always be true
"createPackageDirectory":true,
// Required: Must be the name of your primary CFC File
"packageDirectory":"PLUGIN-NAME",
// Required: The Forgebox slug, must be unique
"slug":"FORGEBOX-SLUG",
// Required: Must be cfwheels-plugins
"type":"cfwheels-plugins",
// Required: From here is optional but recommended
"homepage":"https://github.com/GITHUBUSERNAME/GITHUB-REPONAME",
"shortDescription":"PLUGIN DESCRIPTION",
"keywords":"KEYWORD",
"private":false,
"scripts":{
"postVersion":"package set location='GITHUBUSERNAME/GITHUB-REPONAME#v`package version`'",
"patch-release":"bump --patch",
"minor-release":"bump --minor",
"major-release":"bump --major",
"postPublish":"!git push --follow-tags && publish"
}
}Your completed box.json might look something like this:
{
// Required:
"name":"Shortcodes",
"version":"0.0.4",
"author":"Tom King",
// Required: GitHub Repository stub, including version hash
"location":"neokoenig/cfwheels-shortcodes#v0.0.4",
// Required: Should always be /plugins/
"directory":"/plugins/",
// Required: Should always be true
"createPackageDirectory":true,
// Required: Must be the name of your primary CFC File
"packageDirectory":"Shortcodes",
// Required: The Forgebox slug, must be unique
"slug":"shortcodes",
// Required: Must be cfwheels-plugins
"type":"cfwheels-plugins",
// Required: From here is optional but recommended
"homepage":"https://github.com/neokoenig/cfwheels-shortcodes",
"shortDescription":"Shortcodes Plugin for CFWheels",
"keywords":"shortcodes",
"private":false,
"scripts":{
"postVersion":"package set location='neokoenig/cfwheels-shortcodes#v`package version`'",
"patch-release":"bump --patch",
"minor-release":"bump --minor",
"major-release":"bump --major",
"postPublish":"!git push --follow-tags && publish"
}
}If this is the first time you've done this, you might want to try the forgebox staging server. That way you can make sure your publishing process is spot on without having lots of unnecessary versions pushed up. You can view the staging server version at http://forgebox.stg.ortussolutions.com/
# Add staging server configuration
$ config set endpoints.forgebox.APIURL=http://forgebox.stg.ortussolutions.com/api/v1
# Revert back to production configuration
$ config clear endpoints.forgebox.APIURLRemember this configuration will "stick", so make sure you change it back afterwards. (I find once changed, it might not kick in until you reload the CommandBox shell via r).
Both CFWheels CLI and Forgebox are expecting a tagged release with the plugin contents (e.g. zip). So the best way to publish is to...
Navigate into the plugin directory
Ensure that directory is authorized to publish the repo (e.g. git remote -v should list your fetch/push endpoints)
Note: Git dislikes nested repos, so it's best to setup a test wheels site specifically for plugin development/deployment. Then
git initwithin each plugin directory itself, but not at the root. (e.g./plugins/PluginName/)
# from CommandBox prompt, within plugin directory
$ run-script patch-releaseForgeBox does not store your actual package files like npm, but points to your download location.
The following should happen (again, assuming you have git publish rights from that plugin directory)
Auto increment your version number within box.json
Push updated box.json to forgebox (with new version number + location)
Create a git "Tagged Release" which is basically a zip containing the source files
Once you run this command, you can run forgebox show my-package to confirm it's there. If you change the slug, a new package will be created. If you change the version, a new version will be added to the existing package.
By adding the following block to our box.json, we can more easily deploy new versions with a single command:
"scripts":{
"postVersion":"package set location='GITHUBUSERNAME/GITHUB-REPONAME#v`package version`'",
"patch-release":"bump --patch",
"minor-release":"bump --minor",
"major-release":"bump --major",
"postPublish":"!git push --follow-tags && publish"
}Obviously, you'll need to change location='GITHUBUSERNAME/GITHUB-REPONAME#v to your repo.
With these in place, once you've committed your changes to your local repository, you can now do:
# Don't forget to commit your changes. You can access git directly from commandbox using !
$ !git add .
$ !git commit -m "my new changes"
# Move from 1.0.0 -> 1.0.1
$ run-script patch-release
# Move from 1.0.0 -> 1.1.0
$ run-script minor-release
# Move from 1.0.0 -> 2.0.0
$ run-script major-releaseThis will:
Set the package location to include the new version number
Publish to forgebox.io
Push your changes to gitHub (assuming you've set that up)
Publish a gitHub tagged release
This saves you having to manually update the version number too!
# Example output of a patch release
$ run-script patch-release
Running package script [patch-release].
> bump --patch && publish
Set version = 0.1.7
Running package script [postVersion].
> package set location='neokoenig/cfwheels-cli#v`package version`'
Set location = neokoenig/cfwheels-cli#v0.1.7
Package is a Git repo. Tagging...
Tag [v0.1.7] created.
Sending package information to ForgeBox, please wait...
Package is alive, you can visit it here: https://www.forgebox.io/view/cfwheels-cli
Running package script [postPublish].
> !git push --follow-tags
Counting objects: 10, done.
Delta compression using up to 12 threads.
Compressing objects: 100% (8/8), done.
Writing objects: 100% (10/10), 908 bytes | 0 bytes/s, done.
Total 10 (delta 5), reused 0 (delta 0)
remote: Resolving deltas: 100% (5/5), completed with 4 local objects.
To https://github.com/neokoenig/cfwheels-cli.git
477648f..400604b master -> master
* [new tag] v0.1.7 -> v0.1.7
Package published successfully in [forgebox]Lastly, you can double check it's made it into the plugins list via wheels plugins list
Likewise, you can unpublish a plugin, but keep in mind people might be relying on your plugin, so don't do this lightly!
// Remove all versions of a package
$ unpublish
// Remove a specific version of a package
$ unpublish 1.2.3
// Skip the user confirmation prompt
$ unpublish 1.2.3 --forceHow Wheels handles an incoming request
Wheels is quite simple when it comes to figuring out how incoming requests map to code in your application. Let's look at a URL for an e-commerce website and dissect it a little.
But before we do that, a quick introduction to URLs in Wheels is in order.
URLs in Wheels generally look something like this:
http://localhost/index.cfm/shop/productsIt's also possible that the URLs will look like this in your application:
http://localhost/index.cfm?controller=shop&action=productsThis happens when your web server does not support the cgi.path_info variable.
Regardless of your specific setup, Wheels will try to figure out how to handle
the URLs. If Wheels fails to do this properly (i.e. you know that your web
server supports cgi.path_info, but Wheels insists on creating the URLs with
the query string format), you can override it by setting URLRewriting in
config/settings.cfm to either On, Partial, or Off. The line of code should
look something like this:
set(URLRewriting="Partial");"Partial URL Rewriting" is what we call that first URL up there with the
/index.cfm/ format.
In the example URLs used above, shop is the name of the controller to call,
and products is the name of the action to call on that controller.
Unless you're familiar with the Model-View-Controller pattern, you're probably wondering what controllers and actions are.
Put very simply, a controller takes an incoming request and, based on the parameters in the URL, decides what (if any) data to get from the model (which in most cases means your database), and decides which view (which in most cases means a CFML file producing HTML output) to display to the user.
An action is an entire process of executing code in the controller, including a view file and rendering the result to the browser. As you will see in the example below, an action usually maps directly to one specific function with the same name in the controller file.
Mapping an incoming URL to code is only one side of the equation. You will also need a way to create these URLs. This is done through a variety of different functions like linkTo() (for creating links), startFormTag() (for creating forms), and redirectTo() (for redirecting users), to name a few.
Internally, all of these functions use the same code to create the URL, namely the URLFor() function. The URLFor() function accepts a controller and an action argument, which are what you will use most of the time. It has a lot of other arguments and does some neat stuff (like defaulting to the current controller when you don't specifically pass one in). So check out the documentation for the URLFor() function for all the details.
By the way, by using URL rewriting in Apache or IIS, you can completely get rid
of the index.cfm part of the URL so that
http://localhost/index.cfm/shop/products becomes
http://localhost/shop/products. You can read more about this in the
URL Rewriting chapter.
For the remainder of this chapter, we'll type out the URLs in this shorter and prettier way.
Let's look a little closer at what happens when Wheels receives this example incoming request.
First, it will create an instance of the shop controller
(controllers/Shop.cfc) and call the function inside it named products.
Let's show how the code for the products function could look to make it more
clear what goes on:
component extends="Controller" {
function products() {
renderView(controller="shop", action="products");
}
}The only thing this does is specify the view page to render using the renderView() function.
The renderView() function is available to you because the shop controller extends the main Wheels Controllercomponent. Don't forget to include that extends attribute in your cfcomponent call as you build your controllers!
So, how does renderView() work? Well, it accepts the arguments controller and action (among others, such as route), and, based on these, it will try to include a view file. In our case, the view file is stored at views/shop/products.cfm.
You can read the chapter about Rendering Content for more information about the renderView() function.
It's important to note that the renderView() function does not cause any controller actions or functions to be executed. It just specifies what view files to get content from. Keep this in mind going forward because it's a common assumption that it does. (Especially when you want to include the view page for another action, it's easy to jump to the incorrect conclusion that the code for that action would also get executed.)
Because Wheels favors convention over configuration, we can remove a lot of the code in the example above, and it will still work because Wheels will just guess what your intention is. Let's have a quick look at exactly what code can be removed and why.
The first thing Wheels assumes is that if you call renderView() without arguments, you want to include the view page for the current controller and action.
Therefore, the code above can be changed to:
component extends="Controller" {
function products() {
renderView();
}
}… and it will still work just fine.
Does Wheels assume anything else? Sure it does. You can actually remove the entire renderView() call because Wheels will assume that you always want to call a view page when the processing in the controller is done. Wheels will call it for you behind the scenes.
That leaves you with this code:
component extends="Controller" {
function products() {
}
}That looks rather silly, a products function with no code whatsoever. What do
you think will happen if you just remove that entire function, leaving you with
this code?
component extends="Controller" {
}…If you guessed that Wheels will just assume you don't need any code for the
products action and just want the view rendered directly, then you are correct.
In fact, if you have a completely blank controller like the one above, you can delete it from the file system altogether!
This is quite useful when you're just adding simple pages to a website and you
don't need the controller and model to be involved at all. For example, you can
create a file named about.cfm in the views/home folder and access it at
http://localhost/home/about without having to create a specific controller
and/or action for it, assuming you're still using wildcard routing.
This also highlights the fact that Wheels is a very easy framework to get started in because you can basically program just as you normally would by creating simple pages like this and then gradually "Wheelsifying" your code as you learn the framework.
params StructBesides making sure the correct code is executed, Wheels also does something
else to simplify request handling for you. It combines the url and form
scopes into one. This is something that most CFML frameworks do as well. In
Wheels, it is done in the params struct.
The params struct is available to you in the controller and view files but
not in the model files. (It's considered a best practice to not mix your request
handling with your business logic.) Besides the form and url scope
variables, the params struct also contains the current controller and action
name for easy reference.
If the same variable exists in both the url and form scopes, the value in
the form scope will take precedence.
To make this concept easier to grasp, imagine a login form on your website that
submits to http://localhost/account/login?sendTo=dashboard with the variables
username and password present in the form. Your params struct would look
like this:
params.controller
account
params.action
login
params.sendTo
dashboard
params.username
joe
params.password
1234
Now instead of accessing the variables as url.sendTo, form.username, etc.,
you can just use the params struct for all of them instead.
This concept becomes even more useful once we start getting into creating forms specifically meant for accessing object properties. But let's save the details of all that for the Form Helpers and Showing Errors chapter.
If you're constructing a JSON API, you're inevitably going to come across how to deal with "incoming" json packets to your routing endpoints. Instead of having to test each request with whether it's valid json etc, CFWheels will automatically map the JSON body in a request to the params struct, as long as it has application/json as it's mime type.
So in the same way that the url and form scopes are merged, so a valid json body would be. The exception to the rule is when a javascript array is the root element, where it's then added to params._json to follow Rails conventions. (For obvious reasons, we can't merge an array into a struct!)
For more advanced URL-to-code mappings, you are encourage to use a concept called routing. It allows for you to fully customize every URL in your application, including which HTTP verb can be used. You can read more about this in the chapter called Routing.
Database Migrations are an easy way to build and alter your database structure using cfscript and even deploy across different database engines
With CFWheels 2.x, you can now create, alter and populate your database via cfscript in an organized manner. Using custom CFC files, you can create an organized database schema, and move between versions easily, either programmatically, via the provided GUI, or via the CLI.
If you're new to this concept, the best way to get going is by following the [migrations] link in the debug footer to load the built in GUI. Naturally, you will need your application's datasource setup and ready to go to get started.
On the first tab, we provide some simple database info, just so you can check you're running against the correct datasource. We're going to start by creating a simple template.
The create template tab allows for creation of either a blank CFC file, or from a selection of pre-populated templates. Whilst none of these templates will provide all the information required for a complete database migration, they are a good starting point and fairly heavily commented.
As we've not setup any migrations before, the system needs to know what prefix we want to use for our migration files. Each approach - Timestamp and Numeric is perfectly valid, but we recommend the Timestamp prefix if you're just starting out. Once you have a migration file, this section will disappear as it will get that info from the existing files.
For this tutorial, we're going to create the users table. So under Create a Template, we will select Create table and add a migration description of Create User Table.
Clicking on Create Migration File will then create a CFC at /db/migrate/20170420100502_Create_User_Table.cfc. The system will also display all messages at the top of the GUI whenever it does something - so for this command, we see The migration 20170420100502_Create_User_Table.cfc file was created
Next, open up the Create_User_Table.cfc template we just created. There are two functions to any migration file: up() and down().
up() will be executed when migrating your schema forward, and down() when you're rolling back.
The important concept to grasp is that anything which up() does, down() must undo.
function up() {
hasError = false;
transaction {
try {
t = createTable(name='tableName');
t.timestamps();
t.create();
} catch (any ex) {
hasError = true;
catchObject = ex;
}
if (!hasError) {
transaction action="commit";
} else {
transaction action="rollback";
throw(errorCode="1", detail=catchObject.detail, message=catchObject.message, type="any");
}
}
}Our default up() function will look something like this. Most of it you can actually ignore, as it's just wrapped in a transaction with some error handling. The important lines to look at are:
t = createTable(name='tableName');
t.timestamps();
t.create();createTable() is the command to actually make the table: so we need to change this to users.
t = createTable(name='users');
t.timestamps();
t.create();t.timestamps(); creates CFWheels automatic timestamp columns of createdAt,updatedAt and deletedAt.
The t.create(); is the final statement which executes the actual action.
Remember, the down() function needs to reverse these changes. so in our down() code block, we're going to change the dropTable('tableName'); to `dropTable('users');
Whilst we could execute this template in it's current state (we have an up function which creates, and a down function which drops) we wouldn't get much in the actual table. We can use the same migration file to add additional lines to create some columns to store things like firstname. Here's an example of a slightly more fleshed out migration file to give you some inspiration:
t = createTable(name='users');
t.string(
columnNames='firstname,lastname,password',
default='', null=false, limit='60');
t.string(
columnNames='username,passwordresettoken,apikey',
default='', null=true, limit='60');
t.string(
columnNames='email,address1,address2,city,county,country,tel,www',
default='', null=true, limit='255');
t.string(
columnNames='title,postcode,lang,locale,timezone',
default='', null=true, limit='15');
t.integer(columnNames='roleid', default='0', null=false, limit='11');
t.datetime(columnNames='pwresettokenat', default='', null=true);
t.datetime(columnNames='pwlastresetat', default='', null=true);
t.timestamps();
t.create();As you can see, you can create multiple columns in a single call, set default values, whether to allow null values, and so on.
At this point, we can get going on actually creating this table
Make sure that multiple column names in "columnNames" are only separated with ",". Don't use spaces like ", " as that space becomes part of a column name which will cause problems.
While t = createTable(name='users'); will create a standard auto-increment numeric ID, sometimes you need to create a table which has a composite, or non standard primary key. In this example, we're setting id=false on the createTable() call to bypass the default behavior, then specifying our primarykeys separately via primaryKey():
t = createTable(name='rolepermissions', id=false);
t.primaryKey(name="roleid", null=false, limit=11);
t.primaryKey(name="permissionid", null=false, limit=11);
t.create();This would be a typical setup for a join table where you have a many to many relationship. Alternatively this can be useful if you need to specify a UUID as a primarykey.
Returning to our migration GUI, we can now see some options under the Migrations tab.
Simply click the button to migrate the database to our new version. From this screen we can also roll back to previous schema versions, or even reset the database back to 0.
autoMigrateDatabase
Boolean
false
Automatically runs available migration on applicationstart.
migratorTableName
String
migratorversions
The name of the table that stores the versions migrated.
createMigratorTable
Boolean
true
Create the migratorversions database table.
writeMigratorSQLFiles
Boolean
false
Writes the executed SQL to a .sql file in the /migrator/sql directory.
migratorObjectCase
String
lower
Specifies the case of created database object. Options are 'lower', 'upper' and 'none' (which uses the given value unmodified)
allowMigrationDown
Boolean
false (true in development mode)
Prevents 'down' migrations (rollbacks)
The Migrator needs to run across multiple DB engines, it avoids direct use of varchar, as different adapters will need to use different column types etc. Therefore string translates to VARCHAR.
For instance, here's the mySQL variants:
biginteger = BIGINT UNSIGNED
binary = BLOB boolean = TINYINT',limit=1
date = DATE datetime = DATETIME
decimal = DECIMAL
float = FLOAT
integer = INT
string = VARCHAR',limit=255
text = TEXT
time = TIME
timestamp = TIMESTAMP
uuid = VARBINARY', limit=16
Whereas SQL Server would use:
primaryKey = "int NOT NULL IDENTITY (1, 1)
binary = IMAGE
boolean = BIT
date = DATETIME
datetime = DATETIME
decimal = DECIMAL
float = FLOAT
integer = INT
string = VARCHAR',limit=255
text = TEXT
time = DATETIME
timestamp = DATETIME
uniqueidentifier = UNIQUEIDENTIFIER
char = CHAR',limit=10
Wheels allows you to create layouts so that you don't need to header and footer code on every single view template.
As a red-blooded CFML developer, you're used to creating include files like header.cfm and footer.cfm, and then using <cfinclude> on every single page to include them. The popular way to do it looks something like this:
Does that mean that you should <cfinclude> your headers and footers in every view in your Wheels app? Heck no! If the structure of your pages ever changed, you would need to edit every single page on your site to make the fix.
Layouts to the rescue!
In your Wheels installation, layout files are stored either directly in the root of the views folder or contained in one of the controllers' view folders. Let's go over how layouts work, starting with the simplest way and then moving on to more complex setups.
Let's say that you want to define one layout to be used by every view in your application. You would accomplish this by editing the default layout. The default layout is the views/layout.cfm file. In a fresh install of Wheels, you'll notice that it only contains a few lines of code:
The call to Simple Example represents the output of your page generated by your view files. Whatever code you put before this snippet will be run before the view. Similarly, whatever code you put after the snippet will be run afterward
For most purposes, this means that you could write code for your page header before the snippet, and write code for the footer after. Here is a simple example of wrapping your view's content with a header and footer.
As you can see, we just wrote code that wraps every view's content with the layout. Pretty cool, huh?
Just like views in Wheels, any variable declared by your application's controller can be used within your layouts. In addition to that, any variables that you set in view templates are accessible to the layouts as well.
Notice in the above code example that there is a variable called title being output in between the <title> tags. This would require that any controller or view using this particular layout would need to set a variable named title.
To help document this, you can use <cfparam> tags at the top of your layout files. That way any developer using your layout in the future could easily see which variables need to be set by the controller.
Here's an example:
There's also a different way to set variables that goes hand in hand with the function that you may prefer. It's the function. We'll dig into how that one works later in this chapter.
One layout file that is already created for you is views/layout.cfm. Think of it as the default layout to be used by any given controller.
If you're writing code for a controller called press and there is no layout created for press, Wheels will automatically use views/layout.cfm as the layout.
If you implement a layout for the press controller, then that layout will be used instead of the default layout.
So, how exactly do you implement a layout meant specifically for just one controller? Well, that's next...
Let's pretend that you want to create a layout to be used only in a controller called blog. To do this, you would simply create the layout and save it as views/blog/layout.cfm.
As you can see, the convention is to place your layout file together with the other view files for the controller.
However, if you need to override the name of the layout file or its location in the folder structure, you can specify what layout file to use with the function in the controller's init function instead.
With that code placed in the controllers/Blog.cfc file, all actions will now wrap their contents with the bloglayoutone.cfm file instead of the layout.cfm file.
The function also accepts except, only, and useDefault arguments for further customization.
That code tells Wheels to apply the blogLayoutOne layout for any actions in this controller except for the homeaction. In the case of the home action, it will fall back to the default behavior (i.e. using the views/blog/layout.cfmfile).
If for some reason you do not want the default behavior to be used when conditions aren't met, you can set the useDefault argument to false.
You can even instruct Wheels to run a specific function that will determine the layout handling.
It's worth repeating here that everything inside the controller's config() function runs only once per application and controller. This is why you can't perform the logic that decides which layout to use directly inside the config()function itself. Instead, you tell Wheels to always run the resolveLayout function on each incoming request.
Another option for overriding layouts is to use the layout argument of the function.
As you may already know, Wheels's function is the last thing called in your actions. This function is run automatically by Wheels, so most of the time, you won't need to call it explicitly in your code.
Take a look at this example action, called display:
This assumes that you want for your action to use the layout stored at views/blog/visitorlayout.cfm.
The default behavior for the layout argument is to look for the file in the current controller's view folder, so here we're still assuming that the display action is in the blog controller. The .cfm extension will also be added automatically by Wheels, so you don't need to specifically include that part.
If you want Wheels to locate the file in a different folder, you can start the layout argument with a forward slash, /. By doing this, Wheels will know you want to start the search in the root of the views folder. Let's say that you're storing all miscellaneous layouts in its own folder, simply called layouts. You would display one of them with the following code:
Note that setting the layout argument on will override any settings you may have made with the function. This gives you finer-grained control.
If you don't want for a given template to be wrapped by a layout at all, you may want to consider creating the page as a partial. See the chapter about for more information.
Another alternative is to use the function and set the layout argument to false.
You can also create a separate layout that only contains the call to the function in it and reference it as described above in Using a Different Layout. This may end up a little ugly though if you start getting a lot of small identical files like this, but the option is there for you at least.
Lastly, if your view needs to return XML code or other data for JavaScript calls, then you should reference the and functions to see which would be best used by your action.
Like many templating languages, Wheels offers the ability to create layout files that can be "inherited" by other layout files. The end goal is to create a "parent" layout that has missing sections intended to be filled in by "child" layouts.
Wheels's approach involves the use of and the function that we mentioned briefly earlier in this chapter.
The function simply includes another layout file. The common usage for this is to include a parent layout from a child layout.
So what about the function? Well, as you may recall the code in the default layout file in Wheels contains this:
The function accepts a name argument. The reason we don't have to use it above is because it defaults to body. This body variable has been set internally in the Wheels framework code with the use of the function.
The point I'm trying to make here is that we can use this same functionality to set any type of content for, as an example, sections in our layout files. So, armed with this new knowledge, let's create some nested layout awesomeness.
Say we have a global layout and want to fill out content in it from controller specific layouts, here's how we can do it.
The child layout:
Note: If your parent file is one of the default ones named layout.cfm you can actually remove the "layout" string above since the default for is layout anyway. We're just including it here for completeness and to show that you can of course achieve this regardless of what your parent layout file is named.
The parent layout:
Similar to above, you can remove "body" because that is the default on the function.
That was a fairly basic example of how you can achieve nested layouts in Wheels to DRY up your code. You can of course expand on this by having entire sections of HTML (like a sub menu for example) be created by the child layouts. Also, as a reminder, don't forget that you can use from inside your layout files as well to further keep things DRY.
Besides having layouts for view pages in Wheels, you can also have them on emails that you send out and partial files that you include. We have chosen to speak about these in their respective chapters though: and .
<cfinclude template="/includes/header.cfm">
<p>Some page content</p>
<cfinclude template="/includes/footer.cfm"><html>
<body>
<cfoutput>#includeContent()#</cfoutput>
</body>
</html><html>
<head>
<title><cfoutput>#title#</cfoutput></title>
</head>
<body>
<div id="container">
<div id="navigation">
<ul>
<cfoutput>
<li>#linkTo(text="Home", route="main")#</li>
<li>#linkTo(text="About Us", route="about")#</li>
<li>#linkTo(text="Contact Us", route="contact")#</li>
</cfoutput>
</ul>
</div>
<div id="content">
<cfoutput>#includeContent()#</cfoutput>
</div>
</div>
</body>
</html><!--- Title is required --->
<cfparam name="title" type="string">
<cfoutput>
<html>
<head>
<title>#title#</title>
</head>
<body>
<!--- View's Content --->
<h1>#title#</h1>
#contentForLayout()#
</body>
</html>
</cfoutput>function config(){
usesLayout("blogLayoutOne");
}function config(){
usesLayout("blogLayoutOne", except="home");
}function config(){
usesLayout(name="blogLayoutOne", except="home", useDefault=false);
}function config(){
usesLayout("resolveLayout");
}
function resolveLayout(){
switch(chapter){
case "index":
break;
return "index_layout";
case "show":
return "show_layout";
break;
}
}function display(){
renderView(layout="visitorLayout");
}function display(){
renderView(layout="/layouts/plain");
}<cfoutput>#includeContent()#</cfoutput>contentFor(pageTitle="My custom title");
<cfoutput>#includeLayout("layout")#</cfoutput><html>
<head>
<title><cfoutput>#includeContent("pageTitle")#</cfoutput></title>
</head>
<body>
<cfoutput>#includeContent("body")#</cfoutput>
</body>
</html>


Instructions for upgrading CFWheels applications
CFWheels follows Semantic Versioning (http://semver.org/) so large version changes (e.g, 1.x.x -> 2.x.x) will most likely contain breaking changes which will require evaluation of your codebase. Minor version changes (e.g, 1.3.x->1.4.x) will often contain new functionality, but in a backwards-compatible manner, and maintenance releases (e.g 1.4.4 -> 1.4.5) will just be trying to fix bugs.
Generally speaking, upgrading CFWheels is as easy as replacing the wheels folder, especially for those small maintenance releases: however, there are usually exceptions in minor point releases (i.e, 1.1 to 1.3 required replacing other files outside the wheels folder). The notes below detail those changes.
Replace the wheels folder with the new one from the 2.3.0 download.
Replace the wheels folder with the new one from the 2.2.0 download.
Replace the wheels folder with the new one from the 2.1.0 download.
Rename any instances of findLast() to findLastOne()
Create /events/onabort.cfm to support the onAbort method
As always, the first step is to replace the wheels folder with the new one from the 2.0 download.
Other major changes required to upgrade your application are listed in the following sections.
CFWheels 2.0 requires one of these CFML engines:
Lucee 4.5.5.006 + / 5.2.1.9+
Adobe ColdFusion 10.0.23 / 11.0.12+ / 2016.0.4+
We've updated our minimum requirements to match officially supported versions from the vendors. (For example, Adobe discontinued support for ColdFusion 10 in May 2017, which causes it to be exposed to security exploits in the future. We've included it in 2.0 but it may be discontinued in a future version)
The events/functions.cfm file has been moved to global/functions.cfm.
The models/Model.cfc file should extend wheels.Model instead of Wheels (models/Wheels.cfc can be deleted).
The controllers/Controller.cfc file should extend wheels.Controller instead of Wheels(controllers/Wheels.cfc can be deleted).
The init function of controllers and models must be renamed to config.
The global setting modelRequireInit has been renamed to modelRequireConfig.
The global setting cacheControllerInitialization has been renamed to cacheControllerConfig.
The global setting cacheModelInitialization has been renamed to cacheModelConfig.
The global setting clearServerCache has been renamed to clearTemplateCache.
The updateProperties() method has been removed, use update() instead.
JavaScript arguments like confirm and disable have been removed from the link and form helper functions (use the JS Confirm and JS Disable plugins to reinstate the old behavior).
The renderPage function has been renamed to renderView
includePartial() now requires the partial and query arguments to be set (if using a query)
The addRoute() function has been removed in CFWheels 2.0 in favor of a new routing API. See the Routing chapter for information about the new RESTful routing system.
A limited version of the "wildcard" route ([controller]/[action]/[key]) is available as [controller]/[action]) if you use the new wildcard() mapper method:
mapper()
.wildcard()
.end();By default, this is limited to GET requests for security reasons.
It is strongly recommended that you enable CFWheels 2.0's built-in CSRF protection.
For many applications, you need to follow these steps:
In controllers/Controller.cfc, add a call to protectsFromForgery() to the config method.
Add a call to the csrfMetaTags() helper in your layouts' <head> sections.
Configure any AJAX calls that POST data to your application to pass the authenticityToken from the <meta>tags generated by csrfMetaTags() as an X-CSRF-TOKEN HTTP header.
Update your route definitions to enforce HTTP verbs on actions that manipulate data (get, post, patch, delete, etc.)
Make sure that forms within the application are POSTing data to the actions that require post, patch, and delete verbs.
See documentation for the CSRF Protection Plugin for more information.
Note: If you had previously installed the CSRF Protection plugin, you may remove it and rely on the functionality included in the CFWheels 2 core.
If you have previously been using the dbmigrate plugin, you can now use the inbuilt version within the CFWheels 2 core.
Database Migration files in /db/migrate/ should now be moved to /migrator/migrations and extend wheels.migrator.Migration, not plugins.dbmigrate.Migration which can be changed with a simple find and replace. Note: Oracle is not currently supported for Migrator.
Replace the wheels folder with the new one from the 1.4 download.
Replace URL rewriting rule files – i.e, .htaccess, web.config, IsapiRewrite.ini
In addition, if you're upgrading from an earlier version of CFWheels, we recommend reviewing the instructions from earlier reference guides below.
If you are upgrading from CFWheels 1.1.0 or newer, follow these steps:
Replace the wheels folder with the new one from the 1.3 download.
Replace the root root.cfm file with the new one from the 1.3 download.
Remove the <cfheader> calls from the following files:
events/onerror.cfm
events/onmaintenance.cfm
events/onmissingtemplate.cfm
In addition, if you're upgrading from an earlier version of CFWheels, we recommend reviewing the instructions from earlier reference guides below.
Note: To accompany the newest 1.1.x releases, we've highlighted the changes that are affected by each release in this cycle.
If you are upgrading from Wheels 1.0 or newer, the easiest way to upgrade is to replace the wheels folder with the new one from the 1.1 download. If you are upgrading from an earlier version, we recommend reviewing the steps outlined in Upgrading to Wheels 1.0.
Note: To accompany the newest 1.1.x releases, we've highlighted the changes that are affected by each release in this cycle.
Be sure to review your plugins and their compatibility with your newly-updated version of Wheels. Some plugins may stop working, throw errors, or cause unexpected behavior in your application.
1.1: The minimum Adobe ColdFusion version required is now 8.0.1.
1.1: The minimum Railo version required is now 3.1.2.020.
1.1: The H2 database engine is now supported.
1.1: The .htaccess file has been changed. Be sure to copy over the new one from the new version 1.1 download and copy any addition changes that you may have also made to the original version.
1.1: By default, Wheels 1.1 will wrap database queries in transactions. This requires that your database engine supports transactions. For MySQL in particular, you can convert your MyISAM tables to InnoDB to be compatible with this new functionality. Otherwise, to turn off automatic transactions, place a call to set(transactionMode="none").
1.1: Binary data types are now supported.
Model Code
1.1: Validations will be applied to some model properties automatically. This may cause unintended behavior with your validations. To turn this setting off, call set(automaticValidations=false) in config/settings.cfm.
1.1: The class argument in hasOne(), hasMany(), and belongsTo() has been deprecated. Use the modelName argument instead.
1.1: afterFind() callbacks no longer require special logic to handle the setting of properties in objects and queries. (The "query way" works for both cases now.) Because arguments will always be passed in to the method, you can't rely on StructIsEmpty() to determine if you're dealing with an object or not. In the rare cases that you need to know, you can now call isInstance() or isClass() instead.
1.1: On create, a model will now set the updatedAt auto-timestamp to the same value as the createdAt timestamp. To override this behavior, call set(setUpdatedAtOnCreate=false) in config/settings.cfm.
View Code
1.1: Object form helpers (e.g. textField() and radioButton()) now automatically display a label based on the property name. If you left the label argument blank while using an earlier version of Wheels, some labels may start appearing automatically, leaving you with unintended results. To stop a label from appearing, use label=false instead.
1.1: The contentForLayout() helper to be used in your layout files has been deprecated. Use the includeContent() helper instead.
1.1: In production mode, query strings will automatically be added to the end of all asset URLs (which includes JavaScript includes, stylesheet links, and images). To turn off this setting, call set(assetQueryString=false) in config/settings.cfm.
1.1: stylesheetLinkTag() and javaScriptIncludeTag() now accept external URLs for the source/sources argument. If you manually typed out these tags in previous releases, you can now use these helpers instead.
1.1: flashMessages(), errorMessageOn(), and errorMessagesFor() now create camelCased class attributes instead (for example error-messages is now errorMessages). The same goes for the class attribute on the tag that wraps form elements with errors: it is now fieldWithErrors.
Controller Code
1.1.1: The if argument in all validation functions is now deprecated. Use the condition argument instead.
Our listing of steps to take while upgrading your Wheels application from earlier versions to 1.0.x.
Upgrading from an earlier version of 1.x? Then the upgrade path is simple. All you need to do is replace the wheels folder with the new wheels folder from the download.
The easiest way to upgrade is to setup an empty website, deploy a fresh copy of Wheels 1.0, and then transfer your application code to it. When transferring, please make note of the following changes and make the appropriate changes to your code.
Note: To accompany the newest 1.0 release, we've highlighted the changes that are affected by that release.
1.0: URL rewriting with IIS 7 is now supported.
1.0: URL rewriting in a sub folder on Apache is now supported.
ColdFusion 9 is now supported.
Oracle 10g or later is now supported.
PostgreSQL is now supported.
Railo 3.1 is now supported.
1.0: There is now an app.cfm file in the config folder. Use it to set variables that you'd normally set in Application.cfc (i.e., this.name, this.sessionManagement, this.customTagPaths, etc.)
1.0: There is now a web.config file in the root.
1.0: There is now a Wheels.cfc file in the models folder.
1.0: The Wheels.cfc file in the controllers folder has been updated.
1.0: The IsapiRewrite4.ini and .htaccess files in the root have both been updated.
The controller folder has been changed to controllers.
The model folder has been changed to models.
The view folder has been changed to views.
Rename all of your CFCs in models and controllers to UpperCamelCase. So controller.cfc will become Controller.cfc, adminUser.cfc will become AdminUser.cfc, and so on.
All images must now be stored in the images folder, files in the files folder, JavaScript files in the javascripts folder, and CSS files in the stylesheets folder off of the root.
deletedOn, updatedOn, and createdOn are no longer available as auto-generated fields. Please change the names to deletedAt, updatedAt, and createdAt instead to get similar functionality, and make sure that they are of type datetime, timestamp, or equivalent.
Config Code
1.0: The action of the default route (home) has changed to wheels. The way configuration settings are done has changed quite a bit. To change a Wheels application setting, use the new set() function with the name of the Wheels property to change. (For example, <cfset set(dataSourceName="mydatasource")>.) To see a list of available Wheels settings, refer to the Configuration and Defaults chapter. Model Code
1.0: The extends attribute in models/Model.cfc should now be Wheels.
findById() is now called findByKey(). Additionally, its id argument is now named key instead. For composite keys, this argument will accept a comma-delimited list.
When using a model's findByKey() or findOne() functions, the found property is no longer available. Instead, the functions return false if the record was not found.
A model's errorsOn() function now always returns an array, even if there are no errors on the field. When there are errors for the field, the array elements will contain a struct with name, fieldName, and message elements.
The way callbacks are created has changed. There is now a method for each callback event ( beforeValidation(), beforeValidationOnCreate(), etc.) that should be called from your model's init() method. These methods take a single argument: the method within your model that should be invoked during the callback event. See the chapter on Object Callbacks for an example.
View Code
1.0: The contents of the views/wheels folder have been changed.
The wrapLabel argument in form helpers is now replaced with labelPlacement. Valid values for labelPlacement are before, after, and around.
The first argument for includePartial() has changed from name to partial. If you're referring to it through a named argument, you'll need to replace all instances with partial.
The variable that keeps a counter of the current record when using includePartial() with a query has been renamed from currentRow to current.
There is now an included wheels view folder in views. Be sure to copy that into your existing Wheels application if you're upgrading.
The location of the default layout has changed. It is now stored at /views/layout.cfm. Now controller-specific layouts are stored in their respective view folder as layout.cfm. For example, a custom layout for www.domain.com/about would be stored at /views/about/layout.cfm.
In linkTo(), the id argument is now called key. It now accepts a comma-delimited list in the case of composite keys.
The linkTo() function also accepts an object for the key argument, in which case it will automatically extract the keys from it for use in the hyperlink.
The linkTo() function can be used only for controller-, action-, and route-driven links now. * The url argument has been removed, so now all static links should be coded using a standard "a" tag.
Controller Code
1.0: The extends attribute in controllers/Controller.cfc should now be Wheels. Multiple-word controllers and actions are now word-delimited by hyphens in the URL. For example, if your controller is called SiteAdmin and the action is called editLayout, the URL to access that action would be http://www.domain.com/site-admin/edit-layout.
The default route for Wheels has changed from [controller]/[action]/[id] to [controller]/[action]/[key]. This is to support composite keys. The params.id value will now only be available as params.key.
You can now pass along composite keys in the URL. Delimit multiple keys with a comma. (If you want to use this feature, then you can't have a comma in the key value itself).
Make your model calls more readable by using dynamic finders.
Since the introduction of onMissingMethod() in CFML, we have been able to port over the concept of _dynamic finders_from Rails to CFWheels.
The concept is simple. Instead of using arguments to tell CFWheels what you want to do, you can use a dynamically-named method.
For example, the following code:
me = model("user").findOne(where="email='[email protected]'");Can also be written as:
me = model("user").findOneByEmail("[email protected]");Through the power of onMissingMethod(), CFWheels will parse the method name and figure out that the value supplied is supposed to be matched against the email column.
You can take this one step further by using code such as:
me = model("user").findOneByUserNameAndPassword("bob,pass");In this case, CFWheels will split the function name on the And part and determine that you want to find the record where the username column is "bob" and the password column is "pass".
When you are passing in two values, make special note of the fact that they should be passed in as a list to one argument and not as two separate arguments.
In the examples above, we've used the findOne() method, but you can use the same approach on a findAll() method as well.
In the background, these dynamically-named methods just pass along execution to findOne() or findAll(). This means that you can also pass in any arguments that are accepted by those two methods.
The below code, for example, is perfectly valid:
users = model("user").findAllByState(value="NY", order="name", page=3);When passing in multiple arguments like above, you have to start naming them instead of relying on the order of the arguments though. When doing so, you need to name the argument value if you're passing in just one value and values if you're passing in multiple values in a list. In other words, you need to name it values when calling an Andtype dynamic finder.
users = model("user").findAllByCityAndState(
values="Buffalo,NY", order="name", page=3
);Keep in mind that this dynamic method calling will break down completely if you ever name a column firstandlastname or something similar because CFWheels will then split the method name incorrectly. So avoid using "And" in the column name if you plan on taking advantage of dynamically-named finder methods.
These are the commands in the wheels generate namespace. These commands are called by some of the top level commands but you can use them directly to speed up your development process.
wheels generateThe wheels generate command is what CommandBox calls a namespace and contains many sub commands beneath it. It's main purpose is to isolate those sub commands so there is no name collisions. It also has an alias of wheels g which allows you to shorten the commands you have to type. However, we have opted to show all the commands with their full names in the list below.
wheels generate app-wizardCreates a new CFWheels application using our wizard to gather all the necessary information. This is the recommended route to start a new application.
This command will ask for:
An Application Name (a new directory will be created with this name)
Template to use
A reload Password
A datasource name
What local cfengine you want to run
If using Lucee, do you want to setup a local h2 dev database
Do you want to initialize the app as a ForgeBox module
All these three commands are equivalent and will call the same wizard. The wizard in turn gathers all the required data and passes it all off to the wheels generate app command to do all the heavy lifting.
Let's take a look at the wizard pages after issuing the wheels new command:
You can accept the name offered or change it to whatever name you like. We try to clean up the name and take out special characters and spaces if we need to.
You can select a template to use. If you are reading this before CFWheels 2.4 is released you may want to select the Bleeding Edge Base Template.
You can set what you want to use as your reload password or accept the default. Please make sure to change this before you go into production. Ideally this should be kept out of your source repository by using something like the (CFWheels DotEnvSettings Plugin)[].
The datasource is something you'll have to take care of unless you opt to use the H2 Embedded database in a Lucee server. Here you can define the datasource name if you would like to use something different than the application name.
In this step you can choose what CF Engine and version to launch. Lucee has an embedded SQL compliant database server called H2. So if you use one of the Lucee options you can specify to use the H2 database as well. Notice the last item allows you to specify the module slug or URI to a CF Engine not on the list.
On this step you are asked if you'd like to use the H2 Database, in which case we can set everything up for you, or if you would prefer to use another database engine and will take care of setting up the database yourself.
On this last step, you are asked if you want us to include a box.json file so you can eventually submit this to ForgeBox.io for sharing with he world.
This is the confirmation screen that shows all the choices you've made and gives you one last chance to bail out. If you choose to continue, the choices you've made will be sent over to the wheels g app command to do the actual app creation.
If you opted to continue you'll see a bunch of things scroll across your screen as the various items are downloaded and configured. Eventually you will see this status screen letting you know that everything was installed properly.
wheels generate appCreate a blank CFWheels app from one of our app templates or a template using a valid Endpoint ID which can come from ForgeBox, HTTP/S, git, github, etc.
By default an app named MyCFWheelsApp will be created in a sub directory called MyCFWheelsApp.
The most basic call...
This can be shortened to...
Here are the basic templates that are available for you that come from ForgeBox
CFWheels Base Template - Stable (default)
CFWheels Base Template - Bleeding Edge
CFWheels Template - HelloWorld
CFWheels Template - HelloDynamic
CFWheels Template - HelloPages
CFWheels Example App
CFWheels - TodoMVC - HTMX - Demo App
The template parameter can also be any valid Endpoint ID, which includes a Git repo or HTTP URL pointing to a package. So you can use this to publish your own templates to use to start new projects.
wheels generate routeAdds a default resources Route to the routes table. All the normal CRUD routes are automatically added.
wheels generate controllerI generate a controller in the controllers/ directory. You can either pass in a list of actions to stub out or the standard CRUD methods will be generated.
Create a user controller with full CRUD methods
Create a user object with just "index" and "customaction" methods
wheels generate modelThis command generates a model in the models/ folder and creates the associated DB Table using migrations.
Create "users" table and "User.cfc" in models:
Create just "User.cfc" in models:
wheels generate propertyThis command generates a dbmigration file to add a property to an object and scaffold into _form.cfm and show.cfm if they exist (i.e, wheels generate property table columnName columnType).
Create the a string/textField property called firstname on the User model:
Create a boolean/Checkbox property called isActive on the User model with a default of 0:
Create a boolean/Checkbox property called hasActivated on the User model with a default of 1 (i.e, true):
Create a datetime/datetimepicker property called lastloggedin on the User model:
All columnType options: biginteger,binary,boolean,date,datetime,decimal,float,integer,string,limit,text,time,timestamp,uuid
wheels generate viewThis command generates a view file in the views/ directory when specifying the object name and the action. If a directory for the object does not exist a subdirectory will be created in the views/ directory and the action NAME.cfm file place into it.
Create a default file called show.cfm without a template
Create a default file called show.cfm using the default CRUD template
wheels generate testThis command generates a test stub in /test/TYPE/NAME.cfc.
Wheels utilizes validation setup within the model to enforce appropriate data constraints and persistence. Validation may be performed for saves, creates, and updates.
In order to establish the full cycle of validation, 3 elements need to be in place:
Model file containing business logic for the database table. Example: models/User.cfc
Controller file for creating, saving or updating a model instance. Example: controllers/Users.cfc
View file for displaying the original data inputs and an error list. Example: views/users/index.cfm
Note: Saving, creating, and updating model objects can also be done from the model file itself (or even in the view file if you want to veer completely off into the wild). But to keep things simple, all examples in this chapter will revolve around code in the controller files.
Validations are always defined in the config() method of your model. This keeps everything nice and tidy because another developer can check config() to get a quick idea on how your model behaves.
Let's dive right into a somewhat comprehensive example:
This is fairly readable on its own, but this example defines the following rules that will be run before a create, update, or save is called:
The firstName, lastName, email, age, and password fields must be provided, and they can't be blank.
At maximum, firstName and lastName can each be up to 50 characters long.
The value provided for email cannot already be used in the database.
The value for age can only be an integer.
password must be provided twice, the second time via a field called passwordConfirmation.
If any of these validations fail, Wheels will not commit the create or update to the database. As you'll see later in this chapter, the controller should check for this and react accordingly by showing error messages generated by the model.
Now that you have a good understanding of how validations work in the model, here is a piece of good news. By default, Wheels will perform many of these validations for you based on how you have your fields set up in the database.
By default, these validations will run without your needing to set up anything in the model:
Fields set to NOT NULL will automatically trigger .
Numeric fields will automatically trigger .
Date or time fields will be checked for the appropriate format.
Fields that have a maximum length will automatically trigger .
Note these extra behaviors as well:
Automatic validations will not run for .
If you've already set a validation on a particular property in your model, the automatic validations will be overridden by your settings.
If your database column provides a default value for a given field, Wheels will not enforce a rule on that property.
To disable automatic validations in your Wheels application, change this setting in config/settings.cfm:
You can also turn on or off the automatic validations on a per model basis by calling the method from a model's config() method.
See the chapter on for more information on available Wheels ORM settings.
If you want to limit the scope of the validation, you have 3 arguments at your disposal: when, condition, and unless.
The when argument accepts 3 possible values.
onSave (the default)
onCreate
onUpdate
To limit our email validation to run only on create, we would change that line to this:
condition and unless provide even more flexibility when the when argument isn't specific enough for your validation's needs.
Each argument accepts a string containing an expression to evaluate. condition specifies when the validation should be run. unless specifies when the validation should not be run.
As an example, let's say that the model should only verify a CAPTCHA if the user is logged out, but not when they enter their name as "Ben Forta":
At the end of the listing above are 3 custom validation functions: , , and . These functions allow you to create your own validation rules that aren't covered by Wheels's out-of-the-box functions.
There is only one difference between how the different functions work:
runs on the save event, which happens on both create and update.
runs on create.
runs on update.
To use a custom validation, we pass one of these functions a method or set of methods to run:
We then should create a method called validateEmailFormat, which in this case would verify that the value set for this.email is in the proper format. If not, then the method sets an error message for that field using the function.
Note that IsValid() is a function build into your CFML engine.
This is a simple rule, but you can surmise that this functionality can be used to do more complex validations as well. It's a great way to isolate complex validation rules into separate methods of your model.
We've mainly focused on adding error messages at a property level, which admittedly is what you'll be doing 80% of the time. But we can also add messages at the model object level with the function.
As an example, here's a custom validation method that doesn't allow the user to sign up for an account between the hours of 3:00 and 4:00 am in the server's time zone:
Sure, we could add logic to the view to also not show the registration form, but this validation in the model would make sure that data couldn't be posted via a script between those hours as well. Better safe than sorry if you're running a public-facing application!
The controller continues with the simplicity of validation setup, and at the most basic level requires only 5 lines of code to persist the form data or return to the original form page to display the list of errors.
The first line of the action creates a newUser based on the user model and the form inputs (via the params struct).
Now, to persist the object to the database, the model's call can be placed within a <cfif> test. If the save succeeds, the method will return true, and the contents of the <cfif> will be executed. But if any of the validations set up in the model fail, the method returns false, and the <cfelse> will execute.
The important step here is to recognize that the <cfelse> renders the original form input page using the function. When this happens, the view will use the newUser object defined in our method. If a were used instead, the validation information loaded in our method would be lost.
Wheels factors out much of the error display code that you'll ever need. As you can see by this quick example, it appears to mainly be a normal form. But when there are errors in the provided model, Wheels will apply styles to the erroneous fields.
The biggest thing to note in this example is that a field called passwordConfirmation was provided so that the validation in the model can be properly tested.
For more information on how this code behaves when there is an error, refer to the chapter.
For your reference, here are the default error message formats for the different validation functions:
Wheels models provide a set of sensible defaults for validation errors. But sometimes you may want to show something different than the default.
There are 2 ways to accomplish this: through global defaults in your config files or on a per-property basis.
Using basic global defaults for the validation functions, you can set error messages in your config file at config/settings.cfm.
As you can see, you can inject the property's name by adding [property] to the message string. Wheels will automatically separate words based on your camelCasing of the variable names.
Another way of adding a custom error message is by going into an individual property in the model and adding an argument named message.
Here's a change that we may apply in the config() method of our model:
component extends="Model" output="false" {
function config() {
validatesPresenceOf(
properties="firstName,lastName,email,age,password"
);
validatesLengthOf(properties="firstName,lastName", maximum=50);
validatesUniquenessOf(property="email");
validatesNumericalityOf(property="age", onlyInteger=true);
validatesConfirmationOf(property="password");
}
}set(automaticValidations=false);validatesUniquenessOf(property="email", when="onCreate");validate(
method="validateCaptcha",
condition="not isLoggedIn()",
unless="this.name is 'Ben Forta'"
);validate(method="validateEmailFormat");private function validateEmailFormat() {
if ( !IsValid("email", this.email) ) {
addError(property="email", message="Email address != in a valid format.");
}
}private function disallowMaintenanceWindowRegistrations() {
local.hourNow = DatePart("h", Now());
if ( local.hourNow >= 3 && local.hourNow < 4 ) {
local.timeZone = CreateObject("java", "java.util.TimeZone").getDefault();
addErrorToBase(
message="We're sorry, but we don't allow new registrations between
the hours of 3:00 && 4:00 am #local.timeZone#."
);
}
}component extends="Controller" {
public function save() {
// User model from form fields via params
newUser = model("user").new(params.newUser);
// Persist new user
if ( newUser.save() ) {
redirectTo(action="success");
// Handle errors
} else {
renderView(action="index");
}
}
}<cfoutput>
#errorMessagesFor("newUser")#
#startFormTag(action="save")#
#textField(label="First Name", objectName="newUser", property="nameFirst")#
#textField(label="Last Name", objectName="newUser", property="nameLast")#
#textField(label="Email", objectName="newUser", property="email")#
#textField(label="Age", objectName="newUser", property="age")#
#passwordField(label="Password", objectName="newUser", property="password")#
#passwordField(
label="Re-type Password to Confirm", objectName="newUser",
property="passwordConfirmation"
)#
#submitTag()#
#endFormTag()#
</cfoutput>validatesConfirmationOf()
[property] should match confirmation
validatesExclusionOf()
[property] is reserved
validatesFormatOf()
[property] is invalid
validatesInclusionOf()
[property] is not included in the list
validatesLengthOf()
[property] is the wrong length
validatesNumericalityOf()
[property] is not a number
validatesPresenceOf()
[property] can't be empty
validatesUniquenessOf()
[property] has already been taken
set(functionName="validatesPresenceOf", message="Please provide a value for [property]");validatesNumericalityOf(
property="email",
message="Email address is already in use in another account"
);wheels new
wheels g app-wizard
wheels generate app-wizardwheels generate appwheels g appwheels create app template=basewheels create app template=http://site.com/myCustomAppTemplate.zipname
false
MyCFWheelsApp
The name of the app you want to create
template
false
base template
The name of the app template to use
directory
false
mycfwheelsapp/
The directory to create the app in
reloadPassword
false
ChangeMe
The reload password to set for the app
datasourceName
false
MyCFWheelsApp
The datasource name to set for the app
cfmlEngine
false
Lucee
The CFML engine to use for the app
setupH2
false
false
Setup the H2 database for development
init
false
false
"init" the directory as a package if it isn't already
force
false
false
Force installation into an none empty directory
wheels generate route [objectname]objectname
true
The name of the resource to add to the routes table
wheels generate controller userwheels generate controller user index,customactionname
true
Name of the controller to create without the .cfc
actionList
false
optional list of actions, comma delimited
directory
false
if for some reason you don't have your controllers in controllers/
wheels generate model userwheels generate model user falsename
true
Name of the model to create without the .cfc: assumes singular
db
false
Boolean attribute specifying if the database table should be generated as well
wheels generate property user firstnamewheels generate property user isActive booleanwheels generate property user isActive boolean 1wheels generate property user lastloggedin datetimename
true
Table Name
columnName
false
Name of Column
columnType
false
Type of Column on of biginteger, binary, boolean, date, datetime, decimal, float,integer, string, limit, text, time, timestamp, uuid
default
false
Default Value for column
null
false
Whether to allow null values
limit
false
character or integer size limit for column
precision
false
precision value for decimal columns, i.e. number of digits the column can hold
scale
false
scale value for decimal columns, i.e. number of digits that can be placed to the right of the decimal point (must be less than or equal to precision)
wheels generate view user showwheels generate view user show crud/showobjectname
true
View path folder, i.e user
name
true
Name of the file to create, i.e, edit
template
false
template (used in Scaffolding) - options crud/_form,crud/edit,crud/index,crud/new,crud/show
wheels generate test model userwheels generate test controller userswheels generate test view users edittype
true
Type of test to generate. Options are model, controller, and view
objectname
true
View path folder or name of object, i.e user
name
true
Name of the action/view


CFWheels does some magic to help you link to other pages within your app. Read on to learn why you'll rarely use an <a> tag ever again.
CFWheels's built-in linkTo() function does all of the heavy lifting involved with linking the different pages of your application together. You'll generally be using linkTo() within your view code.
As you'll soon realize, the linkTo() function accepts a whole bunch of arguments. We won't go over all of them here, so don't forget to have a look at the documentation for the complete details.
When installing CFWheels, if you open the file at config/routes.cfm, you'll see something like this:
mapper()
.wildcard()
.root(to="wheels##wheels", method="get")
.end();The call to wildcard() allows a simple linking structure where we can use the linkTo() helper to link to a combination of controller and action.
For example, if we had a widgets controller with a new action, we could link to it like this:
#linkTo(text="New Widget", controller="widgets", action="new")#That would generally produce this HTML markup:
<a href="/widgets/new">New Widget</a>If you're developing a non-trivial CFWheels application, you'll quickly grow out of the wildcard-based routing. You'll likely need to link to URLs containing primary keys, URL-friendly slugged titles, and nested subfolders. Now would be a good time to take a deep dive into the Routing chapter and learn the concepts.
When you're using linkTo() to create links to routes, you need to pay attention to 2 pieces of information: the route name and any parameters that the route requires.
Let's work with a set of sample routes to practice creating links:
mapper()
.get(name="newWidget", pattern="widgets/new", to="widgets##new")
.get(name="widget", pattern="widgets/[key]", to="widgets##show")
.get(name="widgets", to="widgets##index")
.root(to="wheels##wheels")
.end();With this in place, we can load the webroot of our application and click the "View Routes" link in the debugging footer to get a list of our routes. You'll see information presented similarly to this:
newWidget
GET
/widgets/new
widgets
new
widget
GET
/widgets/[key]
widgets
show
widgets
GET
/widgets
widgets
index
(As you become more experienced, you'll be able look at routes.cfm and understand what the names and parameters are. Of course, this View Routes functionality is a great tool too.)
If we want to link to the routes named newWidget and widgets, it's fairly simple:
#linkTo(text="All Widgets", route="widgets")#
#linkTo(text="New Widget", route="newWidget")#As you can see, you create links by calling a method with the route name passed into the route argument. That will generate these links:
<a href="/widgets">All Widgets</a>
<a href="/widgets/new">New Widget</a>The widget route requires an extra step because it has that [key] parameter in its pattern. You can pass that parameter into linkTo as a named argument:
#linkTo(text="The Fifth Widget", route="widget", key=5)#That will produce this markup:
<a href="/widgets/5">The Fifth Widget</a>If you have a route with multiple parameters, you must pass all of the placeholders as arguments:
<!--- config/routes.cfm --->
<cfscript>
mapper()
.get(
name="widgetVariation",
pattern="widgets/[widgetKey]/variations/[key].[format]",
to="widgetVariations##show"
)
.end();
</cfscript>
<!--- View file --->
<cfoutput>
#linkTo(
text="A fine variation (PDF)",
route="widgetVariation",
widgetKey=5,
key=20
format="pdf"
)#
</cfoutput>
<!--- HTML generated --->
<a href="/widgets/5/variations/20.pdf">A fine variation (PDF)</a>Resources are the encouraged routing pattern in CFWheels, and you will likely find yourself using this type of route most often.
Once you setup a resource in config/routes.cfm, the key is to inspect the routes generated and get a feel for the names and parameters that are expected.
Consider this sample posts resource:
mapper()
.resources("posts")
.end();We would see these linkable routes generated related to the posts. (See the chapter on Form Helpers and Showing Errors for information about posting forms to the rest of the routes.)
posts
GET
/posts
posts
index
newPost
GET
/posts/new
posts
new
editPost
GET
/posts/[key]/edit
posts
edit
post
GET
/posts/[key]
posts
show
If we wanted to link to the various pages within that resource, we may write something like this on the index:
<nav class="global-nav">
#linkTo(text="All Posts", route="posts")#
</nav>
<h1>Posts</h1>
<p>
#linkTo(text="New Post", route="newPost")#
</p>
<ul>
<cfloop query="posts">
<li>
#linkTo(text=posts.title, route="post", key=posts.id)#
[#linkTo(text="Edit", route="editPost", key=posts.id)#]
</li>
</cfloop>
</ul>The above code would generate markup like this:
<nav class="global-nav">
<a href="/posts">All Posts</a>
</nav>
<h1>Posts</h1>
<p>
<a href="/posts/new">New Post</a>
</p>
<ul>
<li>
<a href="/posts/1">Some Title</a>
[<a href="/posts/1/edit">Edit</a>]
</li>
</ul>The Routing chapter lists your options for generating URLs that are available in your application. Following is an explanation of how to link to the various types of routes available.
Namespaces will generally add the namespace name to the beginning of the route.
Consider this namespace:
mapper()
.namespace("admin")
.resources("roles")
.end()
.end();To link to the roles resource, you would prefix it with the namespace name:
#linkTo(name="List Roles", route="adminRoles")#
#linkTo(text=role.title, route="adminRole", key=role.key())#However, new and edit routes add the action name to the beginning of the route name:
#linkTo(text="New Role", route="newAdminRole")#
#linkTo(text="Edit Role", route="editAdminRole", key=role.key())#You have the ability to nest a resource within a resource like so:
mapper()
.resources(name="websites", nested=true)
.resources("pages")
.end()
.end();To link to the pages resource, you add the parent resource's singular name first (e.g., the parent website is added, making the route name websitePage):
<!---
Also notice that the parent route's primary key parameter is
`websiteKey`:
--->
#linkTo(text="All Pages", route="websitePages", websiteKey=website.key())#
#linkTo(text="New Page", route="newWebsitePage", websiteKey=website.key())#
<!--- And the child resource's primary key parameter is `key`: --->
#linkTo(
text="Show Page",
route="websitePage",
websiteKey=website.key(),
key=page.key()
)#
#linkTo(
text="Edit Page",
route="editWebsitePage",
websiteKey=website.key(),
key=page.key()
)#CFWheels 2.0 introduced security improvements for actions that change data in your applications (i.e., creating, updating, and deleting database records). CFWheels protects these actions by requiring that they happen along with a form POST in the browser.
A common UI pattern is to have a link to delete a record, usually in an admin area. Unfortunately, links can only trigger GET requests, so we need to work around this.
To link to a delete request's required DELETE method, we need to code the link up as a simple form with submit button:
#buttonTo(
text="Delete",
route="category",
key=category.key(),
method="delete",
inputClass="button-as-link"
)#The buttonTo() helper generates a form with submit button. As you can see from the example, you can style the submit button itself by prepending any arguments with input (e.g., inputClass).
Then it is up to you to style the form and submit button to look like a link or button using CSS (using whatever classes that you prefer in your markup, of course).
If you need even more control, you can code up your own startFormTag() with whatever markup that you like. Just be sure to pass method="delete" to the call to startFormTag.
By the way, this will work with any request method that you please: post, patch, and put as well as delete.
If we were to use all of the parameters for linkTo(), our code may look something like this:
#linkTo(
text='<i class="rock-fist"></i> CFWheels Rocks!',
route="cfwheelsRocks",
key=55,
params="rocks=yes&referral=cfwheels.org",
anchor="rockin",
host="www.example.co.uk",
protocol="https",
onlyPath=false,
encode="attributes"
)#Which would generate this HTML (or something like it):
<a href="https://www.example.co.uk/cfwheels/rocks/55?rocks=yes&amp;referral=cfwheels.org#rockin"><i class="rock-fist"></i> CFWheels Rocks!</a>If you'd like to use an image as a link to another page, pass the output of imageTag() to the text argument of linkTo()and use the encode argument to instruct linkTo to only encode attributes:
#linkTo(
text=imageTag(source="authors.jpg"),
route="blogAuthors",
encode="attributes"
)#You can also use your CFML engine's built-in string interpolation to embed other HTML into the link text in a fairly readable manner:
#linkTo(
text='<i class="fa fa-user"></i> #EncodeForHtml(employees.fullName)#',
route="employee",
key=employees.id,
encode="attributes"
)#Security Notice
If you decide to opt out of encoding, be careful. Any dynamic data passed in to un-encoded values should be escaped manually using your CFML engine's EncodeForHtml() function.
Like many of the other CFWheels view helpers, any additional arguments that you pass to linkTo() will be added to the generated <a> tag as attributes.
For example, if you'd like to add a class attribute value of button to your link, here's what the call to linkTo() would look like:
#linkTo(text="Check Out", route="checkout", class="button")#The same goes for any other argument that you pass, including but not limited to id, rel, onclick, etc.
CFWheels will handle linking to pages without URL rewriting for you automatically. Let's pretend that you still have CFWheels installed in your site root, but you do not have URL rewriting on. How you write your linkTo() call will not change:
#linkTo(
text="This link isn't as pretty, but it still works",
route="product",
key=product.key()
)#CFWheels will still correctly build the link markup:
<a href="/index.cfm/products/3">This link isn't as pretty, but it still works</a>The same would be true if you had CFWheels installed in a subfolder, thus perhaps eliminating your ability to use URL Rewriting (depending on what web server you have). The same linkTo() code above may generate this HTML if you had CFWheels installed in a subfolder called foo:
<a
href="/foo/index.cfm?route=product&key=3">
This link isn't as pretty, but it still works
</a>An <a> tag is easy enough, isn't it? Why would we need to use a function to do this mundane task? It turns out that there are some advantages. Here's the deal.
CFWheels gives you a good amount of structure for your applications. With this, instead of thinking of URLs in the "old way," we think in terms of what route we're sending the user to.
What's more, CFWheels is smart enough to build URLs for you. And it'll do this for you based on your situation with URL rewriting. Are you using URL rewriting in your app? Great. CFWheels will build your URLs accordingly. Not fortunate enough to have URL rewriting capabilities in your development or production environments? That's fine too because CFWheels will handle that automatically. Are you using CFWheels in a subfolder on your site, thus eliminating your ability to use URL rewriting? CFWheels handles that for you too.
If you see the pattern, this gives your application a good deal of portability. For example, you could later enable URL rewriting or move your application to a different subfolder. As long as you're using linkTo() to build your links, you won't need to change anything extra to your code in order to accommodate this change.
Lastly, if you later install a plugin that needs to modify link markup, that plugin's hook is the linkTo() helper.
Oh, and another reason is that it's just plain cool too. ;)
A quick tutorial that demonstrates how quickly you can get database connectivity up and running with CFWheels.
CFWheels's built in model provides your application with some simple and powerful functionality for interacting with databases. To get started, you will make some simple configurations, call some functions within your controllers, and that's it. Best yet, you will rarely ever need to write SQL code to get those redundant CRUD tasks out of the way.
We'll learn by building part of a sample user management application. This tutorial will teach you the basics of setting up a resource that interacts with the CFWheels ORM.
By default, CFWheels will connect to a data source that has the same name as the folder containing your application. So if your application is in a folder called C:\websites\mysite\blog\, then it will connect to a data source named blog.
To change this default behavior, open the file at config/settings.cfm. In a fresh install of CFWheels, you'll see some commented-out lines of code that read as such:
Uncomment the lines that tell CFWheels what it needs to know about the data source and provide the appropriate values. This may include values for dataSourceName, dataSourceUserName, and dataSourcePassword.
CFWheels supports MySQL, SQL Server, PostgreSQL, and H2. It doesn't matter which DBMS you use for this tutorial; we will all be writing the same CFML code to interact with the database. CFWheels does everything behind the scenes that needs to be done to work with each DBMS.
That said, here's a quick look at a table that you'll need in your database, named users:
Note a couple things about this users table:
The table name is plural.
The table has an auto-incrementing primary key named id.
These are database used by CFWheels. This framework strongly encourages that everyone follow convention over configuration. That way everyone is doing things mostly the same way, leading to less maintenance and training headaches down the road.
Fortunately, there are ways of going outside of these conventions when you really need it. But let's learn the conventional way first. Sometimes you need to learn the rules before you can know how to break them.
Next, open the file at config/routes.cfm. You will see contents similar to this:
We are going to create a section of our application for listing, creating, updating, and deleting user records. In CFWheels routing, this requires a plural resource, which we'll name users.
Because a users resource is more specific than the "generic" routes provided by CFWheels, we'll list it first in the chain of mapper method calls:
This will create URL endpoints for creating, reading, updating, and deleting user records:
Name is referenced in your code to tell CFWheels where to point forms and links.
Method is the HTTP verb that CFWheels listens for to match up the request.
URL Path is the URL that CFWheels listens for to match up the request.
First, let's create a simple form for adding a new user to the users table. To do this, we will use CFWheels's form helper functions. CFWheels includes a whole range of functions that simplifies all of the tasks that you need to display forms and communicate errors to the user.
Now create a new file in views/users called new.cfm. This will contain the view code for our simple form.
Next, add these lines of code to the new file:
What we've done here is use form helpers to generate all of the form fields necessary for creating a new user in our database. It may feel a little strange using functions to generate form elements, but it will soon become clear why we're doing this. Trust us on this one… you'll love it!
To generate the form tag's action attribute, the function takes parameters similar to the function that we introduced in the Beginner Tutorial: Hello World tutorial. We can pass in controller, action, key, and other route- and parameter-defined URLs just like we do with .
To end the form, we use the function. Easy enough.
The and helpers are similar. As you probably guessed, they create <input> elements with type="text" and type="password", respectively. And the function creates an <input type="submit" /> element.
One thing you'll notice is the and functions accept arguments called objectName and property. As it turns out, this particular view code will throw an error because these functions are expecting an object named user. Let's fix that.
All of the form helper calls in our view specify an objectName argument with a reference to a variable named user. That means that we need to supply our view code with an object called user. Because the controller is responsible for providing the views with data, we'll set it there.
Create a new ColdFusion component at controllers/Users.cfc.
As it turns out, our controller needs to provide the view with a blank user object (whose instance variable will also be called user in this case). In our new action, we will use the function to generate a new instance of the user model.
To get a blank set of properties in the model, we'll also call the generated model's method.
CFWheels will automatically know that we're talking about the users database table when we instantiate a usermodel. The convention: database tables are plural and their corresponding CFWheels models are singular.
Why is our model name singular instead of plural? When we're talking about a single record in the users database, we represent that with an individual model object. So the users table contains many user objects. It just works better in conversation.
Now when we run the URL at http://localhost/users/new, we'll see the form with the fields that we defined.
The HTML generated by your application will look something like this:
So far we have a fairly well-formed, accessible form, without writing a bunch of repetitive markup.
Next, we'll code the create action in the controller to handle the form submission and save the new user to the database.
A basic way of doing this is using the model object's method:
Because we used the objectName argument in the fields of our form, we can access the user data as a struct in the params struct.
There are more things that we can do in the create action to handle validation, but let's keep it simple in this tutorial.
Notice that our create action above redirects the user to the users index route using the function. We'll use this action to list all users in the system with "Edit" links. We'll also provide a link to the "New User" form that we just coded.
First, let's get the data that the listing needs. Create an action named index in the users controller like so:
This call to the model's method will return a query object of all users in the system. By using the method's order argument, we're also telling the database to order the records by name.
In the view at views/users/index.cfm, it's as simple as looping through the query and outputting the data
We'll now show another cool aspect of form helpers by creating a screen for editing users.
You probably noticed in the code listed above that we'll have an action for editing a single users record. We used the linkTo() form helper function to add an "Edit" button to the form. This action expects a key as well.
Because in the linkTo() form helper function we specified the parameter key, Wheels adds this parameter into the URL when generating the route.
Wheels will automatically add the provided 'key' from the URL to the params struct in the controllers edit() function.
Given the provided key, we'll have the action load the appropriate user object to pass on to the view:
The view at views/user/edit.cfm looks almost exactly the same as the view for creating a user:
But an interesting thing happens. Because the form fields are bound to the user object via the form helpers' objectName arguments, the form will automatically provide default values based on the object's properties.
With the user model populated, we'll end up seeing code similar to this:
Pretty cool, huh?
There's a lot of repetition in the new and edit forms. You'd imagine that we could factor out most of this code into a single view file. To keep this tutorial from becoming a book, we'll just continue on knowing that this could be better.
Now we'll create the update action. This will be similar to the create action, except it will be updating the user object:
To update the user, simply call its method with the user struct passed from the form via params. It's that simple.
After the update, we'll add a success message and send the end user back to the edit form in case they want to make more changes.
Notice in our listing above that we have a delete action. Here's what it would look like:
We simply load the user using the model's method and then call the object's method. That's all there is to it.
We've shown you quite a few of the basics in getting a simple user database up and running. We hope that this has whet your appetite to see some of the power packed into the CFWheels framework. There's plenty more.
Be sure to read on to some of the related chapters listed below to learn more about working with CFWheels's ORM.
Save data in associated model objects through the parent.
When you're starting out as a Wheels developer, you are probably amazed at the simplicity of a model's CRUD methods. But then it all gets quite a bit more complex when you need to update records in multiple database tables in a single transaction.
Nested properties in Wheels makes this scenario dead simple. With a configuration using the function in your model's config() method, you can save changes to that model and its associated models in a single call with , , or .
Consider a user model that has one profile:
By adding the call to in the model, you can create both the user object and the profile object in a single call to .
First, in our controller, let's set the data needed for our form:
Because our form will also expect an object called profile nested within the user object, we must create a new instance of it and set it as a property in the call to user.new().
Also, because we don't intend on using the particular newProfile object set in the first line of the action, we can varscope it to clearly mark our intentions for its use.
If this were an edit action calling an existing object, our call would need to look similar to this:
Because the form will also expect data set in the profile property, you must include that association in the finder call with the include argument.
For this example, our form at views/users/new.cfm will end up looking like this:
Of note are the calls to form helpers for the profile model, which contain an extra argument for association. This argument is available for all object-based form helpers. By using the association argument, Wheels will name the form field in such a way that the properties for the profile will be nested within an object in the user model.
Take a minute to read that last statement again. OK, let's move on to the action that handles the form submission.
You may be surprised to find out that our standard create action does not change at all from what you're used to.
When calling user.save() in the example above, Wheels takes care of the following:
Saves the data passed into the user model.
Sets a property on user called profile with the profile data stored in an object.
Saves the data passed into that profile model.
Wraps all calls in a transaction in case validations on any of the objects fail or something wrong happens with the database.
For the edit scenario, this is what our update action would look like (which is very similar to create):
Nested properties work with one-to-many associations as well, except now the nested properties will contain an array of objects instead of a single one. We know that one user can have many addresses. Furthermore, we know that each user has only one profile.
In the user model, let's add an association called addresses and also enable it as nested properties.
In this example, we have added the addresses association to the call to .
The addresses table contains a foreign key to the Users table called userid, Now in the addresses model, let's associate it with its parent User and also enable it as nested properties.
Setting up data for the form is similar to the one-to-one scenario, but this time the form will expect an array of objects for the nested properties instead of a single object.
In this example, we'll just put one new address in the array.
In the edit scenario, we just need to remember to call the include argument to include the array of addresses saved for the particular user:
This time, we'll add a section for addresses on our form:
In this case, you'll see that the form for addresses is broken into a partial. (See the chapter on Partials for more details.) Let's take a look at that partial.
Here is the code for the partial at views/users/_address.cfm. Wheels will loop through each address in your nested properties and display this piece of code for each one.
Because there can be multiple addresses on the form, the form helpers require an additional argument for position. Without having a unique position identifier for each address, Wheels would have no way of understanding which state field matches with which particular address, for example.
Here, we're passing a value of arguments.current for position. This value is set automatically by Wheels for each iteration through the loop of addresses.
Even with a complex form with a number of child objects, Wheels will save all of the data through its parent's , , or methods.
Basically, your typical code to save the user and its addresses is exactly the same as the code demonstrated in the Saving the Object and Its Nested Properties section earlier in this chapter.
Writing the action to save the data is clearly the easiest part of this process!
As mentioned earlier, Wheels will automatically wrap your database operations for nested properties in a transaction. That way if something goes wrong with any of the operations, the transaction will rollback, and you won't end up with incomplete saves.
See the chapter on for more details.
We all enter the scenario where we have "join tables" where we need to associate models in a many-to-many fashion. Wheels makes this pairing of entities simple with some form helpers.
Consider the many-to-many associations related to customers, publications, and subscriptions, straight from the chapter.
When it's time to save customers' subscriptions in the subscriptions join table, one approach is to loop through data submitted by s from your form, populate subscription model objects with the data, and call . This approach is valid, but it is quite cumbersome. Fortunately, there is a simpler way.
Here is how we would set up the nested properties in the customer model for this example:
Let's define the data needed in an edit action in the controller at controllers/Customers.cfc.
For the view, we need to pull the customer with its associated subscriptions included with the include argument. We also need all of the publications in the system for the user to choose from.
We can now build a series of check boxes that will allow the end user choose which publications to assign to the customer.
The view template at views/customers/edit.cfm is where the magic happens. In this view, we will have a form for editing the customer and check boxes for selecting the customer's subscriptions.
The main point of interest in this example is the <fieldset> for Subscriptions, which loops through the query of publications and uses the form helper. This helper is similar to and , but it is specifically designed for building form data related by associations. (Note that is primarily designed for columns in your table that store a single true/false value, so that is the big difference.)
Notice that the objectName argument passed to is the parent customer object and the associations argument contains the name of the related association. Wheels will build a form variable named in a way that the customer object is automatically bound to the subscriptions association.
The keys argument accepts the foreign keys that should be associated together in the subscriptions join table. Note that these keys should be listed in the order that they appear in the database table. In this example, the subscriptions table in the database contains a composite primary key with columns called customerid and publicationid, in that order.
Handling the form submission is the most powerful part of the process, but like all other nested properties scenarios, it involves no extra effort on your part.
You'll notice that this example update action is fairly standard for a Wheels application:
In fact, there is nothing special about this. But with the nested properties defined in the model, Wheels handles quite a bit when you save the parent customer object:
Wheels will update the customers table with any changes submitted in the Customers <fieldset>.
Wheels will add and remove records in the subscriptions table depending on which check boxes are selected by the user in the Subscriptions <fieldset>.
All of these database queries will be wrapped in a . If any of the above updates don't pass validation or if the database queries fail, the transaction will roll back.
<cfscript>
// Use this file to configure your application.
// You can also use the environment specific files (e.g. /config/production/settings.cfm) to override settings set here.
// Don't forget to issue a reload request (e.g. reload=true) after making changes.
// See http://docs.cfwheels.org/docs/configuration-and-defaults for more info.
// If you leave the settings below commented out, CFWheels will set the data source name to the same name as the folder the application resides in.
// set(dataSourceName="");
// set(dataSourceUserName="");
// set(dataSourcePassword="");
</cfscript>set(dataSourceName="back2thefuture");
// set(dataSourceUserName="marty");
// set(dataSourcePassword="mcfly");id
int
auto increment
name
varchar(100)
varchar(255)
password
varchar(15)
mapper()
.wildcard()
.root(to="wheels##wheels", method="get")
.end();mapper()
.resources("users")
.wildcard()
.root(to="wheels##wheels", method="get")
.end();users
GET
/users
Lists users
newUsers
GET
/users/new
Display a form for creating a user record
users
POST
/users
Form posts a new user record to be created
editUser
GET
/users/[id]/edit
Displays a form for editing a user record
user
PATCH
/users/[id]
Form posts an existing user record to be updated
user
DELETE
/users/[id]
Deletes a user record
<cfoutput>
<h1>New User</h1>
#startFormTag(route="users")#
<div>
#textField(objectName="user", property="name", label="Name")#
</div>
<div>
#textField(objectName="user", property="email", label="Email")#
</div>
<div>
#passwordField(
objectName="user",
property="password",
label="Password"
)#
</div>
<div>#submitTag()#</div>
#endFormTag()#
</cfoutput>component extends="Controller" {
function config(){}
function new() {
user = model("user").new();
}
}<h1>New User</h1>
<form action="/users" method="post">
<div>
<label for="user-name">
Name
<input id="user-name" type="text" value="" name="user[name]">
</label>
</div>
<div>
<label for="user-email">
Email
<input id="user-email" type="text" value="" name="user[email]">
</label>
</div>
<div>
<label for="user-password">
Password
<input id="user-password" type="password" value="" name="user[password]">
</label>
</div>
<div><input value="Save changes" type="submit"></div>
</form>function create() {
user = model("user").create(params.user);
redirectTo(
route="users",
success="User created successfully."
);
}function index() {
users = model("user").findAll(order="name");
}<cfoutput>
<h1>Users</h1>
<p>#linkTo(text="New User", route="newUser")#</p>
<table>
<thead>
<tr>
<th>Name</th>
<th>Email</th>
<th colspan="2"></th>
</tr>
</thead>
<tbody>
<cfloop query="users">
<tr>
<td>
#EncodeForHtml(users.name)#
</td>
<td>
#EncodeForHtml(users.email)#
</td>
<td>
#linkTo(
text="Edit",
route="editUser",
key=users.id,
title="Edit #users.name#"
)#
</td>
<td>
#buttonTo(
text="Delete",
route="user",
key=users.id,
method="delete",
title="Delete #users.name#"
)#
</td>
</tr>
</cfloop>
</tbody>
</table>
</cfoutput>function edit() {
user = model("user").findByKey(params.key);
}<cfoutput>
<h1>Edit User #EncodeForHtml(user.name)#</h1>
#startFormTag(route="user", key=user.key(), method="patch")#
<div>
#textField(objectName="user", property="name", label="Name")#
</div>
<div>
#textField(objectName="user", property="email", label="Email")#
</div>
<div>
#passwordField(
objectName="user",
property="password",
label="Password"
)#
</div>
<div>#submitTag()#</div>
#endFormTag()#
</cfoutput><h1>Edit User Homer Simpson</h1>
<form action="/users/1" method="post">
<input type="hidden" name="_method" value="patch">
<div>
<input type="hidden" name="user[id]" value="15">
</div>
<div>
<label for="user-name">
Name
<input
id="user-name"
type="text"
value="Homer Simpson"
name="user[name]">
</label>
</div>
<div>
<label for="user-email">
Email
<input
id="user-email"
type="text"
value="[email protected]"
name="user[email]">
</label>
</div>
<div>
<label for="user-password">
Password
<input
id="user-password"
type="password"
value="donuts.mmm"
name="user[password]">
</label>
</div>
<div><input value="Save changes" type="submit"></div>
</form>function update() {
user = model("user").findByKey(params.key);
user.update(params.user);
redirectTo(
route="editUser",
key=user.id,
success="User updated successfully."
);
}function delete() {
user = model("user").findByKey(params.key);
user.delete();
redirectTo(
route="users",
success="User deleted successfully."
);
}component extends="Model" {
function config() {
hasOne("profile");
nestedProperties(associations="profile");
}
}// In controllers/User.cfc
function new() {
var newProfile = model("profile").new();
user = model("user").new(profile=newProfile);
}function edit() {
user = model("user").findByKey(key=params.key, include="profile");
}#startFormTag(action="create")#
<!--- Data for user model --->
#textField(label="First Name", objectName="user", property="firstName")#
#textField(label="Last Name", objectName="user", property="lastName")#
<!--- Data for associated profile model --->
#textField(
label="Twitter Handle",
objectName="user",
association="profile",
property="twitterHandle"
)#
#textArea(
label="Biography",
objectName="user",
association="profile",
property="bio"
)#
<div>#submitTag(value="Create")#</div>
#endFormTag()#function create() {
user = model("user").new(params.user);
if ( user.save() ) {
flashInsert(success="The user was created successfully.");
redirectTo(controller=params.controller);
} else {
renderView(action="new");
}
}function update() {
user = model("user").findByKey(params.user.id);
if ( user.update(params.user) ) {
flashInsert(success="The user was updated successfully.");
redirectTo(action="edit");
} else {
renderView(action="edit");
}
}component extends="Model" {
function config() {
hasOne("profile");
hasMany("addresses");
nestedProperties(
associations="profile,addresses",
allowDelete=true
);
}
}component extends="Model" {
function config() {
belongsTo("User");
nestedProperties(
associations="User",
allowDelete=true
);
}
}function new() {
var newAddresses = [ model("address").new() ];
user = model("user").new(addresses=newAddresses);
}function edit() {
user = model("user").findByKey(key=params.key, include="addresses");
}#startFormTag(action="create")#
<!--- Data for `user` model --->
<fieldset>
<legend>User</legend>
#textField(label="First Name", objectName="user", property="firstName")#
#textField(label="Last Name", objectName="user", property="lastName")#
</fieldset>
<!--- Data for `address` models --->
<fieldset>
<legend>Addresses</legend>
<div id="addresses">
#includePartial(user.addresses)#
</div>
</fieldset>
<div>#submitTag(value="Create")#</div>
#endFormTag()#<div class="address">
#textField(
label="Street",
objectName="user",
association="addresses",
position=arguments.current,
property="address1"
)#
#textField(
label="City",
objectName="user",
association="addresses",
position=arguments.current,
property="city"
)#
#textField(
label="State",
objectName="user",
association="addresses",
position=arguments.current,
property="state"
)#
#textField(
label="Zip",
objectName="user",
association="addresses",
position=arguments.current,
property="zip"
)#
</div>// models/Customer.cfc
component extends="Model" {
public function config() {
hasMany(name="subscriptions", shortcut="publications");
}
}
// models/Publication.cfc
component extends="Model" {
public function config() {
hasMany("subscriptions");
}
}
// models/Subscription.cfc
component extends="Model" {
public function config() {
belongsTo("customer");
belongsTo("publication");
}
}component extends="Model" {
public function config() {
// Associations
hasMany(name="subscriptions", shortcut="publications");
// Nested properties
nestedProperties(
associations="subscriptions",
allowDelete=true
);
}
}function edit() {
customer = model("customer").findByKey(
key=params.key,
include="subscriptions"
);
publications = model("publication").findAll(order="title");
}<cfparam name="customer">
<cfparam name="publications" type="query">
<cfoutput>
#startFormTag(action="update")#
<fieldset>
<legend>Customer</legend>
#textField(
label="First Name",
objectName="customer",
property="firstName"
)#
#textField(
label="Last Name",
objectName="customer",
property="lastName"
)#
</fieldset>
<fieldset>
<legend>Subscriptions</legend>
<cfloop query="publications">
#hasManyCheckBox(
label=publications.title,
objectName="customer",
association="subscriptions",
keys="#customer.key()#,#publications.id#"
)#
</cfloop>
</fieldset>
<div>
#hiddenField(objectName="customer", value="id")#
#submitTag()#
</div>
#endFormTag()#
</cfoutput>function update() {
// Load customer object
customer = model("customer").findByKey(params.customer.id);
/* If update is successful, generate success message
and redirect back to edit screen */
if ( customer.update(params.customer) ) {
redirectTo(
action="edit",
key=customer.id,
success="#customer.firstName# #customer.lastName# record updated successfully."
);
// If update fails, show form with errors
} else {
renderView(action="edit");
}
}Through some simple configuration, Wheels allows you to unlock some powerful functionality to use your database tables' relationships in your code.
Associations in Wheels allow you to define the relationships between your database tables. After configuring these relationships, doing pesky table joins becomes a trivial task. And like all other ORM functions in Wheels, this is done without writing a single line of SQL.
In order to set up associations, you only need to remember 3 simple methods. Considering that the human brain only reliably remembers up to 7 items, we've left you with a lot of extra space. You're welcome. :)
The association methods should always be called in the config() method of a model that relates to another model within your application.
If your database table contains a field that is a foreign key to another table, then this is where to use the belongsTo()function.
If we had a comments table that contains a foreign key to the posts table called postid, then we would have this config() method within our comment model:
component extends="Model" {
function config() {
belongsTo("post");
}
}On the other side of the relationship are the "has" functions. As you may have astutely guessed, these functions should be used according to the nature of the model relationship.
At this time, you need to be a little eccentric and talk to yourself. Your association should make sense in plain English language.
So let's consider the post / comment relationship mentioned above for belongsTo(). If we were to talk to ourselves, we would say, "A post has many comments." And that's how you should construct your post model:
component extends="Model" {
function config() {
hasMany("comments");
}
}You may be a little concerned because our model is called comment and not comments. No need to worry: Wheels understands the need for the plural in conjunction with the hasMany() method.
And don't worry about those pesky words in the English language that aren't pluralized by just adding an "s" to the end. Wheels is smart enough to know that words like "deer" and "children" are the plurals of "deer" and "child," respectively.
The hasOne() association is not used as often as the hasMany() association, but it has its use cases. The most common use case is when you have a large table that you have broken down into two or more smaller tables (a.k.a. denormalization) for performance reasons or otherwise.
Let's consider an association between user and profile. A lot of websites allow you to enter required info such as name and email but also allow you to add optional information such as age, salary, and so on. These can of course be stored in the same table. But given the fact that so much information is optional, it would make sense to have the required info in a users table and the optional info in a profiles table. This gives us a hasOne() relationship between these two models: "A user has one profile."
In this case, our profile model would look like this:
component extends="Model" {
function config() {
belongsTo("user");
}
}And our user model would look like this:
component extends="Model" {
function config() {
hasOne("profile");
}
}As you can see, you do not pluralize "profile" in this case because there is only one profile.
By the way, as you can see above, the association goes both ways, i.e. a user hasOne() profile, and a profile belongsTo() a user. Generally speaking, all associations should be set up this way. This will give you the fullest API to work with in terms of the methods and arguments that Wheels makes available for you.
However, this is not a definite requirement. Wheels associations are completely independent of one another, so it's perfectly OK to setup a hasMany() association without specifying the related belongsTo() association.
A dependency is when an associated model relies on the existence of its parent. In the example above, a profile is dependent on a user. When you delete the user, you would usually want to delete the profile as well.
CFWheels makes this easy for you. When setting up your association, simply add the argument dependent with one of the following values, and CFWheels will automatically deal with the dependency.
In your model .cfc file config() function::
// Instantiates the `profile` model and calls its `delete()` method.
hasOne(name="profile", dependent="delete");
// Quickly deletes the `profile` without instantiating it.
hasOne(name="profile", dependent="deleteAll");
// Sets the `userId` of the profile to `NULL`.
hasOne(name="profile", dependent="remove");
// Sets the `userId` of the profile to `NULL` (without instantiation).
hasOne(name="profile", dependent="removeAll");You can create dependencies on hasOne() and hasMany() associations, but not belongsTo().
It's possible for a model to be associated to itself. Take a look at the below setup where an employee belongs to a manager for example:
component extends="Model" {
function config() {
belongsTo(name="manager", modelName="employee", foreignKey="managerId");
}
}Both the manager and employee are stored in the same employees table and share the same Employee model.
When you use this association in your code, the employees table will be joined to itself using the managerid column. CFWheels will handle the aliasing of the (otherwise duplicated) table names. It does this by using the pluralized version of the name you gave the association (in other words "managers" in this case).
This is important to remember because if you, for example, want to select the manager's name, you will have to do so manually (CFWheels won't do this for you, like it does with normal associations) using the select argument.
Here's an example of how to select both the name of the employee and their manager:
component extends="Controller" {
function index() {
employees= model("employee").findAll(include="manager", select="employees.name, managers.name AS managerName");
}
}Like everything else in Wheels, we strongly recommend a default naming convention for foreign key columns in your database tables.
In this case, the convention is to use the singular name of the related table with id appended to the end. So to link up our table to the employees table, the foreign key column should be named employeeid.
Wheels offers a way to configure your models to break this naming convention, however. This is done by using the foreignKey argument in your models' belongsTo() calls.
Let's pretend that you have a relationship betweenauthor and post, but you didn't use the naming convention and instead called the column author_id. (You just can't seem to let go of the underscores, can you?)
Your post's config() method would then need to look like this:
component extends="Model" {
function config() {
belongsTo(name="author", foreignKey="author_id");
}
}You can keep your underscores if it's your preference or if it's required of your application.
Now that we have our associations set up, let's use them to get some data into our applications.
There are a couple ways to join data via associations, which we'll go over now.
To join data from related tables in our findAll() calls, we simply need to use the include argument. Let's say that we wanted to include data about the author in our findAll() call for posts.
Here's what that call would look like:
component extends="Controller" {
function index() {
posts = model("post").findAll(include="author");
}
}It's that simple. Wheels will then join the authors table automatically so that you can use that data along with the data from posts.
Note that if you switch the above statement around like this:
component extends="Controller" {
function index() {
authors = model("author").findAll(include="posts");
}
}Then you would need to specify "post" in its plural form, "posts." If you're thinking about when to use the singular form and when to use the plural form, just use the one that seems most natural.
If you look at the two examples above, you'll see that in example #1, you're asking for all posts including each post's author (hence the singular "author"). In example #2, you're asking for all authors and all of the posts written by each author (hence the plural "posts").
You're not limited to specifying just one association in the include argument. You can for example return data for authors, posts, and bios in one call like this:
component extends="Controller" {
function index() {
authorsPostsAndComments = model("author").findAll(include="posts,bio");
}
}To include several tables, simply delimit the names of the models with a comma. All models should contain related associations, or else you'll get a mountain of repeated data back.
When you need to include tables more than one step away in a chain of joins, you will need to start using parenthesis. Look at the following example:
component extends="Controller" {
function index() {
commentsPostsAndAuthors = model("comment").findAll(include="post(author)");
}
}The use of parentheses above tells Wheels to look for an association named author on the post model instead of on the comment model. (Looking at the comment model is the default behavior when not using parenthesis.)
There is a minor caveat to this approach. If you have a column in both associated tables with the same name, Wheels will pick just one to represent that column.
In order to include both columns, you can override this behavior with the select argument in the finder functions.
For example, if we had a column named name in both your posts and authors tables, then you could use the select argument like so:
component extends="Controller" {
function index() {
posts = model("post").findAll(
select="posts.name, authors.id, authors.post_id, authors.name AS authorname",
include="author"
);
}
}You would need to hard-code all column names that you need in that case, which does remove some of the simplicity. There are always trade-offs!
A cool feature of Wheels is the ability to use dynamic shortcut methods to work with the models you have set up associations for. By dynamic, we mean that the name of the method depends on what name you have given the association when you set it up. By shortcut, we mean that the method usually delegates the actual processing to another Wheels method but gives you, the developer, an easier way to achieve the task (and makes your code more readable in the process).
As usual, this will make more sense when put into the context of an example. So let's do that right now.
Let's say that you tell Wheels through a hasMany() call that a post has many comments. What happens then is that Wheels will enrich the post model by adding a bunch of useful methods related to this association.
If you wanted to get all comments that have been submitted for a post, you can now call post.comments(). In the background, Wheels will delegate this to a findAll() call with the where argument set to postid=#post.id#.
Here are all the methods that are added for the three possible association types.
Methods Added by hasMany
Given that you have told Wheels that a post has many comments through a hasMany() call, here are the methods that will be made available to you on the post model.
Replace XXX below with the name of the associated model (i.e. comments in the case of the example that we're using here).
XXX()
post.comments()
Returns all comments where the foreign key matches the post's primary key value. Similar to calling model("comment").findAll(where="postid=#post.id#").
addXXX()
post.addComment(comment)
Adds a comment to the post association by setting its foreign key to the post's primary key value. Similar to calling model("comment").updateByKey(key=comment.id, postid=post.id).
removeXXX()
post.removeComment(comment)
Removes a comment from the post association by setting its foreign key value to NULL. Similar to calling model("comment").updateByKey(key=comment.id, postid="").
deleteXXX()
post.deleteComment(comment)
Deletes the associated comment from the database table. Similar to calling model("comment").deleteByKey(key=comment.id).
removeAllXXX()
post.removeAllComments()
Removes all comments from the post association by setting their foreign key values to NULL. Similar to calling model("comment").updateAll(postid="", where="postid=#post.id#").
deleteAllXXX()
post.deleteAllComments()
Deletes the associated comments from the database table. Similar to calling model("comment").deleteAll(where="postid=#post.id#").
XXXCount()
post.commentCount()
Returns the number of associated comments. Similar to calling model("comment").count(where="postid=#post.id#").
newXXX()
post.newComment()
Creates a new comment object. Similar to calling model("comment").new(postid=post.id).
createXXX()
post.createComment()
Creates a new comment object and saves it to the database. Similar to calling model("comment").create(postid=post.id).
hasXXX()
post.hasComments()
Returns true if the post has any comments associated with it. Similar to calling model("comment").exists(where="postid=#post.id#").
findOneXXX()
post.findOneComment()
Returns one of the associated comments. Similar to calling model("comment").findOne(where="postid=#post.id#").
Methods Added by hasOne
The hasOne() association adds a few methods as well. Most of them are very similar to the ones added by hasMany().
Given that you have told Wheels that an author has one profile through a hasOne() call, here are the methods that will be made available to you on the author model.
XXX()
author.profile()
Returns the profile where the foreign key matches the author's primary key value. Similar to calling model("profile").findOne(where="authorid=#author.id#").
setXXX()
author.setProfile(profile)
Sets the profile to be associated with the author by setting its foreign key to the author's primary key value. You can pass in either a profile object or the primary key value of a profile object to this method. Similar to calling model("profile").updateByKey(key=profile.id, authorid=author.id).
removeXXX()
author.removeProfile()
Removes the profile from the author association by setting its foreign key to NULL. Similar to calling model("profile").updateOne(where="authorid=#author.id#", authorid="").
deleteXXX()
author.deleteProfile()
Deletes the associated profile from the database table. Similar to calling model("profile").deleteOne(where="authorid=#author.id#")
newXXX()
author.newProfile()
Creates a new profile object. Similar to calling model("profile").new(authorid=author.id).
createXXX()
author.createProfile()
Creates a new profile object and saves it to the database. Similar to calling model("profile").create(authorid=author.id).
hasXXX()
author.hasProfile()
Returns true if the author has an associated profile. Similar to calling model("profile").exists(where="authorid=#author.id#").
Methods Added by belongsTo
The belongsTo() association adds a couple of methods to your model as well.
Given that you have told Wheels that a comment belongs to a post through a belongsTo() call, here are the methods that will be made available to you on the comment model.
XXX()
comment.post()
Returns the post where the primary key matches the comment's foreign key value. Similar to calling model("post").findByKey(comment.postid).
hasXXX()
comment.hasPost()
Returns true if the comment has a post associated with it. Similar to calling model("post").exists(comment.postid).
One general rule for all of the methods above is that you can always supply any argument that is accepted by the method that the processing is delegated to. This means that you can, for example, call post.comments(order="createdAt DESC"), and the order argument will be passed along to findAll().
Another rule is that whenever a method accepts an object as its first argument, you also have the option of supplying the primary key value instead. This means that author.setProfile(profile) will perform the same task as author.setProfile(1). (Of course, we're assuming that the profile object in this example has a primary key value of 1.)
You may be concerned that using a dynamic finder adds yet another database call to your application.
If it makes you feel any better, all calls in your Wheels request that generate the same SQL queries will be cached for that request. No need to worry about the performance implications of making multiple calls to the same author.posts() call in the scenario above, for example.
You can also pass arguments to dynamic shortcut methods where applicable. For example, with the XXX() method, perhaps we'd want to limit a post's comment listing to just ones created today. We can pass a where argument similar to what is passed to the findAll() function that powers XXX() behind the scenes.
today = DateFormat(Now(), "yyyy-mm-dd");
comments = post.comments(where="createdAt >= '#today# 00:00:00'");We can use the same 3 association functions to set up many-to-many table relationships in our models. It follows the same logic as the descriptions mentioned earlier in this chapter, so let's jump right into an example.
Let's say that we wanted to set up a relationship between customers and publications. A customer can be subscribed to many publications, and publications can be subscribed to by many customers. In our database, this relationship is linked together by a third table called subscriptions (sometimes called a bridge entity by ERD snobs).
Here are the representative models:
component extends="Model" {
function config() {
hasMany("subscriptions");
}
}component extends="Model" {
function config() {
hasMany("subscriptions");
}
}component extends="Model" {
function config() {
belongsTo("customer");
belongsTo("publication");
}
}This assumes that there are foreign key columns in subscriptions called customerid and publicationid.
At this point, it's still fairly easy to get data from the many-to-many association that we have set up above.
We can include the related tables from the subscription bridge entity to get the same effect:
component extends="Controller" {
function index() {
subscriptions= model("subscription").findAll(include="customer,publication");
}
}With the shortcut argument to hasMany(), you can have Wheels create a dynamic method that lets you bypass the join model and instead reference the model on the other end of the many-to-many relationship directly.
For our example above, you can alter the hasMany() call on the customer model to look like this instead:
component extends="Model" {
function config() {
hasMany(name="subscriptions", shortcut="publications");
}
}Now you can get a customer's publications directly by using code like this:
component extends="Controller" {
function edit() {
customer= model("customer").findByKey(params.key);
publications= customer.publications();
}
}This functionality relies on having set up all the appropriate hasMany() and belongsTo() associations in all 3 models (like we have in our example in this chapter).
It also relies on the association names being consistent, but if you have customized your association names, you can specify exactly which associations the shortcut method should use with the through argument.
The through argument accepts a list of 2 association names. The first argument is the name of the belongsTo()association (set in the subscription model in this case), and the second argument is the hasMany() association going back the other way (set in the publication model).
Sound complicated? That's another reason to stick to the conventions whenever possible: it keeps things simple.
As you just read, Wheels offers a ton of functionality to make your life easier in working with relational databases. Be sure to give some of these techniques a try in your next Wheels application, and you'll be amazed at how little code that you'll need to write to interact with your database.
Simplify your views by breaking them down into partial page templates.
Partials in Wheels act as a wrapper around the good old <cfinclude> tag. By calling includePartial() or renderPartial(), you can include other view files in a page, just like <cfinclude> would. But at the same time, partials make use of common Wheels features like layouts, caching, model objects, and so on.
These functions also add a few cool things to your development arsenal like the ability to pass in a query or array of objects and have the partial file called on each iteration (to name one).
Websites often display the same thing on multiple pages. It could be an advertisement area that should be displayed in an entire section of a website or a shopping cart that is displayed while browsing products in a shop. You get the idea. To avoid duplicating code, you can place it in a file (the "partial" in Wheels terms) and include that file using includePartial() on the pages that need it.
Even when there is no risk of code duplication, it can still make sense to use a partial. Breaking up a large page into smaller, more manageable chunks will help you focus on each part individually.
If you've used <cfinclude> a lot in the past (and who hasn't?!), you probably already knew all of this though, right?
To make it clear that a file is a partial and not a full page, we start the filename with an underscore character. You can place the partial file anywhere in the views folder. When locating partials, Wheels will use the same rules as it does for the template argument to renderView(). This means that if you save the partial in the current controller's view folder, you reference it simply by its name.
For example, if you wanted to have a partial for a comment in your blog controller, you would save the file at views/blog/_comment.cfm and reference it (in includePartial() and renderPartial()) with just "comment" as the first argument.
Sometimes it's useful to share partials between controllers though. Perhaps you have a banner ad that should be displayed across several controllers. One common approach then is to save them in a dedicated folder for this at the root of the views folder. To reference partials in this folder, in this case named shared, you would then pass in "/shared/banner" to includePartial() instead.
Now that we know why we should use partials and where to store them, let's make a call to includePartial() from a view page to have Wheels display a partial's output.
#includePartial("banner")#That code will look for a file named _banner.cfm in the current controller's view folder and include it.
Let's say we're in the blog controller. Then the file that will be included is views/blog/_banner.cfm.
As you can see, you don't need to specify the .cfm part or the underscore when referencing a partial.
You can pass in data by adding named arguments on the includePartial() call. Because we use the partial argument to determine what file to include, you can't pass in a variable named partial though. The same goes for the other arguments as well, like layout, spacer, and cache.
Here is an example of passing in a title to a partial for a form:
#includePartial(partial="loginRegisterForm", title="Please log in here")#Now you can reference the title variable as arguments.title inside the _loginregisterform.cfm file.
If you prefer, you can still access the view variables that are set outside of the partial. The advantage with specifically passing them in instead is that they are then scoped in the arguments struct (which means less chance of strange bugs occurring due to variable conflicts). It also makes for more readable and maintainable code. (You can see the intent of the partial better when you see what is passed in to it).
There is an even more elegant way of passing data to a partial though. When you start using a partial on several pages on a site spread across multiple controllers, it can get quite cumbersome to remember to first load the data in an appropriate function in the controller, setup a before filter for it, pass that data in to the partial, and so on.
Wheels can automate this process for you. The convention is that a partial will always check if a function exists on the controller with the same name as the partial itself (and that it's set to private and will return a struct). If so, the partial will call the function and add the output returned to its arguments struct.
This way, the partial can be called from anywhere and acts more like a "black box." All communication with the model is kept in the controller as it should be for example.
If you don't want to load the data from a function with the same name as the partial (perhaps due to it clashing with another function name), you can specify the function to load data from with the dataFunction argument to includePartial() and renderPartial().
Just like a regular page, Wheels partials also understand the concept of layouts. To use this feature, simply pass in the name of the layout file you want to wrap the partial in with the layout argument, like this:
#includePartial(partial="newsItem", layout="/boxes/blue")#This will wrap the partial with the code found in views/boxes/_blue.cfm. Just like with other layouts, you use includeContent() to represent the partial's content.
That said, your _blue.cfm file could end up looking something like this:
<div class="news">
#includeContent()#
</div>One difference from page layouts is that the layout file for partials has to start with the underscore character.
It's also worth noting that it's perfectly acceptable to include partials inside layout files as well. This opens up the possibility to nest layouts in complex ways.
Caching a partial is done the same way as caching a page. Pass in the number of minutes you want to cache the partial for to the cache argument.
Here's an example where we cache a partial for 15 minutes:
#includePartial(partial="userListing", cache=15)#Because it's quite common to use partials in conjunction with objects and queries, Wheels has built-in support for this too. Have a look at the code below, which passes in an object to a partial:
cust = model("customer").findByKey(params.key);
#includePartial(cust)#That code will figure out that the cust variable contains a customer model object. It will then try to include a partial named _customer.cfm and pass in the object's properties as arguments to the partial. There will also be an objectvariable available in the arguments struct if you prefer to reference the object directly.
Try that code and <cfdump> the arguments struct inside the partial file, and you'll see what's going on. Pretty cool stuff, huh?
Similar to passing in an object, you can also pass in a query result set to includePartial(). Here's how that looks:
customers = model("customer").findAll();
#includePartial(partial="customers", query=customers)#In this case, Wheels will iterate through the query and call the _customer.cfm partial on each iteration. Similar to the example with the object above, Wheels will pass in the objects' properties (in this case represented by records in the query) to the partial.
In addition to that, you will also see that a counter variable is available. It's named current and is available when passing in queries or arrays of objects to a partial.
The way partials handle objects and queries makes it possible to use the exact same code inside the partial regardless of whether we're dealing with an object or query record at the time.
If you need to display some HTML in between each iteration (maybe each iteration should be a list item for example), then you can make use of the spacer argument. Anything passed in to that will be inserted between iterations. Here's an example:
<ul>
<li>#includePartial(partial=customers, query=customers, spacer="</li><li>")#</li>
</ul>There is a feature of CFML that is very handy: the ability to output a query with the group attribute. Here's an example of how this can be done with a query that contains artists and albums (with the artist potentially being duplicated since they can have more than one album):
<cfoutput query="artistsAndAlbums" group="artistid">
<!--- Artist info is displayed just once for each artist here --->
<cfoutput>
<!--- Each album is looped here --->
</cfoutput>
</cfoutput>We have ported this great functionality into calling partials with queries as well. Here's how you can achieve it:
#includePartial(partial=artistsAndAlbums, query=artistsAndAlbums, group="artistId")#When inside the partial file, you'll have an additional subquery made available to you named group, which contains the albums for the current artist in the loop.
As we've hinted previously in this chapter, it's also possible to pass in an array of objects to a partial. It works very similar to passing in a query in that the partial is called on each iteration.
So far we've only talked about includePartial(), which is what you use from within your views to include other files. There is another similar function as well: renderPartial(). This one is used from your controller files when you want to render a partial instead of a full page. At first glance, this might not make much sense to do. There is one common usage of this though—AJAX requests.
Let's say that you want to submit comments on your blog using AJAX. For example, the user will see all comments, enter their comment, submit it, and the comment will show up below the existing ones without a new page being loaded.
In this case, it's useful to use a partial to display each comment (using includePartial() as outlined above) and use the same partial when rendering the result of the AJAX request.
Here's what your controller action that receives the AJAX form submission would look like:
comment = model("comment").create(params.newComment);
renderPartial(comment);Please note that there currently is no support for creating the AJAX form directly with Wheels. This can easily be implemented using a JavaScript library such as jQuery or Prototype though.
The routing system in CFWheels encourages a conventional RESTful and resourceful style of request handling.
The CFWheels routing system inspects a request's HTTP verb and URL and decides which controller and action to run.
Consider the following request:
GET /products/5The routing system may match the request to a route like this, which tells CFWheels to load the show action on the Products controller:
.get(name="product", pattern="products/[key]", to="products##show")To configure routes, open the file at config/routes.cfm.
The CFWheels router begins with a call to mapper(), various methods chained from that, and lastly ends with a call to end().
In many cases, if you need to know where to go in the code to work with existing functionality in an application, the routes.cfm file can be a handy map, telling you which controller and action to start looking in.
The various route mapping methods that we'll introduce in this chapter basically set up a list of routes, matching URL paths to a controllers and actions within your application.
The terminology goes like this:
A route name is set up for reference in your CFML code for building links, forms, and such. To build URLs, you'll use this name along with helpers like linkTo(), startFormTag(), urlFor(), and so on.
A HTTP request method must be defined: GET, POST, PATCH, or DELETE.
You typically want to require POST, PATCH, or DELETE when a given action changes the state of your application's data:
Creating record(s): POST
Updating record(s): PATCH
Deleting record(s): DELETE
You can permit listing and showing records behind a normal HTTP GET request method.
A pattern is a URL path, sometimes with parameters in [squareBrackets]. Parameter values get sent to the controller in the params struct.
You'll see patterns like these in routes:
posts/[key]/[slug]
posts/[key]
postsIn this example, key and slug are parameters that must be present in the URL for the first route to match, and they are required when linking to the route. In the controller, these parameters will be available at params.key and params.slug, respectively.
When a request is made to CFWheels, the router will look for the first route that matches the requested URL. As an example, this means that if key is present in the URL but not slug, then it's the second route above that will match.
Please note that . is treated as a special characters in patterns and should generally not be used (one exception being when you are responding with multiple formats). If your parameters may have . in their value, please use the long form URL format: /?controller=[controller_name]&action=[action_name]&[parameter_name]=[parameter_value]
In the debugging footer, you'll see a View Routes link next to your application's name:
[Reload, View Routes, Run Tests, View Tests]
Clicking that will load a filterable list of routes drawn in the config/routes.cfm file, including name, method, pattern, controller, and action.
If you don't see debugging information at the bottom of the page, see the docs for the showDebugInformation setting in the Configuration and Defaults chapter.
Many parts of your application will likely be CRUD-based (create, read, update, delete) for specific types of records (users, products, categories). Resources allow you to define a conventional routing structure for this common use case.
Resources are important
You'll want to pay close attention to how resource-based routing works because this is considered an important convention in CFWheels applications.
If we have a products table and want to have a section of our application for managing the products, we can set up the routes using the resources() method like this in config/routes.cfm:
mapper()
.resources("products")
.end();This will set up the following routes, pointing to specific actions within the products controller:
products
GET
/products
products.index
Display a list of all products
product
GET
/products/[key]
products.show
Display a specific product
newProduct
GET
/products/new
products.new
Display a form for creating a new product
products
POST
/products
products.create
Create a new product record
editProduct
GET
/products/[key]/edit
products.edit
Display a form for editing an existing product
product
PATCH/PUT
/products/[key]
products.update
Update an existing product record
product
DELETE
/products/[key]
products.delete
Delete an existing product record
Because the router uses a combination of HTTP verb and path, we only need 4 different URL paths to connect to 7 different actions on the controller.
Standard resources using the resources() method assume that there is a primary key associated with the resource. (Notice the [key] placeholder in the paths listed above in the Strongly Encouraged: Resource Routing section.)
CFWheels also provides a singular resource for routing that will not expose a primary key through the URL.
mapper()
.resource("cart")
.end();This is handy especially when you're manipulating records related directly to the user's session (e.g., a profile or a cart can be managed by the user without exposing the primary key of the underlying database records).
Calling resource() (notice that there's no "s" on the end) then exposes the following routes:
cart
GET
/cart
carts.show
Display the cart
newCart
GET
/cart/new
carts.new
Display a form for creating a new cart
cart
POST
/cart
carts.create
Create a new cart record
editCart
GET
/cart/edit
carts.edit
Display a form for editing the cart
cart
PATCH/PUT
/cart
carts.update
Update the cart record
cart
DELETE
/cart
carts.delete
Delete the cart
Note that even though the resource path is singular, the name of the controller is plural by convention.
Also, this example is slightly contrived because it doesn't make much sense to create a "new" cart as a user typically just has one and only one cart tied to their session.
As you've seen, defining a resource creates several routes for you automatically, and it is great for setting up groupings of routes for managing resources within your application.
But sometimes you just need to define a single one-off route pattern. For this case, you have a method for each HTTP verb: get(), post(), patch(), put(), and delete().
As a refresher, these are the intended purpose for each HTTP verb:
GET
Display a list or record
POST
Create a record
PATCH/PUT
Update a record or set of records
DELETE
Delete a record
Security Warning
We strongly recommend that you not allow any GET requests to modify resources in your database (i.e., creating, updating, or deleting records). Always require POST, PUT, PATCH, or DELETE verbs for those sorts of routing endpoints.
Consider a few examples:
mapper()
.patch(name="heartbeat", to="sessions##update")
.patch(
name="usersActivate",
pattern="users/[userKey]/activations",
to="activations##update"
)
.resources("users")
.get(name="privacy", controller="pages", action="privacy")
.get(name="dashboard", controller="dashboards", action="show")
.end();Rather than creating a whole resource for simple one-off actions or pages, you can create individual endpoints for them.
Notice that you can use the to="controller##action" or use separate controller/action arguments. The toargument allows you to delineate controller and action within a single string using a # separator (which must be escaped as a double ## because of CFML's special usage of that symbol within string syntax).
In fact, you could mock a users resource using these methods like so (though obviously there is little practical reason for doing so):
mapper()
// The following is roughly equivalent to .resources("users")
.get(name="newUser", pattern="users/new", to="users##new")
.get(name="editUser", pattern="users/[key]/edit", to="users##edit")
.get(name="user", pattern="users/[key]", to="users##show")
.patch(name="user", pattern="users/[key]", to="users##update")
.put(name="user", pattern="users/[key]", to="users##update")
.delete(name="user", pattern="users/[key]", to="users##delete")
.post(name="users", to="users##create")
.get(name="users", to="users##index")
.end();If you need to limit the actions that are exposed by resources() and resource(), you can also pass in only or exceptarguments:
mapper()
// Only offer endpoints for cart show, update, and delete:
// - GET /cart
// - PATCH /cart
// - DELETE /cart
.resource(name="cart", only="show,update,delete")
// Offer all endpoints for wishlists, except for delete:
// - GET /wishlists
// - GET /wishlists/new
// - GET /wishlists/[key]
// - GET /wishlists/[key]/edit
// - POST /wishlists
// - PATCH /wishlists/[key]
.resources(name="wishlists", except="delete")
.end();While web standards advocate for usage of these specific HTTP verbs for requests, web browsers don't do a particularly good job of supporting verbs other than GET or POST.
To get around this, the CFWheels router recognizes the specialized verbs from browsers (PUT, PATCH, and DELETE) in this way:
Via a POST request with a
POST variable named _method specifying the specific HTTP verb (e.g., _method=delete)
See the chapter on Linking Pages for strategies for working with this constraint.
Note that using CFWheels to write a REST API doesn't typically have this constraint. You should confidently require API clients to use the specific verbs like PATCH and DELETE.
The CFWheels router allows for namespaces: the ability to add a route to a "subfolder" in the URL as well as within the controllers folder of your application.
Let's say that we want to have an "admin" section of the application that is separate from other "public" sections. We'd want for all of the "admin" controllers to be within an admin subfolder both in the URL and our application.
That's what the namespace() method is for:
mapper()
.namespace("admin")
.resources("products")
.end()
.end();In this example, we have an admin section that will allow the user to manage products. The URL would expose the products section at /admin/products, and the controller would be stored at controllers/admin/Products.cfc.
Let's say that you want to group a set of controllers together in a subfolder (aka package) in your application but don't want to affect a URL. You can do so using the package mapper method:
mapper()
.package("public")
.resources("articles")
.resource("profile")
.end()
.end();With this setup, end users will see /articles and /profile in the URL, but the controllers will be located at controllers/public/Articles.cfc and controllers/public/Profiles.cfc, respectively.
You'll often find yourself implementing a UI where you need to manipulate data scoped to a parent record. Creating nested resources allows you to reflect this nesting relationship in the URL.
Let's consider an example where we want to enable CRUD for a customer and its children appointment records.
In this situation, we'd perhaps want for our URL to look like this for editing a specific customer's appointment:
GET /customers/489/appointments/1909/editTo code up this nested resource, we'd write this code in config/routes.cfm:
mapper()
.resources(name="customers", nested=true)
.resources("appointments")
.end()
.end();That will create the following routes:
newCustomerAppointment
GET
/customers/[customerKey]/appointments/new
appointments.new
Display a form for creating a new appointment for a specific customer
customerAppointment
GET
/customers/[customerKey]/appointments/[key]
appointments.show
Display an existing appointment for a specific customer
editCustomerAppointment
GET
/customers/[customerKey]/appointments/[key]/edit
appointments.edit
Display a form for editing an existing appointment for a specific customer
customerAppointment
PATCH/PUT
/customers/[customerKey]/appointments/[key]
appointments.update
Update an existing appointment record for a specific customer
customerAppointment
DELETE
/customers/[customerKey]/appointments/[key]
appointments.delete
Delete an existing appointment record for an specific customer
customerAppointments
GET
/customers/[customerKey]/appointments
appointments.index
List appointments for a specific customer
customerAppointments
POST
/customers/[customerKey]/appointments
appointments.create
Create an appointment record for a specific customer
newCustomer
GET
/customers/new
customers.new
Display a form for creating a customer
customer
GET
/customers/[key]
customers.show
Display an existing customer
editCustomer
GET
/customers/[key]/edit
customers.edit
Display a form for editing an existing customer
customer
PATCH/PUT
/customers/[key]
customers.update
Update an existing customer
customer
DELETE
/customers/[key]
customers.delete
Delete an existing customer
customers
GET
/customers
customers.index
Display a list of all customers
customers
POST
/customers
customers.create
Create a customer
Notice that the routes for the appointments resource contain a parameter named customerKey. The parent resource's ID will always be represented by its name appended with Key. The child will retain the standard key ID.
You can nest resources and routes as deep as you want, though we recommend considering making the nesting shallower after you get to a few levels deep.
Here's an example of how nesting can be used with different route mapping methods:
mapper()
// /products/[key]
.resources(name="products", nested=true)
// /products/[productKey]/promote
.patch(name="promote", to="promotions##create")
// /products/[productKey]/expire
.delete(name="expire", to="expirations##create")
// A 2nd-level resource
// /products/[productKey]/variations/[key]
.resources(name="variations", nested=true)
// A 3rd-level resource
// /products/[productKey]/variations/[variationKey]/primary
.resource("primary")
.end()
.end()
.end();CFWheels 1.x had a default routing pattern: [controller]/[action]/[key]. The convention for URLs was as follows:
GET /news/show/5With this convention, the URL above told CFWheels to invoke the show action in the news controller. It also passed a parameter called key to the action, with a value of 5.
If you're upgrading from 1.x or still prefer this style of routing for your CFWheels 2+ application, you can use the wildcard() method to enable it part of it:
mapper()
.wildcard()
.end();CFWheels 2 will only generate routes for [controller]/[action], however, because resources and the other routing methods are more appropriate for working with records identified by primary keys.
Here is a sample of the patterns that wildcard generates:
/news/new
/news/create
/news/index
/newsThe wildcard method by default will only generate routes for the GET request method. If you would like to enable other request methods on the wildcard, you can pass in the method or methods argument:
mapper()
.wildcard(methods="get,post")
.end();Security Warning
Specifying a method argument to wildcard with anything other than get gives you the potential to accidentally expose a route that could change data in your application with a GET request. This opens your application to Cross Site Request Forgery (CSRF) vulnerabilities.
wildcard is provided for convenience. Once you're comfortable with routing concepts in CFWheels, we strongly recommend that you use resources (resources, resource) and the other verb-based helpers (get, post, patch, put, and delete) listed above instead.
CFWheels gives precedence to the first listed custom route in your config/routes.cfm file.
Consider this example to demonstrate when this can create unexpected issues:
mapper()
.resources("users")
.get(
name="usersPromoted",
pattern="users/promoted",
to="userPromotions##index"
)
.end();In this case, when the user visits /users/promoted, this will load the show action of the users controller because that was the first pattern that was matched by the CFWheels router.
To fix this, you need the more specific route listed first, leaving the dynamic routing to pick up the less specific pattern:
mapper()
.get(
name="usersPromoted",
pattern="users/promoted",
to="userPromotions##index"
)
.resources("users")
.end();Sometimes you need a catch-all route in CFWheels to support highly dynamic websites (like a content management system, for example), where all requests that are not matched by an existing route get passed to a controller/action that can deal with it.
Let's say you want to have both /welcome-to-the-site and /terms-of-use handled by the same controller and action. Here's what you can do to achieve this.
First, add a new route to config/routes.cfm that catches all pages like this:
mapper()
.get(name="page", pattern="[title]", to="pages##show")
.end();Now when you access /welcome-to-the-site, this route will be triggered and the show action will be called on the pages controller with params.title set to welcome-to-the-site.
The problem with this is that this will break any of your normal controllers though, so you'll need to add them specifically before this route. (Remember the order of precedence explained above.)
You'll end up with a config/routes.cfm file looking something like this:
mapper()
.resources("products")
.get(name="logout", to="sessions#delete")
.get(name="page", pattern="[title]", to="pages##show")
.root(to="dashboards##show")
.end();products and sessions are your normal controllers. By adding them to the top of the routes file, CFWheels looks for them first. But your catch-all route is more specific than the site root (/), so your catch-all should be listed before the call to root().
The constraints feature can be added either at an argument level directly into a resources() or other individual route call, or can be added as a chained function in it's own right. Constraints allow you to add regex to a route matching pattern, so you could for instance, have /users/1/ and /users/bob/ go to different controller actions.
mapper()
// users/1234
.resources(name = "users", constraints = { key = "\d+" })
// users/abc123
.resources(name = "users", constraints = { key = "\w+\d+" })
.end();Constraints can also be used as a wrapping function:
mapper()
.constraints( key = "\d+")
.resources("users")
.resources("cats")
.resources("dogs")
.end()
.end()In this example, the key argument being made of digits only will apply to all the nested resources
Wildcard segments allow for wildcards to be used at any point in the URL pattern.
mapper()
// Match /user/anything/you/want
.get(name="user/*[username]", to="users##search")
// Match /user/anything/you/want/search/
.get(name="user/*[username]/search", to="users##search")
.end()In the above example, anything/you/want you gets set to the params.username including the /'s. The second example would require /search/ to be on the end of the URL
If you have a nested resource where you want to enforce the presence of the parent resource, but only on creation of that resource, then shallow routes can give you a bit of a short cut. An example might be Blog Articles, which have Comments. If we're thinking in terms of our models, let's say that Articles Have Many Comments.
mapper()
.resources(name="articles", nested=true, shallow=true)
.resources("comments")
.resources("quotes")
.resources("drafts")
.end()
.end()Without shallow routes, this block would create RESTful actions for all the nested resources, for example /articles/[articleKey]/comments/[key]
With Shallow resources, we can automatically put the index, create and new RESTful actions with the ArticleKey in the URL, but then separate out edit, show, update and delete actions into their own, and simpler URL path; When we edit or update a comment, we're doing it on that object as it's own entity, and the relationship to the parent article already exists.
So in this case, we get index, new and create with the /articles/[articleKey]/ part in the URL, but to show, edit, update or delete a comment, we can just fall back to /comments/
A member() block is used within a nested resource to create routes which act 'on an object'; A member route will require an ID, because it acts on a member. photos/1/preview is an example of a member route, because it acts on (and displays) a single object.
mapper()
// Create a route like `photos/1/preview`
.resources(name="photos", nested=true)
.member()
.get("preview")
.end()
.end()
.end();A collection route doesn't require an id because it acts on a collection of objects. photos/search is an example of a collection route, because it acts on (and displays) a collection of objects.
mapper()
// Create a route like `photos/search`
.resources(name="photos", nested=true)
.collection()
.get("search")
.end()
.end()
.end();As of CFWheels 2.1, you can now use a redirect argument on GET, POST, PUT, PATCH, and DELETE requests. This will execute before reaching any controllers, and perform a 302 redirect immediately after the route is matched.
CFScript
mapper()
.get(name="foo", redirect="https://www.google.com")
.post(name="foo", redirect="https://www.google.com")
.put(name="foo", redirect="https://www.google.com")
.patch(name="foo", redirect="https://www.google.com")
.delete(name="foo", redirect="https://www.google.com")
.end()This is useful for the occasional redirect, and saves you having to create a dedicated controller filter or action just to perform a simple task. For large amounts of redirects, you may want to look into adding them at a higher level - e.g in an Apache VirtualHost configuration, as that will be more performant.
By default, CFWheels will add .[format] routes when using resources(). You may wish to disable this behavior to trim down the number of generated routes for clarity and performance reasons (or you just don't use this feature!).
You can either disable this via mapFormat = false on a per resource basis, or more widely, on a mapper basis:
// For all chained calls
mapper(mapFormat=false)
.resources("users")
.end()
// or just for this resource
mapper()
.resources(mapFormat=false, name="users)
.end()\
An overview of CFWheels configuration and how is it used in your applications. Learn how to override a CFWheels convention to make it your own.
We all love the "Convention over Configuration" motto of CFWheels, but what about those two cases that pop into everyone's head? What if I want to develop in my own way? Or, What about an existing application that I need to port into CFWheels? Gladly, that's what configuration and defaults are there for. Let's take a look at exactly how this is performed.
You will find configuration files in the config folder of your CFWheels application. In general, most of your settings will go in config/settings.cfm.
You can also set values based on what environment you have set. For example, you can have different values for your settings depending on whether you're in development mode or production mode. See the chapter on Switching Environments for more details.
To change a CFWheels application default, you generally use the set() function. With it, you can perform all sorts of tweaks to the framework's default behaviors.
Use the get() function to access the value of a CFWheels application setting. Just pass it the name of the setting.
if (get("environment") == "production") {
// Do something for production environment
}In CFML's standard Application.cfc, you can normally set values for your application's properties in the thisscope. CFWheels still provides these options to you in the file at config/app.cfm.
Here is an example of what can go in config/app.cfm:
this.name = "TheNextSiteToBeatTwitter";
this.sessionManagement = false;
this.customTagPaths = ListAppend(
this.customTagPaths,
ExpandPath("../customtags")
);There are several types of configurations that you can perform in CFWheels to override all those default behaviors. In CFWheels, you can find all these configuration options:
Let's take a closer look at each of these options.
Not only are the environments useful for separating your production settings from your "under development" settings, but they are also opportunities for you to override settings that will only take effect in a specified environment.
The setting for the current environment can be found in config/environment.cfm and should look something like this:
set(environment="development");Full Listing of Environment Settings
environment
string
development
Environment to load. Set this value in config/environment.cfm. Valid values are development, testing, maintenance, and production.
reloadPassword
string
[empty string]
Password to require when reloading the CFWheels application from the URL. Leave empty to require no password.
redirectAfterReload
boolean
Enabled in maintenance and production
Whether or not to redirect away from the current URL when it includes a reload request. This hinders accidentally exposing your application's reload URL and password in web analytics software, screenshots of the browser, etc.
ipExceptions
string
[empty string]
IP addresses that CFWheels will ignore when the environment is set to maintenance. That way administrators can test the site while in maintenance mode, while the rest of users will see the message loaded in events/onmaintenance.cfm.
allowEnvironmentSwitchViaUrl
boolean
true
Set to false to disable switching of environment configurations via URL. You can still reload the application, but switching environments themselves will be disabled.
Sometimes it is useful for our applications to "force" URL rewriting. By default, CFWheels will try to determinate what type of URL rewriting to perform and set it up for you. But you can force in or out this setting by using the example below:
set(urlRewriting="Off");The code above will tell CFWheels to skip its automatic detection of the URL Rewriting capabilities and just set it as "Off".
You can also set it to "Partial" if you believe that your web server is capable of rewriting the URL as folders after index.cfm.
For more information, read the chapter about URL Rewriting.
Probably the most important configuration of them all. What is an application without a database to store all of its precious data?
The data source configuration is what tells CFWheels which database to use for all of its models. (This can be overridden on a per-model basis, but that will be covered later.) To set this up in CFWheels, it's just as easy as the previous example:
set(dataSourceName="yourDataSourceName");
set(dataSourceUserName="yourDataSourceUsername");
set(dataSourcePassword="yourDataSourcePassword");OK, here it's where the fun begins! CFWheels includes a lot of functions to make your life as a CFML developer easier. A lot of those functions have sensible default argument values to minimize the amount of code that you need to write. And yes, you guessed it, CFWheels lets you override those default argument values application-wide.
Let's look at a little of example:
set(functionName="findAll", perPage=20);That little line of code will make all calls to the findAll() method in CFWheels return a maximum number of 20 record per page (if pagination is enabled for that findAll() call). How great is that? You don't need to set the perPage value for every single call to findAll() if you have a different requirement than the CFWheels default of 10 records.
You'll generally want to configure how CFWheels handles errors and debugging information based on your environment. For example, you probably won't want to expose CFML errors in your production environment, whereas you would want to see those errors in your development environment.
For example, let's say that we want to enable debugging information in our "development" environment temporarily:
// /config/development/settings.cfm
set(showDebugInformation=false);Full Listing of Debugging and Error Settings
errorEmailServer
string
[empty string]
Server to use to send out error emails. When left blank, this defaults to settings in the ColdFusion Administrator (if set).
errorEmailAddress
string
[empty string]
Comma-delimited list of email address to send error notifications to. Only applies if sendEmailOnError is set to true.
errorEmailSubject
string
Error
Subject of email that gets sent to administrators on errors. Only applies if sendEmailOnError is set to true.
excludeFromErrorEmail
string
[empty string]
List of variables (or entire scopes) to exclude from the scope dumps included in error emails. Use this to keep sensitive information from being sent in plain text over email.
sendEmailOnError
boolean
Enabled in production environments that have a TLD like .com, .org, etc.
When set to true, CFWheels will send an email to administrators whenever CFWheels throws an error.
showDebugInformation
boolean
Enabled in development mode.
When set to true, CFWheels will show debugging information in the footers of your pages.
showErrorInformation
boolean
Enabled in development, maintenance, and testing mode.
When set to false, CFWheels will run and display code stored at events/onerror.cfm instead of revealing CFML errors.
For more information, refer to the chapter about Switching Environments.
CFWheels does a pretty good job at caching the framework and its output to speed up your application. But if personalization is key in your application, finer control over caching settings will become more important.
Let's say your application generates dynamic routes and you need it to check the routes on each request. This task will be as simple as this line of code:
set(cacheRoutes=false);Full Listing of Caching Settings
cacheActions
boolean
Enabled in maintenance, testing, and production
When set to true, CFWheels will cache output generated by actions when specified (in a caches() call, for example).
cacheControllerConfig
boolean
Enabled in development, maintenance, testing, and production
When set to false, any changes you make to the config() function in the controller file will be picked up immediately.
cacheCullInterval
numeric
5
Number of minutes between each culling action. The reason the cache is not culled during each request is to keep performance as high as possible.
cacheCullPercentage
numeric
10
If you set this value to 10, then at most, 10% of expired items will be deleted from the cache.
cacheDatabaseSchema
boolean
Enabled in development, maintenance, testing, and production
When set to false, you can add a field to the database, and CFWheels will pick that up right away.
cacheFileChecking
boolean
Enabled in development, maintenance, testing, and production
When set to true, CFWheels will cache whether or not controller, helper, and layout files exist
cacheImages
boolean
Enabled in development, maintenance, testing, and production
When set to true, CFWheels will cache general image information used in imageTag() like width and height.
cacheModelConfig
boolean
Enabled in development, maintenance, testing, and production
When set to false, any changes you make to the config() function in the model file will be picked up immediately.
cachePages
boolean
Enabled in maintenance, testing, and production
When set to true, CFWheels will cache output generated by a view page when specified (in a renderView() call, for example).
cachePartials
boolean
Enabled in maintenance, testing, and production
When set to true, CFWheels will cache output generated by partials when specified (in a includePartial() call for example).
cacheQueries
boolean
Enabled in maintenance, testing, and production
When set to true, CFWheels will cache SQL queries when specified (in a findAll() call, for example).
clearQueryCacheOnReload
boolean
true
Set to true to clear any queries that CFWheels has cached on application reload.
cacheRoutes
boolean
Enabled in development, maintenance, testing, and production
When set to true, CFWheels will cache routes across all page views.
defaultCacheTime
numeric
60
Number of minutes an item should be cached when it has not been specifically set through one of the functions that perform the caching in CFWheels (i.e., caches(), findAll(), includePartial(), etc.)
maximumItemsToCache
numeric
5000
Maximum number of items to store in CFWheels's cache at one time. When the cache is full, items will be deleted automatically at a regular interval based on the other cache settings.
For more information, refer to the chapter on Caching.
The CFWheels ORM provides many sensible conventions and defaults, but sometimes your data structure requires different column naming or behavior than what CFWheels expects out of the box. Use these settings to change those naming conventions or behaviors across your entire application.
For example, if we wanted to prefix all of the database table names in our application with blog_ but didn't want to include that at the beginning of model names, we would do this:
set(tableNamePrefix="blog_");Now your post model will map to the blog_posts table, comment model will map to the blog_comments table, etc.
Full Listing of ORM Settings
afterFindCallbackLegacySupport
boolean
true
When this is set to false and you're implementing an afterFind() callback, you need to write the same logic for both the this scope (for objects) and arguments scope (for queries). Setting this to false makes both ways use the arguments scope so you don't need to duplicate logic. Note that the default is true for backwards compatibility.
automaticValidations
boolean
true
Set to false to stop CFWheels from automatically running object validations based on column settings in your database.
setUpdatedAtOnCreate
boolean
true
Set to false to stop CFWheels from populating the updatedAt timestamp with the createdAt timestamp's value.
softDeleteProperty
string
deletedAt
Name of database column that CFWheels will look for in order to enforce soft deletes.
tableNamePrefix
string
[empty string]
String to prefix all database tables with so you don't need to define your model objects including it. Useful in environments that have table naming conventions like starting all table names with tbl
timeStampOnCreateProperty
string
createdAt
Name of database column that CFWheels will look for in order to automatically store a "created at" time stamp when records are created.
timeStampOnUpdateProperty
string
updatedAt
Name of the database column that CFWheels will look for in order to automatically store an "updated at" time stamp when records are updated.
transactionMode
string
commit
Use commit, rollback, or none to set default transaction handling for creates, updates and deletes.
useExpandedColumnAliases
boolean
false
When set to true, CFWheels will always prepend children objects' names to columns included via findAll()'s include argument, even if there are no naming conflicts. For example, model("post").findAll(include="comment") in a fictitious blog application would yield these column names: id, title, authorId, body, createdAt, commentID, commentName, commentBody, commentCreatedAt, commentDeletedAt. When this setting is set to false, the returned column list would look like this: id, title, authorId, body, createdAt, commentID, name, commentBody, commentCreatedAt, deletedAt.
modelRequireConfig
boolean
false
Set to true to have CFWheels throw an error when it can't find a config() method for a model. If you prefer to always use config() methods, this setting could save you some confusion when it appears that your configuration code isn't running due to misspelling "config" for example.
There are several settings that make plugin development more convenient. We recommend only changing these settings in development mode so there aren't any deployment issues in production, testing, and maintenancemodes. (At that point, your plugin should be properly packaged in a zip file.)
If you want to keep what's stored in a plugin's zip file from overwriting changes that you made in its expanded folder, set this in config/development/settings.cfm:
set(overwritePlugins=false);See the chapter on Installing and Using Plugins for more information.
deletePluginDirectories
boolean
true
When set to true, CFWheels will remove subdirectories within the plugins folder that do not contain corresponding plugin zip files. Set to false to add convenience to the process for developing your own plugins.
loadIncompatiblePlugins
boolean
true
Set to false to stop CFWheels from loading plugins whose supported versions do not match your current version of CFWheels.
overwritePlugins
boolean
true
When set to true, CFWheels will overwrite plugin files based on their source zip files on application reload. Setting this to false makes plugin development easier because you don't need to keep rezipping your plugin files every time you make a change.
showIncompatiblePlugins
boolean
false
When set to true, an incompatibility warning will be displayed for plugins that do not specify the current CFWheels version.
Configure how CFWheels handles linking to assets through view helpers like imageTag(), styleSheetLinkTag(), and javaScriptIncludeTag().
See the chapter about Date, Media, and Text Helpers for more information.
Full Listing of Asset Settings
assetQueryString
boolean
false in development mode, true in the other modes
Set to true to append a unique query string based on a time stamp to JavaScript, CSS, and image files included with the media view helpers. This helps force local browser caches to refresh when there is an update to your assets. This query string is updated when reloading your CFWheels application. You can also hard code it by passing in a string.
assetPaths
struct
false
Pass false or a struct with up to 2 different keys to autopopulate the domains of your assets: http (required) and https. For example: {http="asset0.domain1.com,asset2.domain1.com,asset3.domain1.com", https="secure.domain1.com"}
CFWheels includes a powerful routing system. Parts of it are configurable with the following settings.
See the chapters about Using Routes and Obfuscating URLs for more information about how this all works together.
Full Listing of Miscellaneous Settings
loadDefaultRoutes
boolean
true
Set to false to disable CFWheels's default route patterns for controller/action/key, etc.
obfuscateUrls
boolean
false
Set to true to obfuscate primary keys in URLs.
CFWheels has a multitude of view helpers for building links, forms, form elements, and more. Use these settings to configure global defaults for their behavior.
booleanAttributes
any
allowfullscreen, async, autofocus, autoplay, checked, compact, controls, declare, default, defaultchecked, defaultmuted, defaultselected, defer, disabled, draggable, enabled, formnovalidate, hidden, indeterminate, inert, ismap, itemscope, loop, multiple, muted, nohref, noresize, noshade, novalidate, nowrap, open, pauseonexit, readonly, required, reversed, scoped, seamless, selected, sortable, spellcheck, translate, truespeed, typemustmatch, visible
A list of HTML attributes that should be allowed to be set as boolean values when added to HTML tags (e.g. disabled instead of disabled="disabled"). You can also pass in true(all attributes will be boolean) or false (no boolean attributes allowed, like in XHTML).
CFWheels includes built-in Cross-Site Request Forgery (CSRF) protection for form posts. Part of the CSRF protection involves storing an authenticity token in the session (default) or within an encrypted cookie. Most of the settings below are for when you've chosen to store the authenticity token within a cookie instead of the server's session store.
csrfStore
string
session
Which storage strategy to use for storing the CSRF authenticity token. Valid values are session or cookie.
Choosing session requires no additional configuration.
Choosing cookie for this requires additional configuration listed below.
csrfCookieEncryptionAlgorithm
string
AES
Encryption algorithm to use for encrypting the authenticity token cookie contents. This setting is ignored if you're using session storage. See your CF engine's documentation for the Encrypt()function for more information.
csrfCookieEncryptionSecretKey
string
Secret key used to encrypt the authenticity token cookie contents. This value must be configured to a string compatible with the csrfCookieEncryptionAlgorithmsetting if you're using cookie storage. This value is ignored if you're using session storage. See your CF engine's documentation for the Encrypt()function for more information.
csrfCookieEncryptionEncoding
string
Base64
Encoding to use to write the encrypted value to the cookie. This value is ignored if you're using session storage. See your CF engine's documentation for the Encrypt() function for more information.
csrfCookieName
string
_wheels_authenticity
The name of the cookie to be set to store CSRF token data. This value is ignored if you're using session storage.
csrfCookieDomain
string
Domain to set the cookie on. See your CF engine's documentation for cfcookie for more information.
csrfCookieEncodeValue
boolean
Whether or not to have CF encode the cookie. See your CF engine's documentation for cfcookie for more information.
csrfCookieHttpOnly
boolean
true
Whether or not the have CF set the cookie as HTTPOnly. See your CF engine's documentation for cfcookie for more information.
csrfCookiePath
string
/
Path to set the cookie on. See your CF engine's documentation for cfcookie for more information.
csrfCookiePreserveCase
boolean
Whether or not to preserve the case of the cookie's name. See your CF engine's documentation for cfcookie for more information.
csrfCookieSecure
boolean
Whether or not to only allow the cookie to be delivered over the HTTPS protocol. See your CF engine's documentation for cfcookie for more information.
CFWheels includes built-in Cross-Origin Resource Sharing (CORS) which allows you to configure which cross-origin requests and methods are allowed. By default, this feature is turned off which will deny cross origin requests at the browser level.
In this first version, the user can enable this feature, which will allow requests from all origins and all methods.
allowCorsRequests
boolean
false
disableEngineCheck
boolean
false
Set to true if you don't want CFWheels to block you from using older CFML engines (such as ColdFusion 9, Railo etc).
enableMigratorComponent
boolean
true
Set to false to completely disable the migrator component which will prevent any Database migrations
enablePluginsComponent
boolean
true
Set to false to completely disable the plugins component which will prevent any plugin loading, and not load the entire plugins system
enablePublicComponent
boolean
true
Set to false to completely disable the public component which will disable the GUI even in development mode
autoMigrateDatabase
Boolean
false
Automatically runs available migration on applicationstart.
migratorTableName
String
migratorversions
The name of the table that stores the versions migrated.
createMigratorTable
Boolean
true
Create the migratorversions database table.
writeMigratorSQLFiles
Boolean
false
Writes the executed SQL to a .sql file in the /migrator/sql directory.
migratorObjectCase
String
lower
Specifies the case of created database object. Options are 'lower', 'upper' and 'none' (which uses the given value unmodified)
allowMigrationDown
Boolean
false (true in development mode)
Prevents 'down' migrations (rollbacks)
With CFWheels, writing automated tests for your application is part of the development lifecycle itself, and running the tests is as simple as clicking a link.
At some point, your code is going to break. Upgrades, feature enhancements, and bug fixes are all part of the development lifecycle. Quite often with deadlines, you don't have the time to test the functionality of your entire application with every change you make.
The problem is that today's fix could be tomorrow's bug. What if there were an automated way of checking if that change you're making is going to break something? That's where writing tests for your application can be invaluable.
In the past, writing test against your application meant downloading, configuring and learning a completely separate framework. This often caused more headaches than it was worth and was the reason why most developers didn't bother writing tests. With CFWheels, we've included a small and very simple testing framework based on RocketUnit to help address just this issue.
Like everything else in CFWheels, the testing framework is very simple, yet powerful. You don't need to remember a hundred different functions because CFWheels' testing framework contains only a handful.
In order to run tests against your application, all tests must reside in the tests directory off the root of your CFWheels application, or within a subdirectory thereof.
When you run the tests for your application, CFWheels recursively scans your application's tests directory for valid tests. Whilst you have freedom to organize your subdirectories, tests and supporting files any way you see fit, we would recommend using the directory structure below as a guide:
tests/
├── functions/
├── requests/Any components that will contain tests must extend the wheels.Test component:
component extends="wheels.Test" {
// your tests here
}If the testing framework sees that a component does not extend wheels.Test, that component will be skipped. This lets you create and store any mock components that you might want to use with your tests and keep everything together.
Any test methods must begin their name with "test":
function testExpectedEqualsActual() {
assert("true");
}If a method does not begin with test, it is ignored and skipped. This lets you create as many helper methods for your testing components as you want.
Do not var-scope any variables used in your tests. In order for the testing framework to access the variables within the tests that you're writing, all variables need to be within the component's variables scope. The easy way to do this is to just not var variables within your tests, and your CFML engine will automatically assign these variables into the variables scope of the component for you. You'll see this in the examples below.
When writing a group of tests, it's common for there to be some duplicate code, global configuration, and/or cleanup needs that need to be run before or after each test. In order to keep things DRY (Don't Repeat Yourself), the testing framework offers 2 special methods that you can optionally use to handle such configuration.
setup(): Used to initialize or override any variables or execute any code that needs to be run before each test.
teardown(): Used to clean up any variables or execute any code that needs to be ran after each test.
Example:
function setup() {
_controller = controller(name="dummy");
args = {
fromTime=Now(),
includeSeconds=true;
};
}
function testWithSecondsBelow5Seconds() {
number = 5 - 1;
args.toTime = DateAdd("s", number, args.fromTime);
actual = _controller.distanceOfTimeInWords(argumentCollection=args);
expected = "less than 5 seconds";
assert("actual eq expected");
}
function testWithSecondsBelow10Seconds() {
number = 10 - 1;
args.toTime = DateAdd("s", number, args.fromTime);
actual = _controller.distanceOfTimeInWords(argumentCollection=args);
expected = "less than 10 seconds";
assert("actual eq expected");
}assert(): This is the main method that you will be using when developing tests. To use, all you have to do is provide a quoted expression. The power of this is that ANY 'truthy' expression can be used.
An example test that checks that two values equal each other:
function testActualEqualsExpected() {
actual = true;
expected = true;
assert("actual eq expected");
}An example test that checks that the first value is less then the second value:
function testOneIsLessThanFive() {
one = 1;
five = 5;
assert("one lt five");
}You get the idea since you've used these kinds of expressions a thousand times. If you think of the assert()command as another way of using evaluate(), it will all make sense. Remember that you can use any expression that evaluates to a boolean value, so if you can write assertions against structures, arrays, objects, you name it, you can test it!
An example test that checks that a key exists in a structure:
function testKeyExistsInStructure() {
struct = {
foo="bar"
};
key = "foo";
assert("StructKeyExists(struct, key)");
}raised(): Used when you want to test that an exception will be thrown. raised() will raise and catch the exception and return to you the exception type (think cfcatch.type). Just like assert(), raised() takes a quoted expression as its argument.
An example of raising the Wheels.TableNotFound error when you specify an invalid model name:
function testTableNotFound() {
actual = raised("model('thisHasNoTable')");
expected = "Wheels.TableNotFound";
assert("actual eq expected");
}debug(): Will display its output after the test result so you can examine an expression more closely.
expression (string) - a quoted expression to display
display (boolean) - whether or not to display the output
function testKeyExistsInStructure() {
struct = {
foo="bar"
};
key = "foo";
// displaying the debug output
debug("struct");
// calling debug but NOT displaying the output
debug("struct", false);
// displaying the output of debug as text with a label
debug(expression="struct", format="text", label="my struct");
assert("StructKeyExists(struct, key)");
}The first part of your application that you are going to want to test against are your models because this is where all the business logic of your application lives. Suppose that we have the following model:
component extends="Model" {
public void function config() {
// validation
validate("checkUsernameDoesNotStartWithNumber")
// callbacks
beforeSave("sanitizeEmail");
}
/**
* Check the username does not start with a number
*/
private void function checkUsernameDoesNotStartWithNumber() {
if (IsNumeric(Left(this.username, 1))) {
addError(
property="username",
message="Username cannot start with a number."
);
}
}
/**
* trim and force email address to lowercase before saving
*/
private void function sanitizeEmail() {
this.email = Trim(LCase(this.email));
}
}As you can see from the code above, our model has a beforeSave callback that runs whenever we save a user object. Let's get started writing some tests against this model to make sure that our callback works properly.
First, create a test component called /tests/models/TestUserModel.cfc, and in the setup function, create an instance of the model that we can use in each test that we write. We will also create a structure containing some default properties for the model.
function setup() {
// create an instance of our model
user = model("user").new();
// a structure containing some default properties for the model
properties = {
firstName="Hugh",
lastName="Dunnit",
email="[email protected]",
username="myusername",
password="foobar",
passwordConfirmation="foobar"
};
}As you can see, we invoke our model by using the model() method just like you would normally do in your controllers.
The first thing we do is add a simple test to make sure that our custom model validation works.
function testUserModelShouldFailCustomValidation() {
// set the properties of the model
user.setProperties(properties);
user.username = "2theBatmobile!";
// run the validation
user.valid();
actual = user.allErrors()[1].message;
expected = "Username cannot start with a number.";
// assert that the expected error message is generated
assert("actual eq expected");
}Now that we have tests to make sure that our model validations work, it's time to make sure that the callback works as expected when a valid model is created.
function testSanitizeEmailCallbackShouldReturnExpectedValue() {
// set the properties of the model
user.setProperties(properties);
user.email = " [email protected] ";
/*
Save the model, but use transactions so we don't actually write to
the database. this prevents us from having to have to reload a new
copy of the database every time the test runs.
*/
user.save(transaction="rollback");
// make sure that email address was sanitized
assert('user.email eq "[email protected]"');
}The next part of our application that we need to test is our controller. Below is what a typical controller for our user model would contain for creating and displaying a list of users:
component extends="Controller" {
// users/index
public void function index() {
users = model("user").findAll();
}
// users/new
public void function new() {
user = model("user").new();
}
// users/create
public any function create() {
user = model("user").new(params.user);
// Verify that the user creates successfully
if (user.save()) {
flashInsert(success="The user was created successfully.");
// notice something about this redirectTo?
return redirectTo(action="index");
}
else {
flashInsert(error="There was a problem creating the user.");
renderView(action="new");
}
}
}Notice the return in the create action in the redirectTo() method? The reason for this is quite simple, under the covers, when you call redirectTo(), CFWheels is using cflocation. As we all know, there is no way to intercept or stop a cflocation from happening. This can cause quite a number of problems when testing out a controller because you would never be able to get back any information about the redirection.
To work around this, the CFWheels test framework will "delay" the execution of a redirect until after the controller has finished processing. This allows CFWheels to gather and present some information to you about what redirection will occur.
The drawback to this technique is that the controller will continue processing and as such we need to explicitly exit out of the controller action on our own, thus the reason why we use return.
Let's create a test package called /tests/controllers/TestUsersController.cfc to test that the create action works as expected:
function testRedirectAndFlashStatus() {
// define the controller, action and user params we are testing
local.params = {
controller="users",
action="create",
user={
firstName="Hugh",
lastName="Dunnit",
email="[email protected]",
username="myusername",
password="foobar",
passwordConfirmation="foobar"
}
};
// process the create action of the controller
result = processRequest(params=local.params, method="post", returnAs="struct");
// make sure that the expected redirect happened
assert("result.status eq 302");
assert("result.flash.success eq 'Hugh was created'");
assert("result.redirect eq '/users/show/1'");
}Notice that a lot more goes into testing a controller than a model. The first step is setting up the params that will need to be passed to the controller. We then pass the 'params' to the processRequest() function which returns a structure containing a bunch of useful information.
We use this information to make sure that the controller redirected the visitor to the index action once the action was completed.
Note: processRequest() is only for use within the test framework.
Below are some examples of how a controller can be tested:
// asserts that a failed user update returns a 302 http response, an error exists in the flash and will be redirected to the error page
function testStatusFlashAndRedirect() {
local.params = {
controller = "users",
action = "update"
};
result = processRequest(params=local.params, method="post", rollback=true, returnAs="struct");
assert("result.status eq 302");
assert("StructKeyExists(result.flash, 'error') eq true");
assert("result.redirect eq '/common/error'");
}
// asserts that expected results are returned. Notice the update transactions is rolled back
function testStatusDatabaseUpdateEmailAndFlash() {
local.params = {
controller = "users",
action = "update",
key = 1,
user = {
name = "Hugh"
}
}
transaction {
result = processRequest(params=local.params, method="post", returnAs="struct");
user = model("user").findByKey(1);
transaction action="rollback";
}
assert("result.status eq 302");
assert("user.name eq 'Hugh'");
assert("result.emails[1].subject eq 'User was updated'");
assert("result.flash.success eq 'User was updated'");
}
// asserts that an api request returns the expected JSON response
function testJsonApi() {
local.params = {
controller = "countries",
action = "index",
format = "json",
route = "countries"
};
result = DeserializeJSON(processRequest(local.params)).data;
assert("ArrayLen(result) eq 196");
}
// asserts that an API create method returns the expected result
function testJsonApiCreate() {
local.params = {
action = "create",
controller = "users",
data = {
type = "users",
attributes = {
"first-name" = "Hugh",
"last-name" = "Dunnit"
}
},
format = "json",
route = "users"
};
result = processRequest(params=local.params, returnAs="struct").status;
assert("result.status eq 201");
}If you want to test a variable that's being set on a controller you can make use of the this scope. This way it's available from outside the controller, which makes it testable.
this.employeeNumber = params.empNum;
// Then from your test...
local.controller = controller(...);
local.controller.processAction();
theValue = local.controller.employeeNumber;If you think that's too "ugly", you can instead make a public function on the controller that returns the value and then call that from your tests.
You may at some point want to test a partial (usually called via includePartial()) outside of a request. You'll notice that if you just try and call includePartial() from within the test suite, it won't work. Thankfully there's a fairly easy technique you can use by calling a "fake" or "dummy" controller.
component extends="tests.Test" {
function setup() {
params = {controller="dummy", action="dummy"};
_controller = controller("dummy", params);
}
function testMyPartial(){
result = _controller.includePartial(partial="/foo/bar/");
assert("result CONTAINS 'foobar'");
}
}Next we will look at testing the view layer. Below is the code for new.cfm, which is the view file for the controller's new action:
<cfoutput>
<h1>Create a New user</h1>
#flashMessages()#
#errorMessagesFor("user")#
#startFormTag(route="users")#
#textField(objectName='user', property='username')#
#passwordField(objectName='user', property='password')#
#passwordField(objectName='user', property='passwordConfirmation')#
#textField(objectName='user', property='firstName')#
#textField(objectName='user', property='lastName')#
<p>
#submitTag()# or
#linkTo(text="Return to the listing", route="users")#
</p>
#endFormTag()#
</cfoutput>Testing the view layer is very similar to testing controllers, we will setup a params structure to pass to the processRequest() function which will return (among other things) the generated view output.
Once we have this output, we can then search through it to make sure that whatever we wanted the view to display is presented to our visitor. In the test below, we are simply checking for the heading.
function testUsersIndexContainsHeading() {
local.params = {
controller = "users",
action = "index"
};
result = processRequest(params=local.params, returnAs="struct");
assert("result.status eq 200");
assert("result.body contains '<h1>Create a New user</h1>'");
}Next up is testing global helper functions. Below is a simple function that removes spaces from a string.
// global/functions.cfm
public string function stripSpaces(required string string) {
return Replace(arguments.string, " ", "", "all");
}Testing these helpers is fairly straightforward. All we need to do is compare the function's return value against a value that we expect, using the assert() function.
function testStripSpacesShouldReturnExpectedResult() {
actual = stripSpaces(" foo - bar ");
expected = "foo-bar";
assert("actual eq expected");
}Testing your view helpers are very similar to testing application helpers except we need to explicitly include the helpers in the setup() function so our view functions are available to the test framework.
Below is a simple function that returns a string wrapped in h1 tags.
// views/helpers.cfm
public string function heading(required string text, string class="foo") {
return '<h1 class="#arguments.class#">#arguments.text#</h1>';
}And in our view test package:
function setup() {
// include our helper functions
include "/views/helpers.cfm";
text = "Why so serious?";
}
function testHeadingReturnsExpectedMarkup() {
actual = heading(text=text);
expected = '<h1 class="foo">#text#</h1>'
assert("actual eq expected")
}
function testHeadingWithClassReturnsExpectedMarkup() {
actual = heading(text=text, class="bar");
expected = '<h1 class="bar">#text#</h1>'
assert("actual eq expected")
}Testing plugins requires slightly different approaches depending on the mixin attribute defined in the plugin's main component.
Below is a simple plugin called timeAgo that extends CFWheels' timeAgoInWords view helper by appending "ago" to the function's return value. Take note of the mixin="controller" argument as this will play a part in how we test the plugin.
component mixin="controller" {
public any function init() {
this.version = "2.0";
return this;
}
/*
* Append the term "ago" to the timeAgoInWords core function
*/
public string function timeAgo() {
return core.timeAgoInWords(argumentCollection=arguments) & " " & __timeAgoValueToAppend();
}
/*
* Define the term to append to the main function
*/
private string function __timeAgoValueToAppend() {
return "ago";
}
}In order to test our plugin, we'll need to do a little setup. Our plugin's tests will reside in a directory within our plugin package named tests. We'll also need a directory to keep test assets, in this case a dummy controller that we will need to instantiate in out test's setup() function.
plugins/
├─ timeago/
└─ TimeAgo.cfc
└─ index.cfm
└─ tests/
└─ TestTimeAgo.cfc
└─ assets/
└─ controllers/
└─ Dummy.cfcThe /plugins/timeago/tests/assets/controllers/Dummy.cfc controller contains the bare minimum for a controller.
component extends="wheels.Controller" {
}Firstly, in our /plugins/timeago/tests/TestTimeAgo.cfc we'll need to copy the application scope so that we can change some of CFWheels' internal paths. Fear not, we'll reinstate any changes after the tests have finished executing using the teardown function. so that if you're running your tests on your local development machine, your application will continue to function as expected after you're done testing.
Once the setup is done, we simply execute the plugin functions and assert that the return values are what we expect.
component extends="wheels.Test" {
function setup() {
// save the original environment
applicationScope = Duplicate(application);
// a relative path to our plugin's assets folder where we will store any plugin specific components and files
assetsPath = "plugins/timeAgo/tests/assets/";
// override wheels' path with our plugin's assets directory
application.wheels.controllerPath = assetsPath & "controllers";
// clear any plugin default values that may have been set
StructDelete(application.wheels.functions, "timeAgo";
// we're always going to need a controller for these tests so we'll just create a dummy
_params = {controller="foo", action="bar"};
dummyController = controller("Dummy", _params);
}
function teardown() {
// reinstate the original application environment
application = applicationScope;
}
// testing main public function
function testTimeAgoReturnsExpectedValue() {
actual = dummyController.timeAgo(fromTime=Now(), toTime=DateAdd("h", -1, Now()));
expected = "About 1 hour ago";
assert("actual eq expected");
}
// testing the 'private' function
function testTimeAgoValueToAppendReturnsExpectedValue() {
actual = dummyController.__timeAgoValueToAppend();
expected = "ago";
assert("actual eq expected");
}
}If your plugin is uses mixin="model", you will need to create and instantiate a dummy model component.
Down in the debug area of your CFWheels application (that grey area at the bottom of the page), you will notice a some links for running tests for the following areas:
Run Tests Runs all tests that you have created for your application. You should run these tests before deploying your application.
View Tests Shows a list of all your test packages with links to run individual packages or single tests.
Framework Tests If you have cloned the CFWheels repository, you will also see a link to run the core framework unit tests.
Plugin Tests If a plugin has a /tests directory, you will also see a link to run the plugin's tests.
The test URL will look something like this:
/index.cfm?controller=wheels&action=wheels&view=tests&type=app
Running an individual package:
/index.cfm?controller=wheels&action=wheels&view=tests&type=app&package=controllers
Running a single test:
/index.cfm?controller=wheels&action=wheels&view=tests&type=app&package=controllers&test=testCaseOne
These URLs are useful should you want an external system to run your tests.
Test Resuts Format
CFWheels can return your test results in either HTML, JUnit or JSON formats, simply by using the format url parameter. Eg: format=junit
Once you're comfortable with the concepts thus far, there are a few more functions available which can be used to modify the behavior of your test suite.
beforeAll() - Runs once before the test suite has run. Here is where you might populate a test database or set suite-specific application variables*.
afterAll() - Runs once after the test suite has finished.
packageSetup() - Used in a test package, similar to setup() but only runs once before a package's first test case. Here is where you might set variables that are common to all the tests in a CFC.
packageTeardown() - Used in a test package, similar to teardown() but only runs once after a package's last test case. Here is where you might cleanup files, database rows created by test cases or revert application variables in a CFC.
A typical test request lifecycle will look something like this:
Test.cfc -beforeAll()
Foo.cfc - packageSetup()
Foo.cfc - setup()
Foo.cfc - testCaseOne()
Foo.cfc - teardown()
Foo.cfc - setup()
Foo.cfc - testCaseTwo()
Foo.cfc - teardown()
Foo.cfc - packageTeardown()
Bar.cfc - packageSetup()
Bar.cfc - setup()
Bar.cfc - testCaseThree()
Bar.cfc - teardown()
Bar.cfc - packageTeardown()
Test.cfc - afterAll()
In order to use beforeAll() and afterAll(), you'll need to make a few small changes to your test suite. Firstly, create a Test.cfc in the root of your /tests/ directory. This is where you'll define your beforeAll() and afterAll() functions and it should look something like this:
component extends="wheels.Test" output=false {
/*
* Executes once before the test suite runs.
*/
function beforeAll() {
}
/*
* Executes once after the test suite runs.
*/
function afterAll() {
}
/*
* Executes before every tests case unless overridden in a package.
*/
function setup() {
}
/*
* Executes after every tests case unless overridden in a package.
*/
function teardown() {
}
}For your test packages to inherit these functions, you'll need to change the extends attribute in your
test packages to extends="tests.Test". This enables the CFWheels test framework to run your functions.
Since we've implemented the new Test.cfc component, we now have global setup() and teardown() functions will run respectively before and after every test case. If we want to prevent these from running in a particular package, we simply override the global functions like this:
function setup() {
// your setup code
}
function teardown() {
// your teardown code
}If we want to run the global function AND some package-specific setup & teardown code, here's how achieve that:
function setup() {
super.setup();
// your setup code
}
function teardown() {
super.teardown();
// your teardown code
}Whilst best practice recommends that tests should be kept as simple and readable as possible, sometimes moving commonly used code into test suite helpers can greatly improve the simplicity of your tests.
Some examples may include, serializing complex values for use in assert() or grouping multiple assertions together. Whatever your requirements, there are a number of ways to use test helpers.
Put your helper functions in your /tests/Test.cfc.
These will be available to any package that extends this component. Be mindful of
functions you put in here, as it's easy to create naming collisions.
If you've arranged your tests into subdirectories, you can create a helpers.cfm file in any given
directory and simply include it in the package.
Put package-specific helper functions in the same package as the tests that use it.
These will only be available to the tests in that package. To ensure that these test helpers
are not run as tests, use a function name that doesn't start with "test_". Eg: $simplify()
component extends="tests.Test" {
// 1. All functions in /tests/Test.cfc will be available
// 2. Include a file containing helpers
include "helpers.cfm";
// 3. This is only available to this package
function $simplify(required string string) {
local.rv = Replace(arguments.string, " ", "", "all");
local.rv = Replace(local.rv, Chr(13), "", "all");
local.rv = Replace(local.rv, Chr(10), "", "all");
return local.rv;
}
}Overloading application vars.. CFWheels will revert the application scope after all tests have completed.
Caveat: The test suite request must complete without uncaught exceptions. If an uncaught exception occurs, the application scope may stay 'dirty', so it's recommended to reload the application by adding reload=true param to your url whilst developing your test packages.
The CFWheels core uses this test framework for its unit test suite and contains a wealth of useful examples. They can all be found in the tests folder of the CFWheels git repo.
CFWheels ties your application's forms together with your model layer elegantly. With CFWheels form conventions, you'll find yourself spending less time writing repetitive markup.
The majority of applications are not all about back-end. There is a great deal of work to perform on the front-end as well. It can be argued that most of your users will think of the interface as the application.
CFWheels is here to take you to greener pastures with its form helper functions. Let's get visual with some code examples.
Here is a simple form for editing a user profile. Normally, you would code your web form similarly to this:
<cfoutput>
<form action="/profile" method="post">
<div>
<label for="firstName">First Name</label>
<input id="firstName" name="firstName" value="#EncodeForHtml(profile.firstName)#">
</div>
<div>
<label for="lastName">Last Name</label>
<input id="lastName" name="lastName" value="#EncodeForHtml(profile.lastName)#">
</div>
<div>
<label for="department">Department</label>
<select id="department" name="departmentId">
<cfloop query="departments">
<option
value="#EncodeForHtml(departments.id)#"
<cfif profile.departmentId eq departments.id>
selected
</cfif>
>#EncodeForHtml(departments.name)#</option>
</cfloop>
</select>
</div>
<div>
<input type="submit" value="Save Changes">
</div>
</form>
</cfoutput>Then you would write a script for the form that validates the data submitted, handles interactions with the data source(s), and displays the form with errors that may happen as a result of user input. (And most of that code isn't even included in this example.)
We know that you are quite familiar with the drudgery of typing this sort of code over and over again. Let's not even mention the pain associated with debugging it or adding new fields and business logic!
The good news is that CFWheels simplifies this quite a bit for you. At first, it looks a little different using these conventions. But you'll quickly see how it all ties together and saves you some serious time.
Let's rewrite and then explain.
<cfoutput>
#startFormTag(route="profile", method="patch")#
#textField(
label="First Name",
objectName="profile",
property="firstName",
prependToLabel="<div>",
append="</div>",
labelPlacement="before"
)#
#textField(
label="Last Name",
objectName="profile",
property="lastName",
prependToLabel="<div>",
append="</div>",
labelPlacement="before"
)#
#select(
label="Department",
objectName="profile",
property="departmentId",
options=departments,
prependToLabel="<div>",
append="</div>",
labelPlacement="before"
)#
<div>
#submitTag()#
</div>
#endFormTag()#
</cfoutput>I know what you are thinking. 9 lines of code can't replace all that work, right? In fact, they do. The HTML output will be very nearly the same as the previous example. By using CFWheels conventions, you are saving yourself a lot of key strokes and a great deal of time.
The first helper you'll notice in the CFWheels-ified version of the form is startFormTag(). This helper allows you to easily link up the form to the action that it's posting to in a secure way.
You'll need to configure the route and method arguments, depending on the route that you're sending the form to. Also, if the route expects any parameters, you must pass those in as arguments to startFormTag as well. If you haven't already, read up about routes in the Routing chapter.
As we said, when linking a form to a route, there are 3 pieces of information that you will need to work with:
Route name
Parameters that the route may expect
Request method that the route requires
Most of the time, you'll probably be working with a resource. Your config/routes.cfm may look something like this:
mapper()
.resources("users")
.end();If you click the View Routes link in the debug footer, you'll be most interested in these types of routes for your forms:
users
GET
/users
users
index
users
POST
/users
users
create
user
PATCH
/users/[key]
users
update
user
DELETE
/users/[key]
users
delete
Once you get to this list of routes, it really doesn't matter how you authored them in your config/routes.cfm. What matters is that you know the names, methods, and parameters that the routes expect. (With some practice, you'll probably be able to look at config/routes.cfm and know exactly what the names, methods, and parameters are though.)
If you are creating a record, your route is likely setup to accept a POST method. That happens to be the default for startFormTag(), so you don't even need to include the method argument. You can then pass the users route name to the route argument:
<!--- `method` argument defaults to `post`, so we don't need to pass it in. --->
#startFormTag(route="users")#
#endFormTag()If you need to send the form via another HTTP method, you can pass that in for the method argument as listed in your routes:
<!---
Search forms typically are done via `get` requests. This one is to
the index. --->
#startFormTag(route="users", method="get")#
#textFieldTag(type="search", name="q")#
#submitTag("Search")#
#endFormTag()#
<!--- Update forms typically are sent via `patch` requests. --->
#startFormTag(route="user", key=user.key(), method="patch")#
#textField(objectName="user", property="firstName")#
#submitTag()#
#endFormTag()#
<!---
Delete requests are best done via a form post, even if you're styling the
form to look like a link.
--->
#startFormTag(
route="user",
key=user.key(),
method="delete",
class="inline-form"
)#
#buttonTag(content="Delete User", class="link-button")#
#endFormTag()#Notice above that the user route expects a key parameter, so that is passed into startFormTag as the keyargument.
To drive the point home about routing parameters, let's say that we have this route:
productVariation
PATCH
[language]/products/[productKey]/variations/[key]
variations
update
As you can see, the parameters can be anything, not just primary keys.
You would link up the form like so:
#startFormTag(
route="productVariation",
language="es",
productKey=product,key(),
key=variation.key(),
method="patch"
)#
<!--- ... --->
#endFormTag()Browsers (even the modern ones) tend to only work well with GET and POST requests, so how does CFWheels also enable PATCH and DELETE requests?
To keep things secure, CFWheels will still use method="post" on the form to send PATCH and DELETE requests. But the CFWheels router will recognize a PATCH or DELETE request if a form variable called _method is also sent, specifying the PATCH or DELETE method.
Under the hood, startFormTag() will also generate a hidden field called _method that passes the request method along with the form POST.
So the <form> tag generated along with a method of patch will look something like this:
<form action="/users/1234" method="post">
<input type="hidden" name="_method" value="patch">
<input type="hidden" name="authenticityToken" value="cxRbrHAnwpG0Ki9vTYW4yg==">
</form>You'll notice that startFormTag() will also add another hidden field along with POSTed requests called authenticityToken, which helps prevent against Cross-Site Request Forgery (CSRF) attacks.
The moral of the story: startFormTag() takes care of all of this for you. If you for some reason decide to wire up your own custom <form> tag that must POST data, be sure to add your own hidden fields for _method and use the authenticityTokenField() helper to generate the hidden field for the authenticityToken that CFWheels will require on the POST.
By setting up global defaults (as explained in the Configuration and Defaults) for the prependToLabel, append, and labelPlacement arguments, you can make the form code ever simpler across your whole application.
Here are the settings that you would apply in config/settings.cfm:
set(
functionName="textField",
prependToLabel="<div>",
append="</div>",
labelPlacement="before"
);
set(
functionName="select",
prependToLabel="<div>",
append="</div>",
labelPlacement="before"
);And here's how our example code can be simplified as a result:
<cfoutput>
#startFormTag(route="profile", method="patch")#
#textField(label="First Name", objectName="profile", property="firstName")#
#textField(label="Last Name", objectName="profile", property="lastName")#
#select(
label="Department",
objectName="profile",
property="departmentId",
options=departments
)#
<div>
#submitTag()#
</div>
#endFormTag()#
</cfoutput>All that the controller needs to provide at this point is a model object instance named profile that contains firstName, lastName, and departmentId properties and a query object named departments that contains identifier and text values. Note that the instance variable is named profile, though the model itself doesn't necessarily need to be named profile.
If you pass the form an empty instance named profile (for example, created by new(), the form will display blank values for all the fields. If you pass it an object created by a finder like findOne() or findByKey(), then the form will display the values provided through the object. This allows for us to potentially use the same view file for both create and update scenarios in our application.
If you look at the previous examples, there is one other bit of configuration that we can clean up: the label arguments passed to textField() and select().
Because we've named firstName, lastName, and departmentId in conventional ways (camel case), CFWheels will generate the labels for us automatically:
<cfoutput>
#startFormTag(route="profile", method="patch")#
#textField(objectName="profile", property="firstName")#
#textField(objectName="profile", property="lastName")#
#select(
objectName="profile",
property="departmentId",
options=departments
)#
<div>
#submitTag()#
</div>
#endFormTag()#
</cfoutput>You'll notice that CFWheels is even smart enough to translate the departmentId property to Department.
If you ever need to override a label, you can do so in the model's initializer using the label argument of the property()method:
component extends="Model" {
function init() {
property(name="lastName", label="Surname");
}
}If you really want to secure a form, you need to do it server side. Sure, you can add JavaScript here and there to validate your web form. Unfortunately, disabling JavaScript (and thus your JavaScript-powered form validation) is simple in web browsers, and malicious bots tend not to listen to JavaScript.
Securing the integrity of your web forms in CFWheels on the server side is very easy. Assuming that you have read the chapter on Object Validation, you can rest assured that your code is a lot more secure now.
CFWheels provides you with a tool set of Helper Functions just for displaying error messages as well.
In the controller, let's say that this just happened. Your model includes validations that require the presence of both firstName and lastName. The user didn't enter either. So in the controller's update action, it loads the model object, sets the values that the user submitted, sees that there was a validation error after calling update(), and displays the form view again.
The update action may look something like this:
function update() {
// In this example, we're loading an existing object based on the user's
// session.
profile = model("user").findByKey(session.userId);
// If everything validated, then send user to success message
if (profile.update(params.profile)) {
flashInsert(success="Profile updated.");
}
// If there were errors with the form submission, show the form again
// with errors.
else {
flashInsert(error="There was an error with your changes.");
renderView(action="edit");
}
}Notice that the view for the edit action is rendered if the profile object's update() returns false.
Let's take the previous form example and add some visual indication to the user about what he did wrong and where, by simply adding the following code on your form page.
<cfoutput>
#errorMessagesFor("profile")#
#startFormTag(route="profile", method="patch")#
#textField(objectName="profile", property="firstName")#
#textField(objectName="profile", property="lastName")#
#select(
objectName="department",
property="departmentId",
options=departments
)#
<div>
#submitTag()#
</div>
#endFormTag()#
</cfoutput>How about that? With just that line of code (and the required validations on your object model), CFWheels will do the following:
Generate an HTML unordered list with a HTML class name of errorMessages.
Display all the error messages on your profile object as list items in that unordered list.
Wrap each of the erroneous fields in your form with a surrounding <div class="fieldWithErrors"> HTML tag for you to enrich with your ninja CSS skills.
There is no longer the need to manually code error logic in your form markup.
Let's say that would rather display the error messages just below the failed fields (or anywhere else, for that matter). CFWheels has that covered too. All that it takes is a simple line of code for each form field that could end up displaying feedback to the user.
Let's add some error message handlers for the firstName, lastName, and departmentId fields:
<cfoutput>
#startFormTag(route="profile", method="patch")#
#textField(objectName="profile", property="firstName")#
#errorMessageOn(objectName="profile", property="firstName")#
#textField(objectName="profile", property="lastName")#
#errorMessageOn(objectName="profile", property="lastName")#
#selectTag(
objectName="profile",
property="departmentId",
options=departments
)#
#errorMessageOn(objectName="profile", property="departmentId")#
<div>
#submitTag()#
</div>
#endFormTag()#
</cfoutput>Notice the call to the errorMessageOn() function below the firstName, lastName, and departmentId fields. That's all it takes to display the corresponding error messages of each form control on your form.
And the error messages won't even display if there aren't any. That way you can yet again use the same form code for error and non-error scenarios alike.
There is a CFWheels form helper for basically every type of form element available in HTML. And they all have the ability to be bound to CFWheels model instances to make displaying values and errors easier. Here is a brief description of each helper.
Text and password fields work similarly to each other. They allow you to show labels and bind to model object instances to determine whether or not a value should be pre-populated.
#textField(objectName="user", property="username")#
#passwordField(objectName="user", property="password")#
#textArea(objectName="user", property="biography", rows=5, cols=40)#May yield the equivalent to this HTML (if we assume the global defaults defined above in the section named Factoring out Common Settings with Global Defaults):
<div>
<label for="user-username">Username</label>
<input id="user-username" type="text" name="user[username]" value="cfguy">
</div>
<div>
<label for="user-password">Password</label>
<input id="user-password" type="password" name="user[password]" value="">
</div>
<div>
<label for="user-biography">Bio</label>
<textarea id="user-biography" name="user[biography]">
CF Guy really is a great guy. He's much nicer than .NET guy.
</textarea>
</div>Hidden fields are powered by the hiddenField() form helper, and it also works similarly to textField() and passwordField().
#hiddenField(objectName="user", property="referralSourceId")#Would yield this type of markup:
<input type="hidden" name="user[referralSourceId]" value="425">As hinted in our first example of form helpers, the select() function builds a <select> list with options. What's really cool about this helper is that it can populate the <option>s with values from a query, struct, or array.
Take a look at this line:
#select(objectName="user", property="departmentId", options=departments)#Assume that the departments variable passed to the options argument contains a query, struct, or array of department data that should be selectable in the drop-down.
Each data type has its advantages and disadvantages:
Queries allow you to order your results, but you can only use one column. But this can be overcome using Calculated Properties.
Structs allow you to build out static or dynamic values using whatever data that you please, but there is no guarantee that your CFML engine will honor the order in which you add the elements.
Arrays also allow you to build out static or dynamic values, and there is a guarantee that your CFML engine will honor the order. But arrays are a tad more verbose to work with.
CFWheels will examine the data passed to options and intelligently pick out elements to populate for the <option>s' values and text.
Query: CFWheels will try to pick out the first numeric column for value and the first non-numeric column for the display text. The order of the columns is determined how you have them defined in your database.
Struct: CFWheels will use the keys as the value and the values as the display text.
Array: CFWheels will react depending on how many dimensions there are. If it's only a single dimension, it will populate both the value and display text with the elements. When it's a 2D array, CFWheels will use each item's first element as the value and each element's second element as the display text. For anything larger than 2 dimensions, CFWheels only uses the first 2 sub-elements and ignores the rest.
Here's an example of how you might use each option:
// Query generated in your controller --->
departments = findAll(orderBy="name");
// Hard-coded struct set up in events/onapplicationstart.cfm
application.departments["1"] = "Sales";
application.departments["2"] = "Marketing";
application.departments["3"] = "Information Technology";
application.departments["4"] = "Human Resources";
// Array built from query call in model
departments = this.findAll(orderBy="lastName,hq");
departmentsArray = [];
for (department in departments) {
ArrayAppend(
departmentsArray,
[department.id, "#department.name# - #department.hq#"]
);
}When sending a query, if you need to populate your <option>s' values and display text with specific columns, you should pass the names of the columns to use as the textField and valueField arguments.
You can also include a blank option by passing true or the desired text to the includeBlank argument.
Here's a full usage with this new knowledge:
#select(
objectName="user",
property="departmentId",
options=departments,
valueField="id",
textField="departmentName",
includeBlank="Select a Department"
)#Radio buttons via radioButton() also take objectName and property values, and they accept an argument called tagValue that determines what value should be passed based on what the user selects.
Here is an example using a query object called eyeColor to power the possible values:
<fieldset>
<legend>Eye Color</legend>
<cfloop query="eyeColor">
#radioButton(
label=eyeColor.color,
objectName="profile",
property="eyeColorId",
tagValue=eyeColor.id,
labelPlacement="after"
)#<br>
</cfloop>
</fieldset>If the profile object already has a value set for eyeColorId, then radioButton() will make sure that that value is checked on page load.
If profile.eyeColorId's value were already set to 1, the rendered HTML would appear similar to this:
<fieldset>
<legend>Eye Color</legend>
<input
type="radio"
id="profile-eyeColorId-2"
name="profile[eyeColorId]"
value="2"
>
<label for="profile-eyeColorId-2">Blue</label><br>
<input
type="radio"
id="profile-eyeColorId-1"
name="profile[eyeColorId]"
value="1"
checked="checked"
>
<label for="profile-eyeColorId-1">Brown</label><br>
<input
type="radio"
id="profile-eyeColorId-3"
name="profile[eyeColorId]"
value="3"
>
<label for="profile-eyeColorId-3">Hazel</label><br>
</fieldset>Note that if you don't specify labelPlacement="after" in your calls to radioButton(), CFWheels will place the labels before the form controls.
Check boxes work similarly to radio buttons, except checkBox() takes parameters called checkedValue and uncheckedValue to determine whether or not the check box should be checked on load.
Note that binding check boxes to model objects is best suited for properties in your object that have a yes/no or true/false type value.
#checkBox(
label="Sign me up for the email newsletter.",
objectName="customer",
property="newsletterSubscription",
labelPlacement="after"
)#Because the concept of check boxes don't tie too well to models (you can select several for the same "property"), we recommend using checkBoxTag() instead if you want to use check boxes for more values than just true/false. See the Helpers That Aren't Bound to Model Objects section below.
The fileField() helper builds a file field form control based on the supplied objectName and property.
#fileField(label="Photo", objectName="profile", property="photo")#In order for your form to pass the correct enctype, you can pass multipart=true to startFormTag():
#startFormTag(route="attachments", multipart=true)#Looking at this form code, it isn't 100% evident how to set an initial value for the fields:
#startFormTag(route="accounts")#
#textField(objectName="account", property="title")#
#select(objectName="account", property="accountTypeId")#
#checkBox(objectName="account", property="subscribedToNewsletter")#
#endFormTag()#What if we want a random title pre-filled, a certain account type pre-selected, and the check box automatically checked when the form first loads?
The answer lies in the account object that the fields are bound to. Let's say that you always wanted this behavior to happen when the form for a new account loads. You can do something like this in the controller:
component extends="controllers.Controller" {
function new() {
local.defaultAccountType = model("accountType").findOne(
where="isDefault=1"
);
account = model("account").new(
title=generateRandomTitle(),
accountTypeId=local.defaultAccountType.key(),
subscribedToNewsletter=true
);
}
}Now the initial state of the form will reflect the default values setup on the object in the controller.
Sometimes you'll want to output a form element that isn't bound to a model object.
A search form that passes the user's query as a variable in the URL called q is a good example. In this example case, you would use the textFieldTag() function to produce the <input> tag needed.
#textFieldTag(label="Search", name="q", value=params.q)#There are "tag" versions of all of the form helpers that we've listed in this chapter. As a rule of thumb, add Tag to the end of the function name and use the name and value, checked, and selected arguments instead of the objectName and property arguments that you normally use.
Here is a list of the "tag" helpers for your reference:
Much like CFWheels's linkTo() function, any extra arguments that you pass to form helpers will be passed to the corresponding HTML tag as attributes.
For example, if we wanted to define a class on our starting form tag, we just pass that as an extra argument to startFormTag():
#startFormTag(route="posts", class="login-form")#Which would produce this HTML:
<form action="/posts" method="post" class="login-form">When a form helper creates more than one HTML element you can typically pass in extra arguments to be set on that element as well. One common example of this is when you need to set a class for a label element; you can do so by passing in labelClass="class-name". CFWheels will detect that your argument starts with "label" and assume it should go on the label element and not the input element (or whatever "main" element the form helper creates). This means you could also pass in labelId="my-id" to set the id on the label for example.
HTML includes many boolean attributes like novalidate, disabled, required, etc.
If you want for a CFWheels view helper to render one of these attributes, just pass the name of the attribute as an extra argument, set it to true, and CFWheels will include the boolean attribute:
#textField(objectName="post", property="title", required=true)#
-> <input type="text" name="post[title]" value="" required>data attributes in HTML usually look something like this:
<input type="submit" value="Submit" data-ajax-url="/contacts/send.js">Because ColdFusion arguments cannot contain any hyphens, we have constructed a workaround for you for CFWheels view helpers.
Let's say you want a data-ajax-url HTML attribute as depicted above. All you need to do is pass in an argument named dataAjaxUrl, and CFWheels will convert that attribute name to the hyphenated version in the HTML output.
#submitTag(
value="Submit",
dataAjaxUrl=urlFor(route="contactsSend", format="js")
)#
-> <input type="submit" value="Submit" data-ajax-url="/contacts/send.js">As an alternative, you can pass in data_ajax_url instead if you prefer underscores, and it will produce the same result.
CFWheels provides a few extra form helpers that make it easier for you to generate accessible fields for dates and/or times. These also bind to properties that are of type DATE, TIMESTAMP, DATETIME, etc.
We won't go over these in detail, but here is a list of the date and time form helpers available: